How to Compose an ASP.NET Core Web API (.NET 6) with an MS SQL Server 2022 on Linux in Docker

In this quick-start guide, I will teach you how to set up and run a simple ASP.NET Core Web API using the official .NET Core SDK image with an SQL Server on a Linux image with Docker Compose. In other words, we are going to Dockerize ASP.NET Core with MS SQL into micro-services.
In this example, we will be building a simple Web Application using mcr.microsoft.com/dotnet/sdk:6.0image. To complete this tutorial, it is required that you are familiar with Docker and ASP.NET Core. It is required that you have Docker Engine and Docker Compose installed on your computer – either, Linux, Mac, or Windows.
If you are ready, then let’s move on and create a new Web API with a new SQL Server in a docker container.
The Final Result
By the end of this guide, we have created a simple .NET Core Web API using the mcr.microsoft.com/dotnet/sdk:6.0 Docker Image. This will include the creation of a Dockerfile, configuration of our app to make use of the SQL Server, and a docker-compose.yml file, that will line up the behavior of the two components we will spin up together on Docker.
Run ASP.NET Core and MS SQL Server on Docker (Dockerize ASP.NET Core)
Let’s get started with the fun part you are here for.
1. Create a new directory for the application
The first thing we have to do is create a new directory for our application. The directory (volume) will be the context of our docker-compose project in the end. If you plan to run your container on Mac outside any of these directories: /Users, /Volume, /private, /tmp, /var/folders you would have to make a custom mapping. These directories are by default shared between your OS and Docker. Please refer to this documentation for Linux, macOS, and Windows.
I have added a new folder on my desktop named docker-asp-net-core-sql-server-demo. Go inside that folder with your Terminal or PowerShell.
2. Create a simple app using the Docker Image
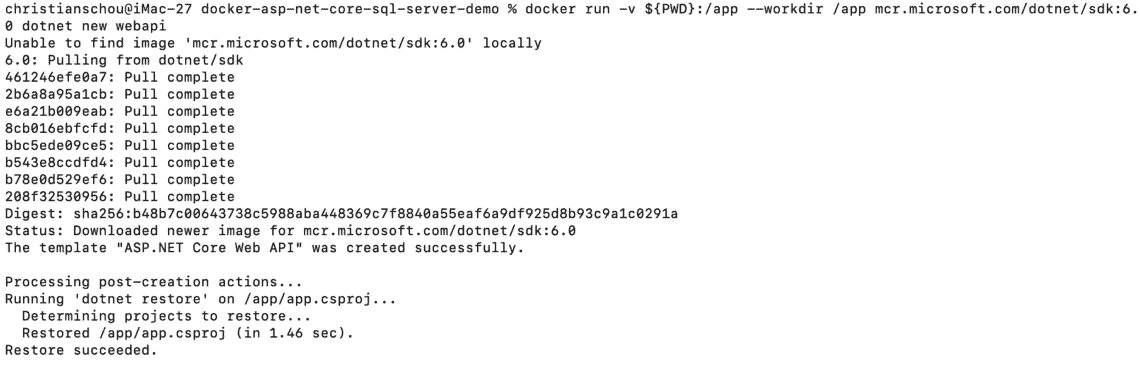
Inside the new directory you just created, we will use the mcr.microsoft.com/dotnet/sdk:6.0 Docker image to generate a sample Web API application. This will be placed within the container under the /app directory and into our host machine inside the same working directory. This can be done using the following command in PowerShell or your Terminal. (I am in the terminal for this guide)
docker run -v ${PWD}:/app --workdir /app mcr.microsoft.com/dotnet/sdk:6.0 dotnet new webapiYou should now see your terminal pull the image (if you have not pulled it earlier), create the sample API in the directory you created, and restore the project.
3. Create the Dockerfile
To build our Web API image, we need to create a Dockerfile within our app directory with the following content:
FROM mcr.microsoft.com/dotnet/aspnet:6.0 AS base
WORKDIR /app
EXPOSE 80

FROM mcr.microsoft.com/dotnet/sdk:6.0 AS build
WORKDIR /src
COPY ["app.csproj", "./"]
RUN dotnet restore "./app.csproj"
COPY . .
RUN dotnet build "app.csproj" -c Release -o /app

FROM build AS publish
RUN dotnet publish "app.csproj" -c Release -o /app

FROM base AS final
WORKDIR /app
COPY --from=publish /app .
ENTRYPOINT ["dotnet", "app.dll"]
The Dockerfile is responsible for instructing Docker on how we want to build our image. The following is happening in this Dockerfile:
- It makes use of the .NET Core SDK Image.
- Maps our volume with the generated code for the Web API.
- Restores the dependencies in the project.
- Builds the solution.
- Publish it to the app folder in release mode (swagger will normally not work here unless you change it in
Program.cs) - Exposes the Web API application at port 80.
- Start up the application at app.dll (Entrypoint).
4. Writing docker-compose.yml
So far we have instructed our Docker image to build the image and wait for the MS SQL Server to start up, but we have not instructed the configuration to actually startup any database. To make everything happen at once, we can create a new file named docker-compose.yml.
Create a new file named docker-compose.yml inside your root folder (the one with the Dockerfile, entrypoint.sh, and the web app). Remember to replace the password with something difficult (you don’t have to remember it) under the db service. The docker-compose.yml file is responsible for defining how the images are interacting at runtime as independent services at our host.
version: "3.4"

services:
    api:
        build:
          context: .
          dockerfile: Dockerfile
        ports:
          - "8080:80"
        depends_on:
          - db

    db:
        image: "mcr.microsoft.com/mssql/server:2022-latest"
        ports:
          - "1433:1433"

        environment:
            SA_PASSWORD: "S3cur3P@ssW0rd!"
            ACCEPT_EULA: "Y"
Our compose file is defining two services API and db as micro-services. It also defines their relationship, ports, and mapping + specific environment variables. As you can see we tell our compose file to use the Dockerfile we created before.
5. Configure Web API to use SQL Server
With all the services in place, we have to tell our application to use the database, by specifying a connection string in the application.
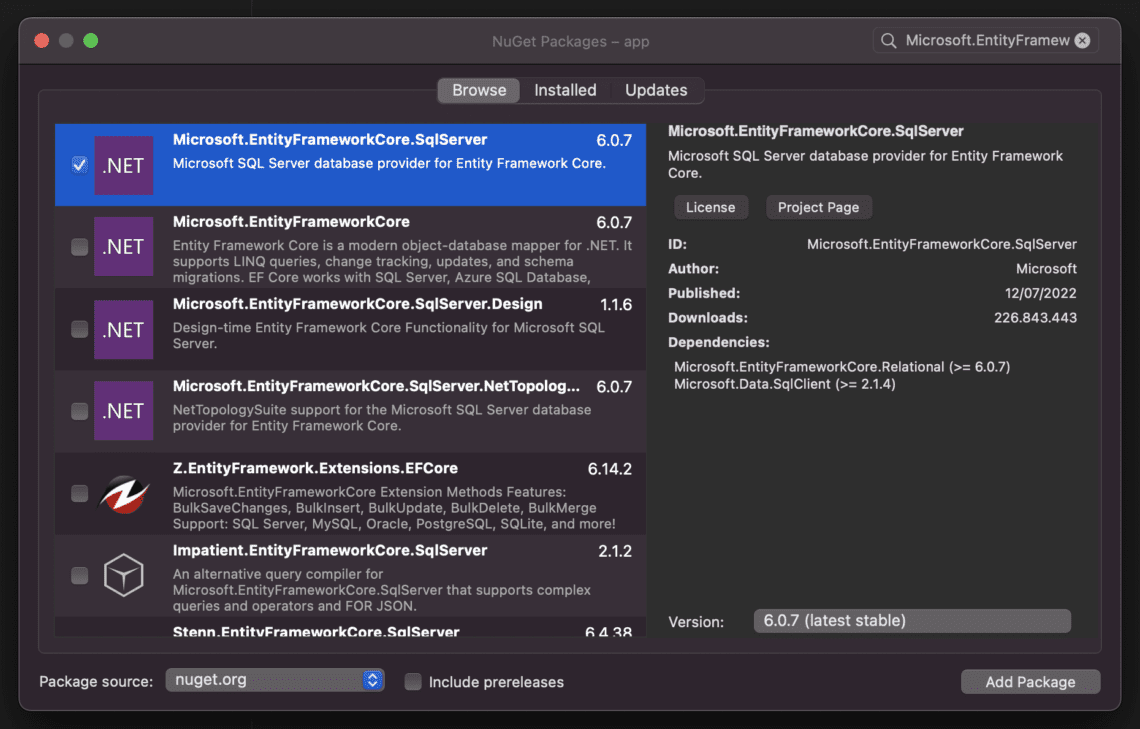
Add dependency for MS SQL Server
Before we initialize the SQL server in Program.cs we have to add a dependency to the MS SQL Server package by Microsoft.
Add Connection String to appsettings.json
Open up the file appsettings.json and make sure your file looks like the code below:
{
  "ConnectionStrings": {
    "Default": "Server=db;Database=master;User=sa;Password=S3cur3P@ssW0rd!;"
  },
  "Logging": {
    "LogLevel": {
      "Default": "Information",
      "Microsoft.AspNetCore": "Warning"
    }
  },
  "AllowedHosts": "*"
}
This will use the db service we created in our compose file. Make sure to update the password with the one you created.
Add AppDbContext
We could stick to DbContext when initializing, but then we got no control over the context and are not able to add any new models or do any seeding at startup.
Create a new folder in your project named Context and add a new empty class inside named AppDbContext.cs. Inside AppDbContext.cs we will add the following code:
using Microsoft.EntityFrameworkCore;

namespace app.Context
{
    public class AppDbContext : DbContext
    {
        public AppDbContext(DbContextOptions<AppDbContext> options) : base(options)
        {
        }
    }
}
I will not be extending this project with models, data seeding, etc… which is beyond scope of this quick-start guide. I will create a new article in near future showing you how to do this.
Register AppDbContext in Program.cs
ASP.NET Core includes dependency injection. Services such as our EF (Entity Framework) database context, are registered with dependency injection during app startup.
To register AppDbContext as a service, open Program.cs and add the highlighted code below to your file.
using app.Context;
using Microsoft.EntityFrameworkCore;

var builder = WebApplication.CreateBuilder(args);

// Add services to the container.

builder.Services.AddControllers();
// Learn more about configuring Swagger/OpenAPI at https://aka.ms/aspnetcore/swashbuckle
builder.Services.AddEndpointsApiExplorer();
builder.Services.AddSwaggerGen();

builder.Services.AddDbContext(options =>
    options.UseSqlServer(builder.Configuration.GetConnectionString("Default")));

var app = builder.Build();

// Configure the HTTP request pipeline.
if (app.Environment.IsDevelopment())
{
    app.UseSwagger();
    app.UseSwaggerUI();
}

app.UseHttpsRedirection();

app.UseAuthorization();

app.MapControllers();

app.Run();
By adding these few lines of code we can add our database as a service inside the application. The name of the connection string “Default” we created earlier is passed into the context by calling a method on a DbContextOptionsBuilder object. For all local development, it will be read from the appsettings.json so no need to worry about configuring that.
Add The Database Exception Filter
When making new applications or extending old ones, I tend to add the exception filter for my database. It provides helpful error information in our development environment. You can add the filter by adding the highlighted line of code:
<...>
builder.Services.AddControllers();
// Learn more about configuring Swagger/OpenAPI at https://aka.ms/aspnetcore/swashbuckle
builder.Services.AddEndpointsApiExplorer();
builder.Services.AddSwaggerGen();
builder.Services.AddDbContext<AppDbContext>(options =>
options.UseSqlServer(builder.Configuration.GetConnectionString("Default")));
builder.Services.AddDatabaseDeveloperPageExceptionFilter();
var app = builder.Build();
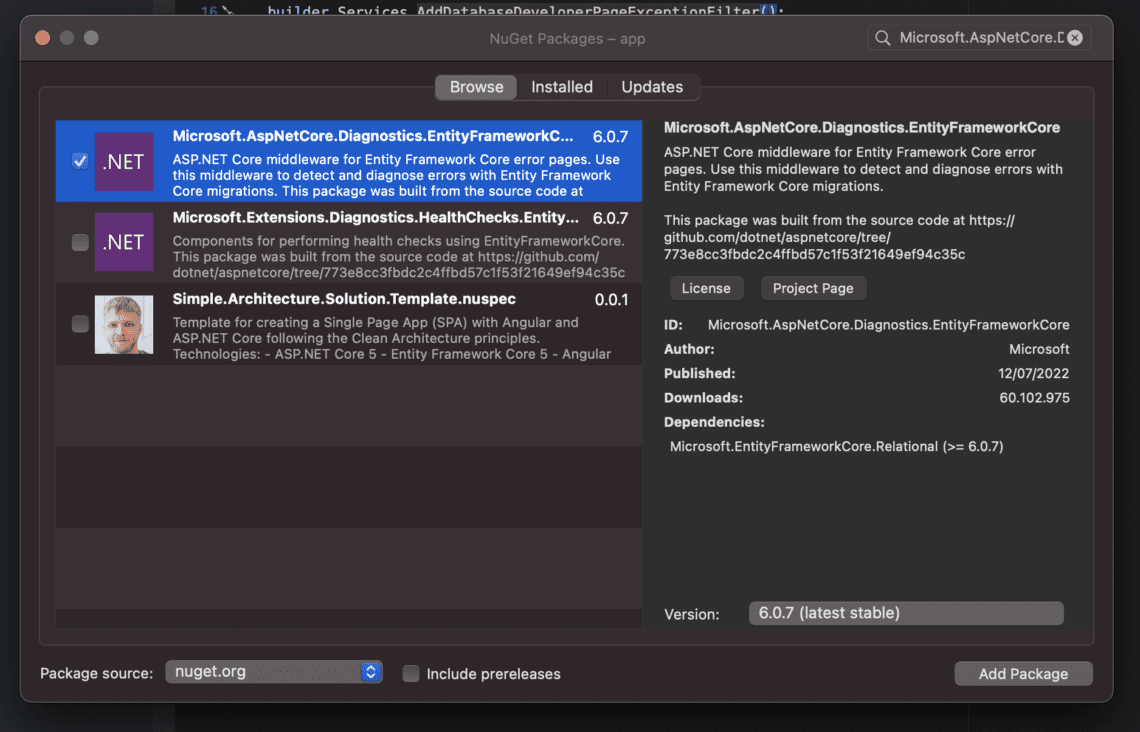
<...>You have to install the package Microsoft.AspNetCore.Diagnostics.EntityFrameworkCore to enable the middleware to detect and diagnose errors with Entity Framework Core.
Add Swagger in release mode
To make it easier to test out the API, we will be adding Swagger in release mode as well. To do this we will move Swagger out of the development environment check in Program.cs.
using app.Context;
using Microsoft.EntityFrameworkCore;

var builder = WebApplication.CreateBuilder(args);

// Add services to the container.

builder.Services.AddControllers();
// Learn more about configuring Swagger/OpenAPI at https://aka.ms/aspnetcore/swashbuckle
builder.Services.AddEndpointsApiExplorer();
builder.Services.AddSwaggerGen();

builder.Services.AddDbContext(options =>
    options.UseSqlServer(builder.Configuration.GetConnectionString("Default")));

builder.Services.AddDatabaseDeveloperPageExceptionFilter();

var app = builder.Build();

// Configure the HTTP request pipeline.
app.UseSwagger();
app.UseSwaggerUI();

//app.UseHttpsRedirection();

app.UseAuthorization();

app.MapControllers();

app.Run();
6. Build and Run Docker Compose
Awesome! We are now ready to run the docker-compose build command in our working directory.
$ docker-compose buildIf you get any error about not being able to run the SQL Server, please allocate more memory to Docker. MS SQL Server needs a least 2GB of memory to run on the Linux container.
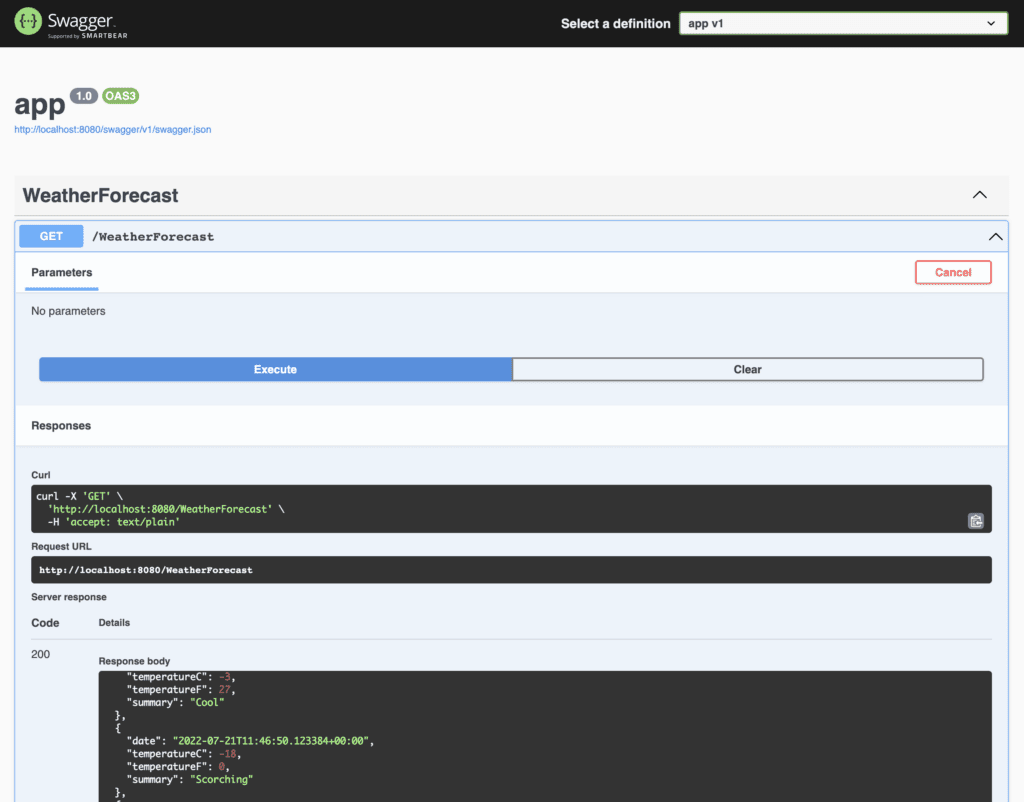
Let’s spin up the solution. Run the docker-compose up command. Wait for a few seconds, you should now be able to open up your browser and head to http://localhost:8080/swagger and see your API running smoothly.
In my terminal I am able to see the logs and that the containers are running. If I open up Docker Desktop and head to my Container tab, I am also able to see them running here.
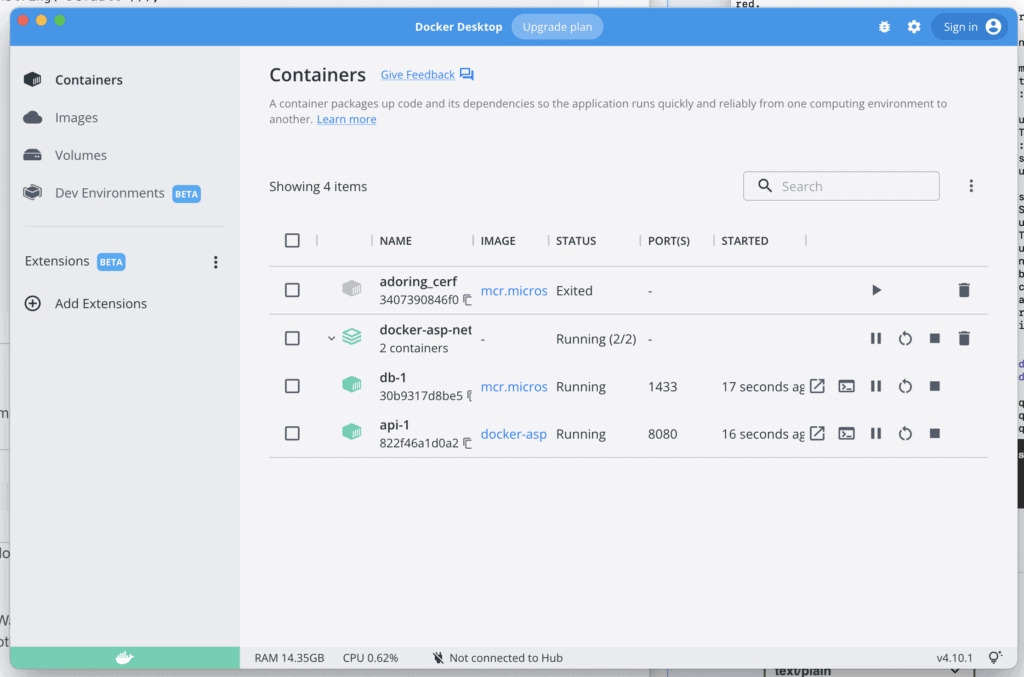
Great! Our application is running with its own MS SQL Database Service.
Summary
Cool! You have now made your own ASP.NET Core application running against an MS SQL Server in Linux using Docker Compose. In this tutorial, you learned how to use some very popular Microsoft products for Linux (the containers are running on Linux).
I hope you learned something new from this guide on how to dockerize an ASP.NET Core Web API with MS SQL Server. If you got any questions, issues, or suggestions, please let me know in the comments below. Until next time – happy dockerizing!