How to use Hangfire with ASP.NET Core 5.0 - Making Background Jobs Easy
In this tutorial, I will talk about Hangfire in ASP.NET Core 5.0 and how you can integrate it with your Core Applications like an API or Web app. A common thing developers often face (I do) is handling jobs or tasks that have to be executed in the background to make the application function.
Running these tasks properly without messing up the readability, structure, and maintainability in the Startup configuration is not an easy task.
In the past, I used to make background jobs/tasks with Quartz or Windows Services for scheduling them within my C# applications. Then I was introduced to Hangfire - an awesome project that can schedule background jobs, without making it messy.
With that said, let's get started with Hangfire and .NET Core. Below is a shortlist of what I'm going to take you through.
What is a background job in ASP.NET Core?
A background job is a method or function in our code that may take up a lot of our time to run (most of the time the amount of time is unknown). By default, the jobs run in our main thread of the application. This may in some cases lead to a bad user experience as they may be a block of interactions. You can in some cases think this is a "bug" because the application is hanging or not responding.
No one likes a hanging application, especially if the application is a client-facing one that is serving our front-end. This is the place, where background jobs come into place - you can see them similar to multithreading. They are being executed on another thread, which makes our application more asynchronous.
Also, it would be a great option to be able to schedule the jobs as we often might need jobs to run automatically in the background. IF you are a developer (which I hope - else this tutorial might not make any sense), then you know that background jobs are an awesome possibility to implement in your application.
What is Hangfire?
Hangfire is an open-source library that allows you to schedule events in the background of your application with ease. It's very flexible (thank you for that) and offers various features that make job scheduling very easy. You can actually schedule a method or function in the background on one line. It's a library you should not miss out on if you need to run background tasks.
Hangfire and ASP.NET Core 5.0
With inspiration from the documentation on Hangfires website, I will in this tutorial be developing an API that should send mails to a specific user, depending on different scenarios.
Hangfire is very powerful in terms of functionality, but thanks to the developers behind it's very easy to adapt and implement in your current or new applications.
Hangfire will make use of a database to store data about jobs. I always make a separate database for Hangfire to make maintenance easier. In this tutorial, I will make use of MS SQL Server to demonstrate how easy it is to run an asynchronous job in the background. Hangfire will automatically create the necessary tables in the database at the first run of the application.
Configuration of Hangfire and ASP.NET Core Api Project
Kickoff by creating a new ASP.NET Core project, where you select the API template and name it what you like - the name doesn't matter to make the API work. To test the project, I will be using Swagger and my IDE is Visual Studio Community 2019.
Install Hangfire Packages
You can install NuGet Packages in two ways. The first one is through the Package Manager Console and the second one is through the NuGet Package Manager - I will use the first one in the project as it's faster.
Install-Package Hangfire.AspNetCore
Install-Package Hangfire.Core
Install-Package Hangfire.SqlServer
Configure Hangfire in Startup
Normally I would have made a ServiceExtension to make my startup file more readable and easier to maintain in the future, but for this project, I'm going to keep the Hangfire configuration inside the Startup file. So go ahead and open up the Startup.cs file in the root of your project and add the following lines to ConfigureServices:
public void ConfigureServices(IServiceCollection services)
{
    services.AddControllersWithViews();

    // Add Hangfire services.
    services.AddHangfire(configuration => configuration
        .SetDataCompatibilityLevel(CompatibilityLevel.Version_170)
        .UseSimpleAssemblyNameTypeSerializer()
        .UseRecommendedSerializerSettings()
        .UseSqlServerStorage(Configuration.GetConnectionString("Hangfire"), new SqlServerStorageOptions
        {
            CommandBatchMaxTimeout = TimeSpan.FromMinutes(5),
            SlidingInvisibilityTimeout = TimeSpan.FromMinutes(5),
            QueuePollInterval = TimeSpan.Zero,
            UseRecommendedIsolationLevel = true,
            DisableGlobalLocks = true
        }));

    // Add the processing server as IHostedService
    services.AddHangfireServer();

        }
What's going on with that code? Line 5 is adding the Hangfire service to our application, with several parameters like compatibility level, recommended serializer settings, and specified that we want to use MS SQL as our database with the connection string "Hangfire". What is Line 20 for then? services.AddHangfireServer() is actually the one that is responsible for starting the Hangfire server that will execute the background jobs.
With that in place, we can continue and add Hangfire to the method that gets called by the runtime. This will allow us to use the Hangfire dashboard when the application is running. By default, you can request the dashboard at /hangfire when the application has been launched. Below is the code you have to add:
// This method gets called by the runtime. Use this method to configure the HTTP request pipeline.
public void Configure(IApplicationBuilder app, IBackgroundJobClient backgroundJobs, IWebHostEnvironment env)
{
    if (env.IsDevelopment())
    {
        app.UseDeveloperExceptionPage();
    }
    else
    {
        app.UseExceptionHandler("/Home/Error");
        // The default HSTS value is 30 days. You may want to change this for production scenarios, see https://aka.ms/aspnetcore-hsts.
        app.UseHsts();
    }

    app.UseHangfireDashboard();

    app.UseHttpsRedirection();
    app.UseStaticFiles();

    app.UseRouting();

    app.UseAuthorization();

    app.UseEndpoints(endpoints =>
    {
        endpoints.MapControllerRoute(
            name: "default",
            pattern: "{controller=Home}/{action=Index}/{id?}");
        endpoints.MapHangfireDashboard();
    });
}
The Hangfire Database Setup
In the above code, we specified that we want to use the connection string Hangfire. In order to make that happen, we have to add a new connection string to appsettings.json and also update the logging level to make Hangfire get information from the application.
{
  "Logging": {
    "LogLevel": {
      "Default": "Information",
      "Microsoft": "Warning",
      "Microsoft.Hosting.Lifetime": "Information",
      "Hangfire": "Information"
    }
  },
  "ConnectionStrings": {
    "Hangfire": "Server=localhost\\SQLEXPRESS2017;Database=HangfireTest;Trusted_Connection=True;MultipleActiveResultSets=true;"
  },
  "AllowedHosts": "*"
}
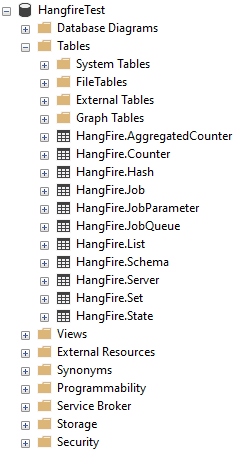
Hangfire DB Schema
At first run, your database for Hangfire will be empty, but the application will automatically create the required tables in the database for Hangfire by checking if there is already an associated Hangfire Schema in the database. Below is a screenshot of what your database will look like once the tables have been added the first time.
The Hangfire Dashboard
When you start the application and navigate to localhost:xxxxx/hangfire. You will get access to the Overview showing you the Hangfire Dashboard with a real-time and history graph of background jobs.
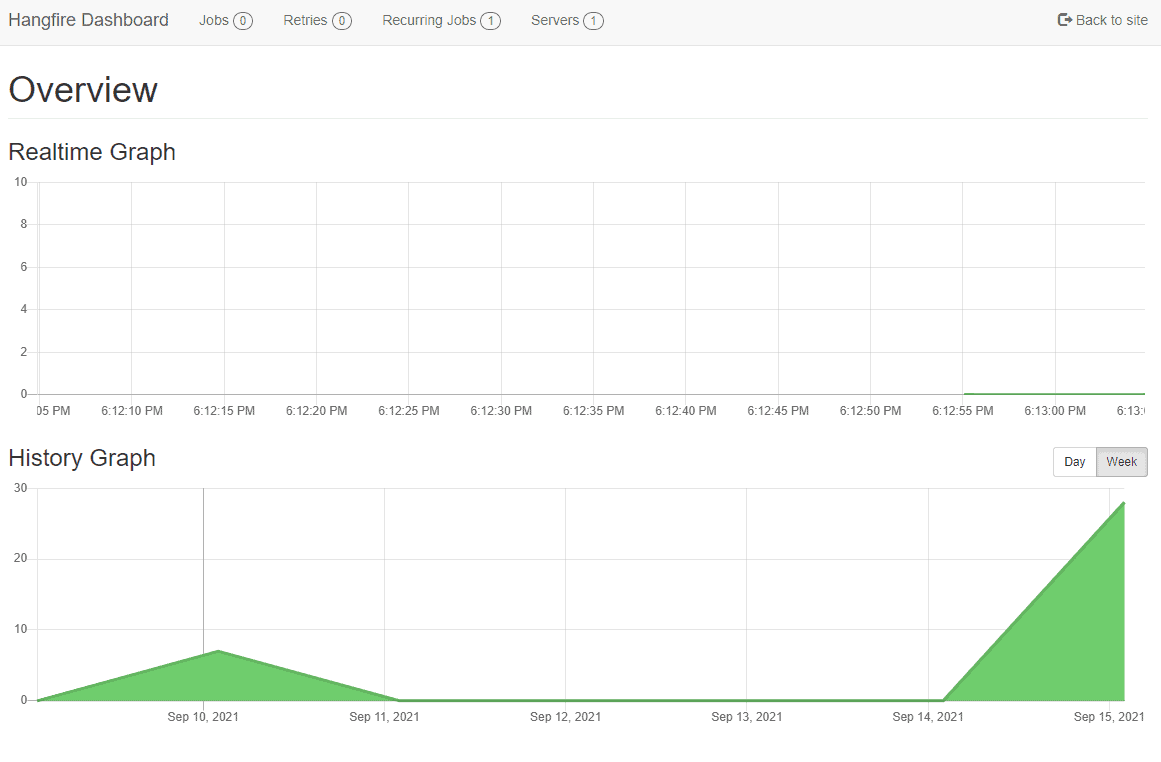
At the dashboard you will be able to see already run jobs, scheduled jobs, etc… you will also be able to trigger a job manually if you need to run a task here and now. This is an awesome feature (if you ask me) – I haven’t seen that in the other available schedulers. The above dashboard is one where I have tested a few simple tasks – let’s check it out and see what the dashboard looks like by navigating to each tab and taking a look.
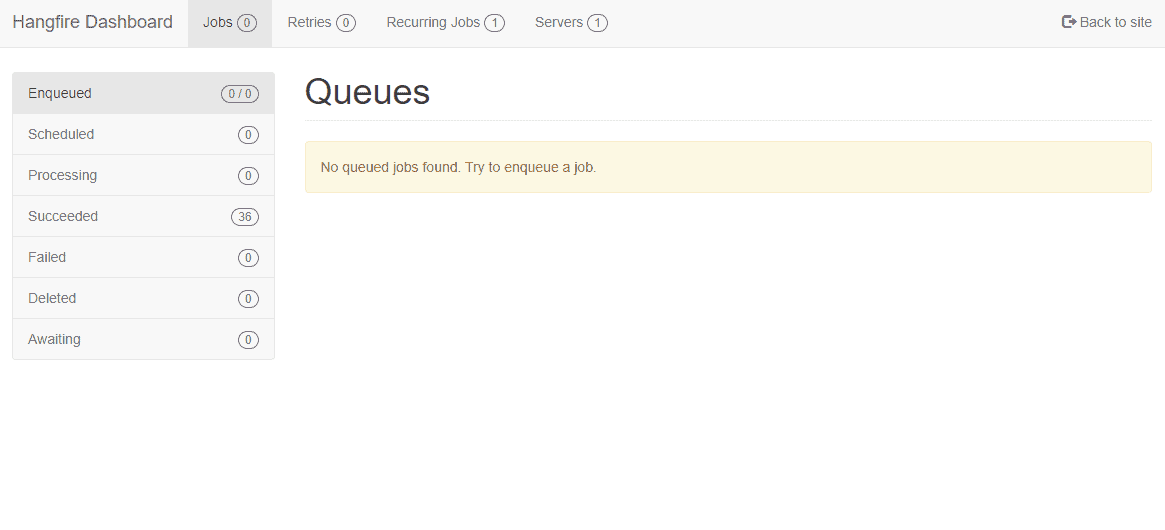
Jobs tab
All jobs that have been executed etc… will be available at this tab as the data have been stored in the database from earlier runs of the application. From here you can get a complete overview of all background tasks.
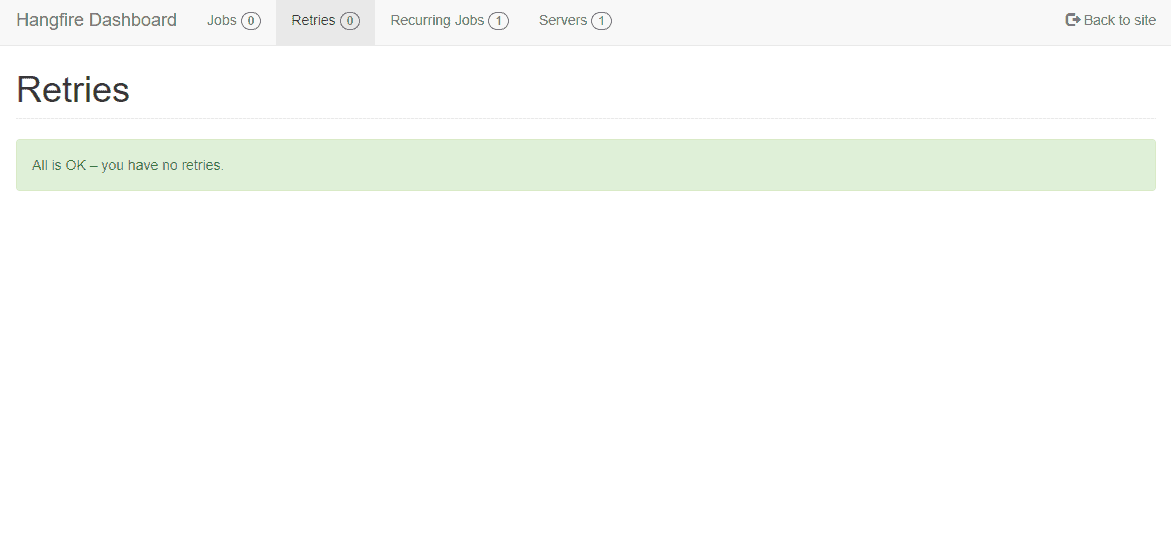
Retries tab
Once in a while, you will experience jobs to fail. In this example, the API is trying to send a mail to the user, but there are several services that have to be available like a third-party mail server or other methods that this job is depending on. When a job fails it will be re-scheduled for a retry and tried executed till it passes (you can configure this to max X retries).
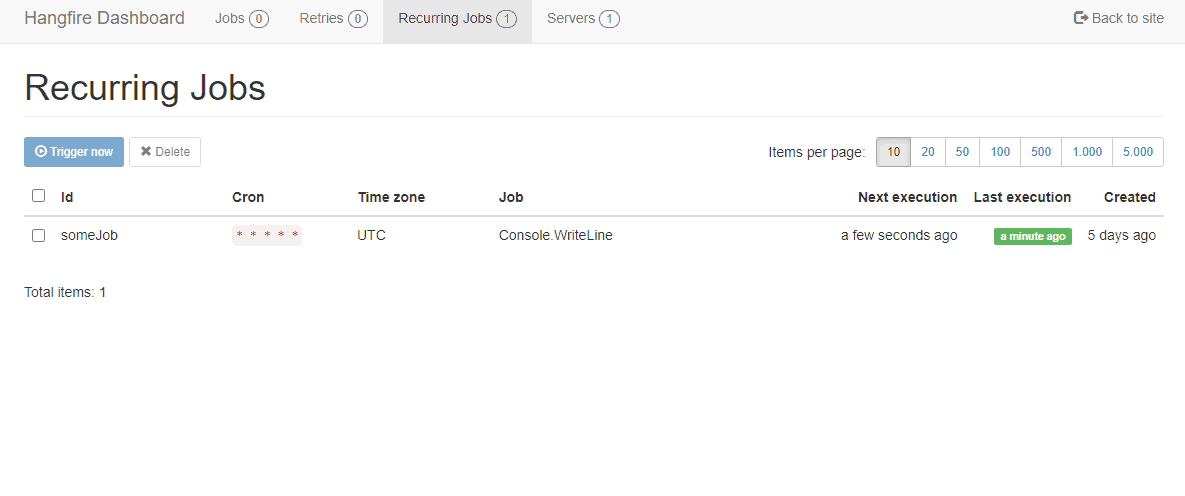
Recurring Jobs tab
Imagine having an ERP (Enterprise Resource Planning) system that should send out invoices during the morning at a specific time, then we need a recurring job. This is one of the core features of Hangfire. This allows us to monitor all recurring jobs and their details.
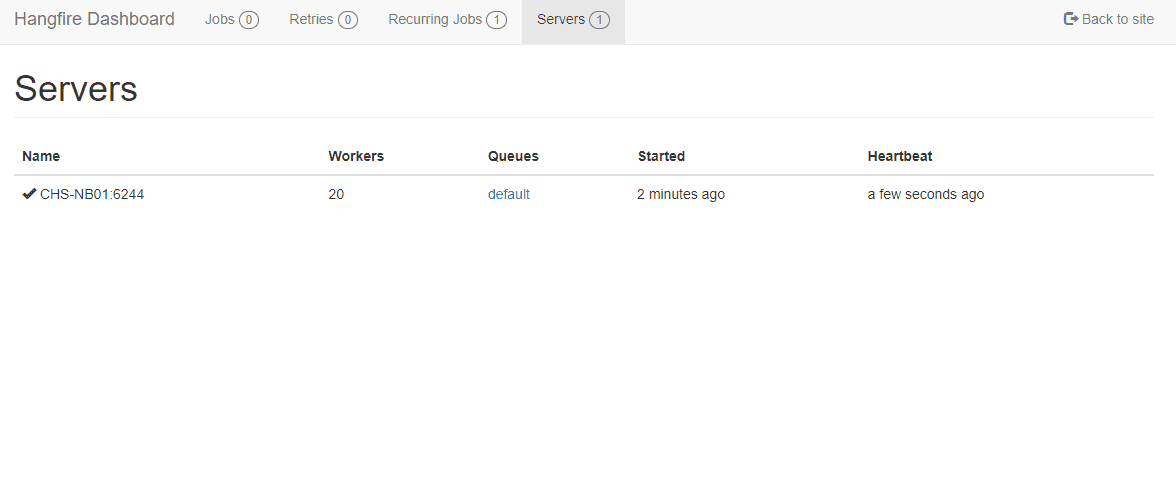
Servers tab
In our Startup.cs file, we added services.AddHangfireServer() to the ConfigureServices method. This tab allows you to see all servers running an active Hangfire server. This is the servers responsible for executing scheduled jobs in their respective application. If you don’t add the Addservices.AddHangfireServer() to the startup class but only jobs, then the jobs will be added to the database but not executed as expected.
Secure Hangfire Dashboard If Exposed To Public
If you plan to expose the Hangfire Dashboard publicly then it’s obvious that you would want to secure its interface. The dashboard is exposing names of methods with sensitive data on methods, parameters ids, etc… Hangfire has out of the box made the dashboard secure by only allowing local requests. This can be changed if you need to access the dashboard remotely by implementing your own version of IDashboardAuthorizationFilter(). Please refer to the official documentation about security for the dashboard, if you need this feature implemented.
Hangfire Jobs
A background job in programming can be of many types depending on what it should accomplish or execute. Below is a brief description of the different Hangfire job types. I will be showing the implementation and how to test it with Swagger and Hangfire.
Fire-And-Forget
If you are looking for a job that has to be run only once, then the fire-and-forget job type is what you are looking for. It will execute only once and almost at the time it is requested. Create a new controller named JobController open it and add the following code to the controller.
namespace NetCoreApiServer.Controllers
{
    public class JobController : Controller
    {

        [HttpPost("fireandforget")]
        public IActionResult fireAndForget(string mail)
        {
            // Stores the job id into a variable and adding a background job for SendMail method.
            var fireAndForgetJob = BackgroundJob.Enqueue(() => SendMail(mail));

            // Return OK (Status 200) with a message that includes the job id from the scheduled job
            return Ok($"Great! The job {fireAndForgetJob} has been completed. The mail has been sent to the user.");
        }

        public void SendMail(string mail)
        {
            // Implement any logic you want - not in the controller but in some repository.
            Console.WriteLine($"This is a test - Hello {mail}");
        }
    }
}
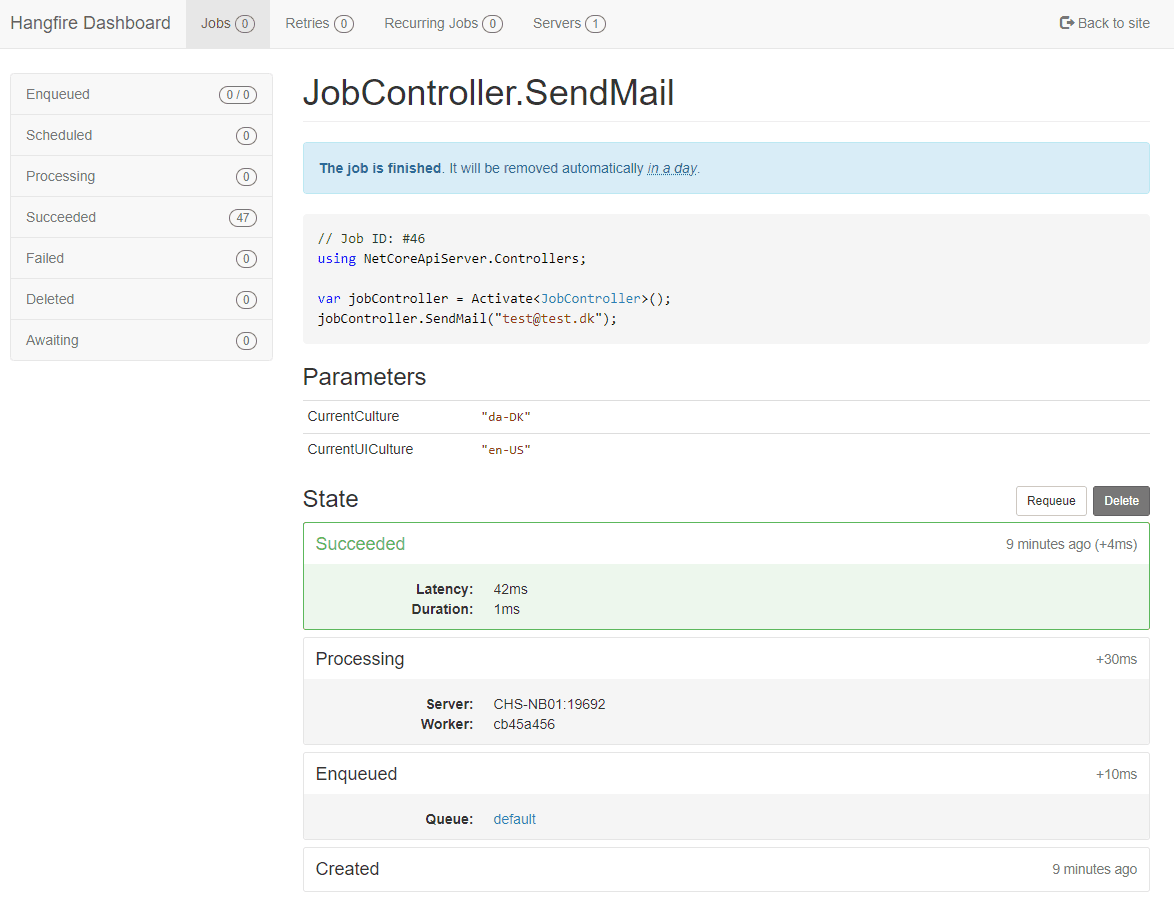
It was a success, let’s check out the dashboard to see how it went. Under the Succeeded tab in the Jobs section, you can find your jobs that have been successfully completed. By clicking on a specific job you will be able to see details for the job including sensitive data like method and parameters. If you would like to run the job again (with the same details), just hit the Requeue button. Hangfire now adds the job to its queue for processing.
Delayed
If you would like to schedule the job for a later time than the request was sent, you can use the Schedule method. Below is the code that allows for implementing the scheduled/delayed job. In the JobController add a new method called ScheduledJob(string mail).
[HttpPost("delayed")]
        public IActionResult Delayed(string mail)
        {
            var delayed = BackgroundJob.Schedule(() => SendMail(mail), TimeSpan.FromMinutes(1));
            return Ok($"Great! The Delayed job with id: {delayed} has been added. The delayed mail has been scheduled to the user and will be sent within 1 minute.");
        }
Once again I add the job to a variable so I am able to access the job id later on when returning a status to the requester. When making a scheduled job, we make use of TimeSpan which is predefined (if not from the caller). In this example, I have set the schedule to be one minute from the request time, as I don’t want to wait for too much to see some results.
Let’s open Swagger and test one more time against the Delayed endpoint in the API.
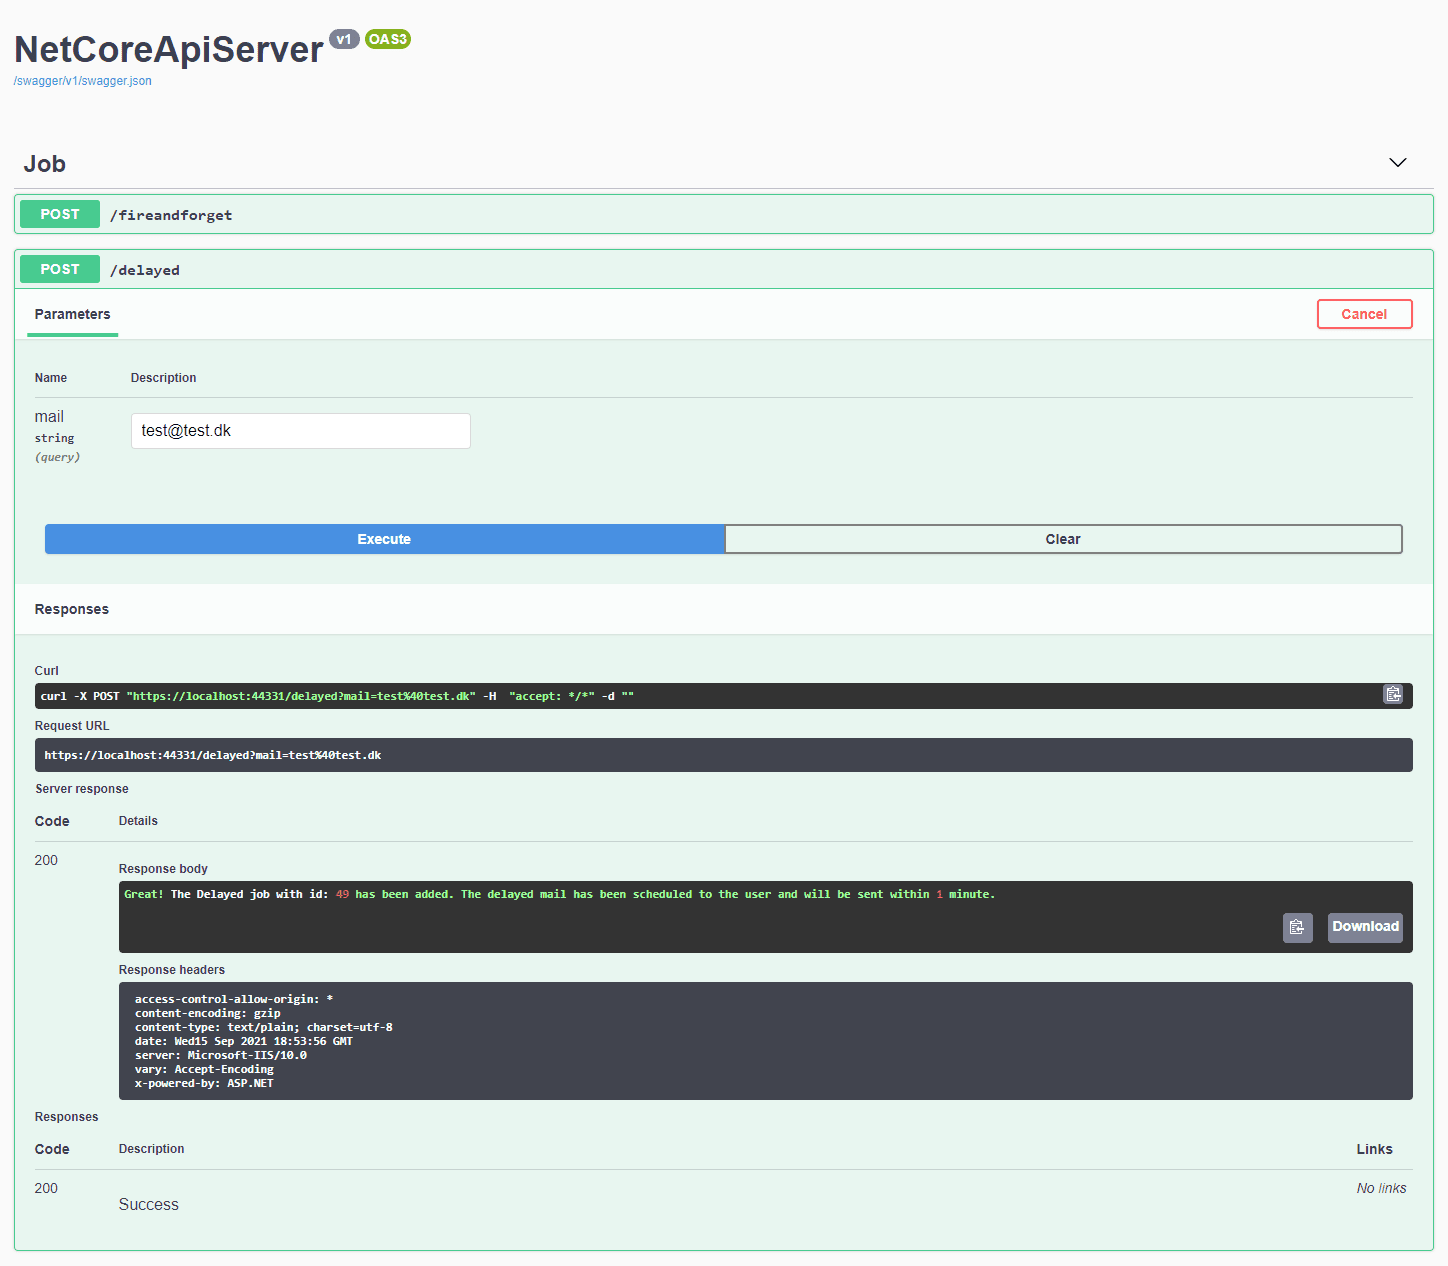
When requesting we get the expected response from the API. Now let’s switch to the Hangfire Dashboard and head to the Scheduled Jobs section, here we should be able to see the newly scheduled job. It should inform us that it will run within one minute. That's it! We have now created a scheduled job that will be executed later than the request was made.

Recurring
Recurring jobs could be something like a credit report to the customer about how much money they have spent with us and how many more they are capable of spending etc… It could literally be anything. The main point here is that we would like to send our customer a mail every week with a status. To accomplish this we need to call the RecurringJob, where we can execute our send mail based on a CRON specified by us.
[HttpPost("recurring")]
public IActionResult Recurring(string mail)
{
    RecurringJob.AddOrUpdate(() => SendMail(mail), Cron.Weekly);
    return Ok($"The recurring job has been scheduled for user with mail: {mail}.");
}
In the code above we are adding/updating a recurring job to our database, that we would like to be scheduled for a weekly basis. Let’s power up the application and head over to Swagger and request the endpoint for the recurring job. I’m adding the job on the 15 of September – and since it’s a weekly job I expect this to be executed in 4 days.
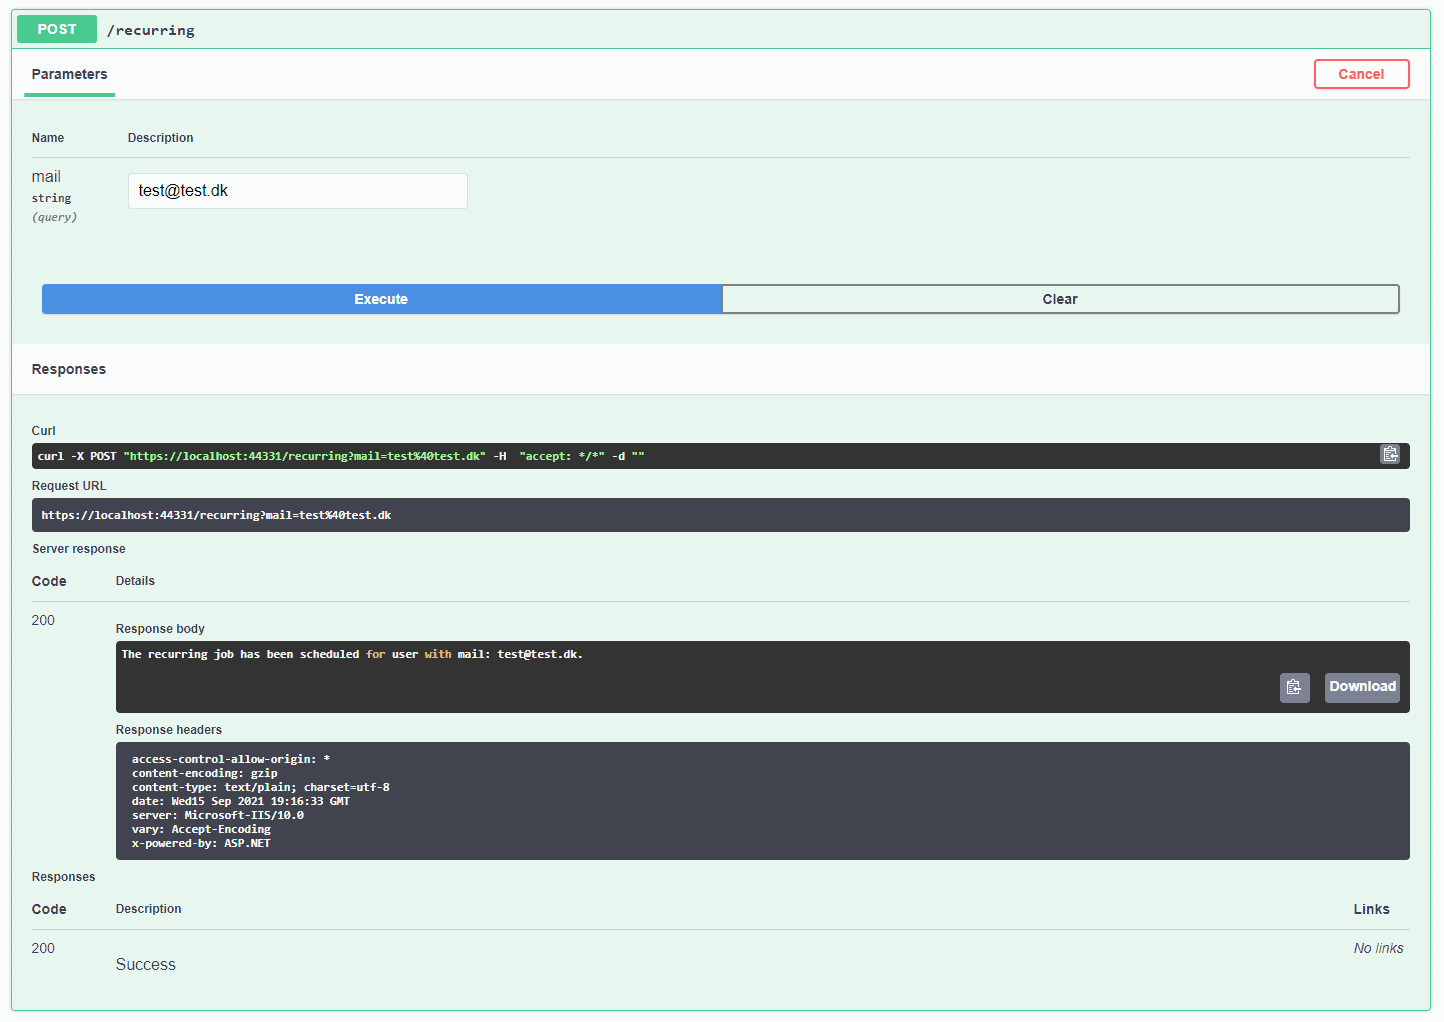
So the API tells us that the job was successfully added for the mail test@test.dk – Awesome! Let’s head over to Hangfire and check the Recurring Jobs tab to see our newly created job.
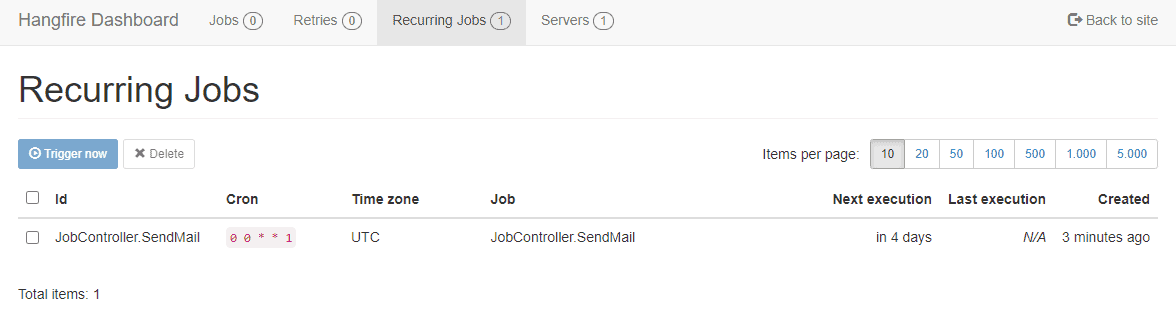
Great! It worked as I expected it to. If you would like to learn more about CRONS you can check out crontab.guru – it’s a nice website I often use when making CRONs.
Continuations
The last and most complex situation is the one where we would like to make continuations. To make an example let’s take a look at GDPR and the right to get or delete data.
Scenario: A user decides to request a deletion of all his/her data in the application. It’s our job to make sure that the data is being deleted and send a confirmation to the user once it has been completed. So that leaves us with two jobs – the first one is the deletion and the second one is sending a mail confirmation. The second job must only be executed once the first job has been completed – it’s very important. Below is the code to achieve this:
[HttpPost("continuation")]
public IActionResult Continuation(string username, string mail)
{
    var jobId = BackgroundJob.Enqueue(() => DeleteUserData(username));
    BackgroundJob.ContinueJobWith(jobId, () => SendConfirmationMailUponDataDeletion(mail));
    return Ok($"OK - Data for user with username: {username} has been deleted and a confirmation has been sent to: {mail}");
}

public void DeleteUserData(string username)
{
    // Implement logic to delete data here for a specific user
    Console.WriteLine($"Deleted data for user {username}");
}

public void SendConfirmationMailUponDataDeletion(string mail)
{
    Console.WriteLine($"Successfully sent deletion confirmation to mail: {mail}");
}
The first method is the endpoint and is the one responsible for enqueuing the deletion job. I have added this to a variable to make use of the jobId when adding the continuation job. The two void methods should of course implement functionality that will delete the user’s data within the database and then send a confirmation mail to the specified mail at the input.
Let's fire up Swagger and test it out.
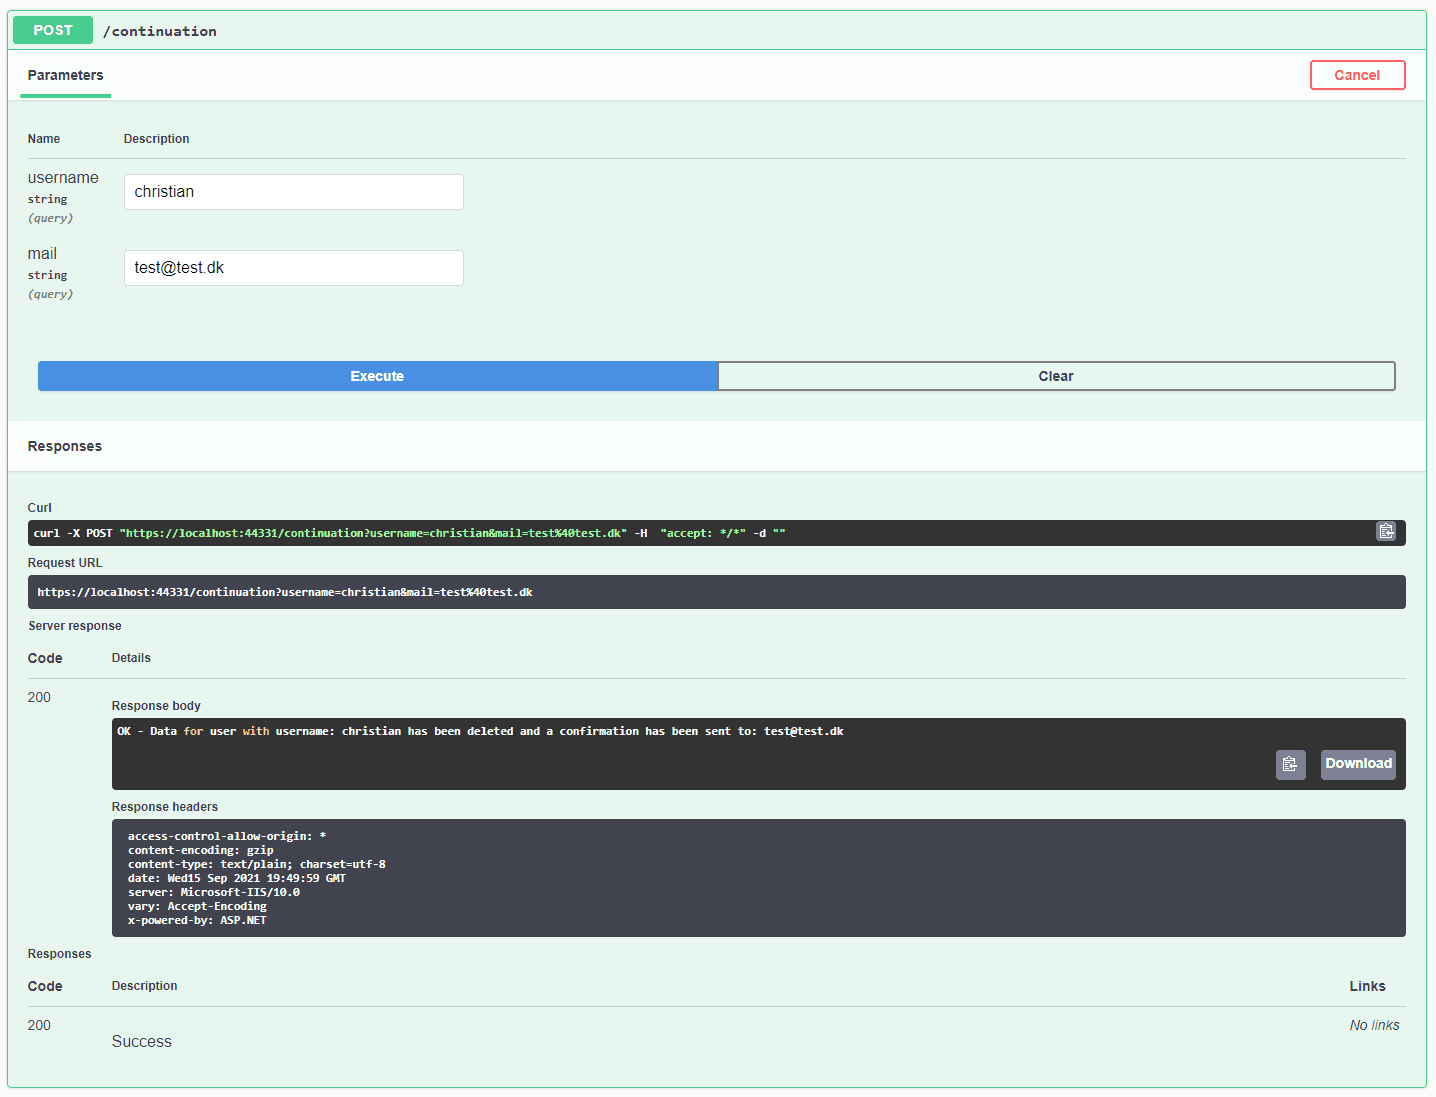
It looks like a success at the API, let’s check out Hangfire to confirm that the jobs also were added and executed.
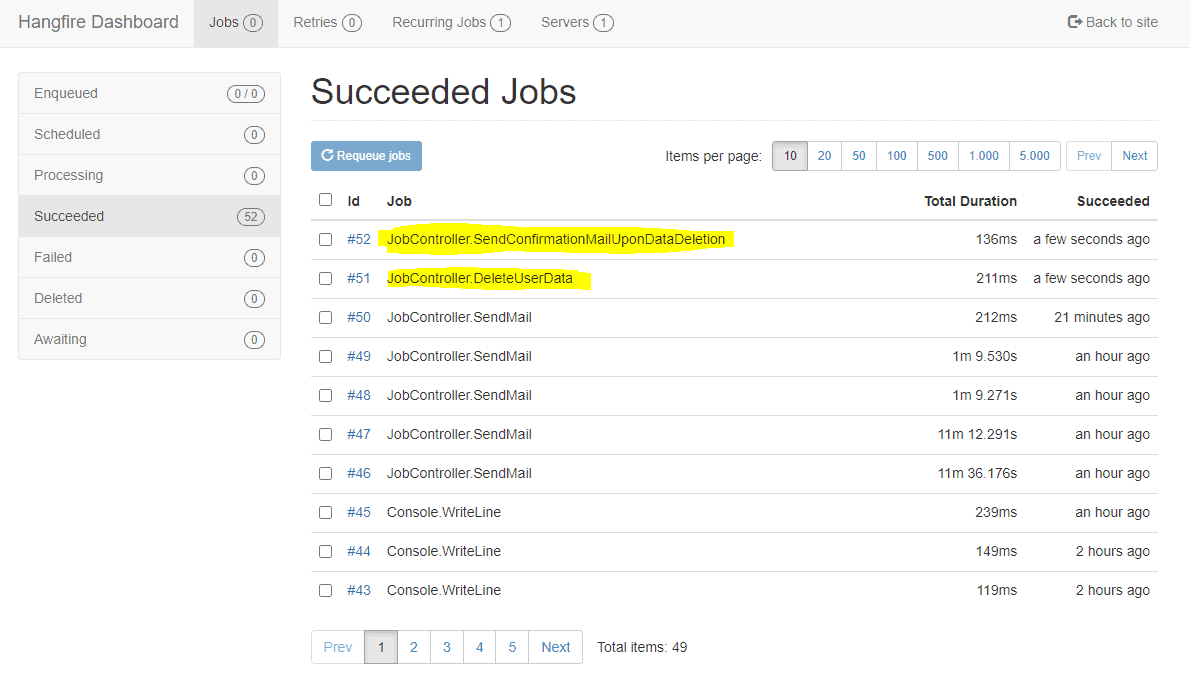
I have marked the two jobs in the image above. As expected we got the two jobs and the confirmation was sent right after the deletion where complete.
Summary
That’s it for this Hangfire and .NET Core tutorial. I hope you now have a good understanding of how Hangfire and ASP.NET Core integrate and how you can make use of this awesome library in your own applications. We have gone through the different background job types, features, and implementation of them in an API controller. These jobs can actually be added wherever you need them in your application.
If you got any questions or suggestions for the post, please let me know in the comments. Have an awesome day and happy coding to everyone 🙂
What is Hangfire?
Hangfire is an open-source library that gives developers an easy way to schedule jobs in the background of their applications. It is very flexible and offers various features that make background job scheduling peace of cake.
Is Hangfire free?
Hangfire is fully open-source and comes in a free edition for commercial use. They got upgrades that give you more features like batching etc… The Core library will remain free and is more than enough for most developers when just testing out and doesn’t need enterprise features.