How to Use PowerShell - An Introduction to PowerShell for Windows Administration Tasks
Discover the power of PowerShell! This tutorial introduces you to basic commands, scripting, and advanced techniques for Windows administration tasks. In this guide, you'll gain the skills to automate processes and optimize system management.
Greetings from the world of PowerShell, a robust and adaptable scripting language created especially for Windows administration tasks that I personally use for automating software deployments, repetitive tasks, and configurations on servers and client computers.
Learning PowerShell can significantly increase your productivity and efficiency when managing Windows environments (free up your time), regardless of whether you are an experienced system administrator or a novice exploring the world of IT management.
A Brief Overview of PowerShell
Microsoft's PowerShell, which was first released in 2006, has since grown in importance among IT specialists and Windows system administrators. PowerShell is fundamentally a command-line shell and scripting language built on top of the .NET framework that gives users access to a wide range of Windows operating systems (servers and clients) administrative features.
PowerShell, in contrast to conventional command-line interfaces, adopts a novel strategy by treating everything as an object. Wooha! ✌️ In PowerShell, each command returns an object that can be modified and passed to other commands. 💪 Due to its object-oriented design, PowerShell is extremely flexible and can automate complex tasks using straightforward scripting. 🔥
Advantages of Using PowerShell for Windows Administration Tasks
For Windows administration tasks, there are a number of important benefits to using PowerShell. Below is a list of some of the most important ones I would like to share with you.
- Efficiency and Automation - PowerShell enables you to automate routine tasks and economize administrative procedures. You can complete tasks that would take hours or even days to complete manually with a few lines of code.
- Adaptability - PowerShell is capable of handling a variety of administrative tasks, including setting up networks, controlling Active Directory, and managing services, processes, and files.
- Integration with Existing Tools - PowerShell integrates seamlessly with other Microsoft technologies and products, including Active Directory, Exchange Server, SharePoint, and Azure, enabling programmatic management of these platforms.
- Promotes Reusability - PowerShell scripts are reusable because they can be easily shared and used in a variety of environments and systems, which saves time and effort when deploying consistent configurations.
- Powerful Automation Platform - PowerShell may be enhanced to carry out complex activities and integrate with external systems thanks to its ability to communicate with the .NET framework and other APIs. I have personally used it in combination with SQL databases, APIs, Microsoft Office, etc...
Who is this Tutorial for and what are the Requirements?
A range of Windows administration experience levels are targeted by this tutorial. This manual will give you a firm foundation in using PowerShell effectively, whether you are a system administrator new to the field or an IT professional looking to advance your skills.
To continue in this tutorial, you should have a fundamental knowledge of Windows operating systems and some experience with the command-line interface in order to benefit the most from this tutorial. No prior PowerShell expertise is necessary. I will teach you the fundamentals and gradually advance your knowledge, throughout the tutorial.
Now that the fundamentals have been covered, let's explore PowerShell's fundamental ideas and commands. By the time you finish this tutorial, you'll be equipped with the skills and confidence necessary to use PowerShell for a variety of Windows administration tasks and automate your regular work processes. If not, please let me know in the comments by the end.
So... Now let's get to the fun stuff and start using PowerShell and explore its incredible potential for Windows administration! 🚀
Getting Started with PowerShell
I'll walk you through the necessary steps to begin using PowerShell in this section. PowerShell is already installed and ready to use whether you are using Windows 10 or Windows Server. We'll also look at the various settings in which PowerShell commands can be executed, giving you the freedom to select the one that best suits your requirements.
Installing PowerShell (for Windows and Windows Server)
Users of Windows 10 or 11 already have PowerShell installed. You can find both the Integrated Scripting Environment and the standard PowerShell console by searching for "PowerShell" in the Start menu (ISE).
However, if you are using an older version of Windows or Windows Server, you might need to install PowerShell manually. To do this, you can follow my steps below:
For Windows Server
- Open the Server Manager.
- Click on "Add roles and features".
- Follow the installation wizard, and under "Features," select "Windows PowerShell".
For Windows 7, 8, or 8.1
- Download the Windows Management Framework (WMF) package from the Microsoft Download Center.
- Install the WMF package, which includes PowerShell and other management tools.
Once you have PowerShell installed, you can start using it - you might have to restart Windows.
Open PowerShell
PowerShell can be started in two different ways: through the standard console or the Integrated Scripting Environment (ISE). Depending on the complexity of the task you want to complete, each has its advantages.
PowerShell Console
The PowerShell console provides a command-line interface where you can run individual commands and scripts. This option is a perfect choice if you need to execute something quickly and don't need advanced features. To open the console, follow these steps.
- Press the
Windows key + Xand select "Windows PowerShell" from the menu (you might see "Windows PowerShell (Admin)" for elevated privileges). - Alternatively, you can search for "PowerShell" in the Start menu and choose the "Windows PowerShell" app.
PowerShell ISE
The Integrated Scripting Environment (ISE) offers a more feature-rich environment for writing, testing, and debugging PowerShell scripts. I personally like this as I can execute each line at the time when developing the scripts. To open the ISE, you can follow the steps below.
- Press the
Windows key + Xand select "Windows PowerShell ISE" from the menu (you might see "Windows PowerShell ISE (Admin)" for elevated privileges). - You can also search for "PowerShell ISE" in the Start menu and choose the "Windows PowerShell ISE" app.
What version should you choose?
The ability to run commands and scripts is offered by both the PowerShell console and the ISE, but their functionalities differ in some ways.
PowerShell Console
- Best for running individual commands and quick tasks.
- Suitable for users who prefer a simple and lightweight interface.
PowerShell ISE
- Ideal for writing and editing scripts, with syntax highlighting and tab completion.
- Offers two panes - the script editor and the PowerShell console.
- Useful for testing and debugging scripts as you can run specific script sections.
Regardless of what you choose, PowerShell's capabilities are constant in both the Console and ISE. I'll now demonstrate some basic PowerShell commands and scripting examples in the sections that follow, giving you the tools you need to start using PowerShell effectively for Windows administration tasks.
Basic PowerShell Commands
I'll introduce you to a few fundamental PowerShell commands in this part that are frequently used for Windows administration chores. These commands will help you become comfortable with PowerShell's object-oriented methodology and show you how straightforward it is to carry out numerous administrative tasks.
Running Some Simple Commands
To execute a PowerShell command, type the command in either the PowerShell console or the Integrated Scripting Environment (ISE) and press the Enter key. Let's begin with some basic commands to retrieve some system information.
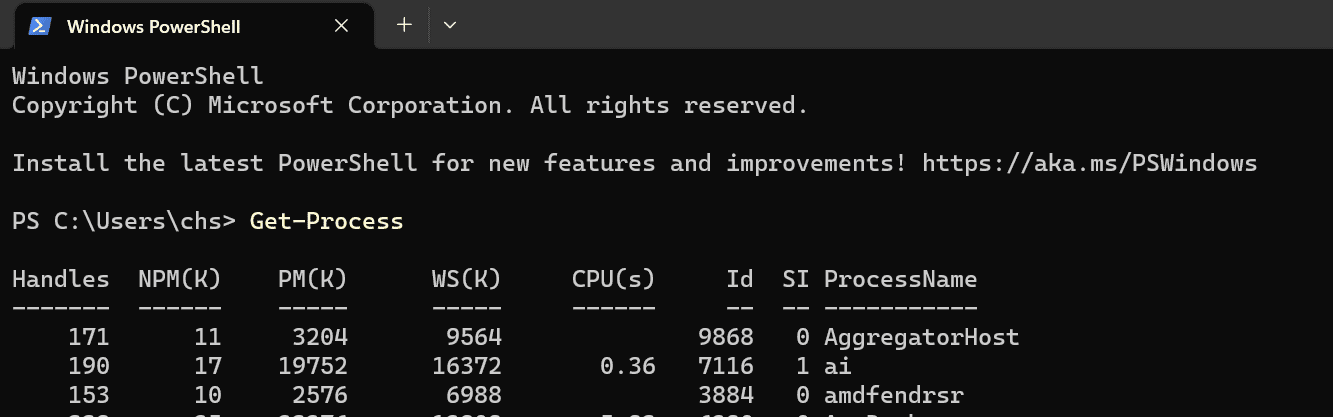
Get-Process
This command retrieves information about the processes running on your system, including their names, IDs, and memory usage.
Get-Process
Get-Service
Use this command to view a list of services on your system, their statuses (running or stopped), and their display names directly in the output.
Get-Service

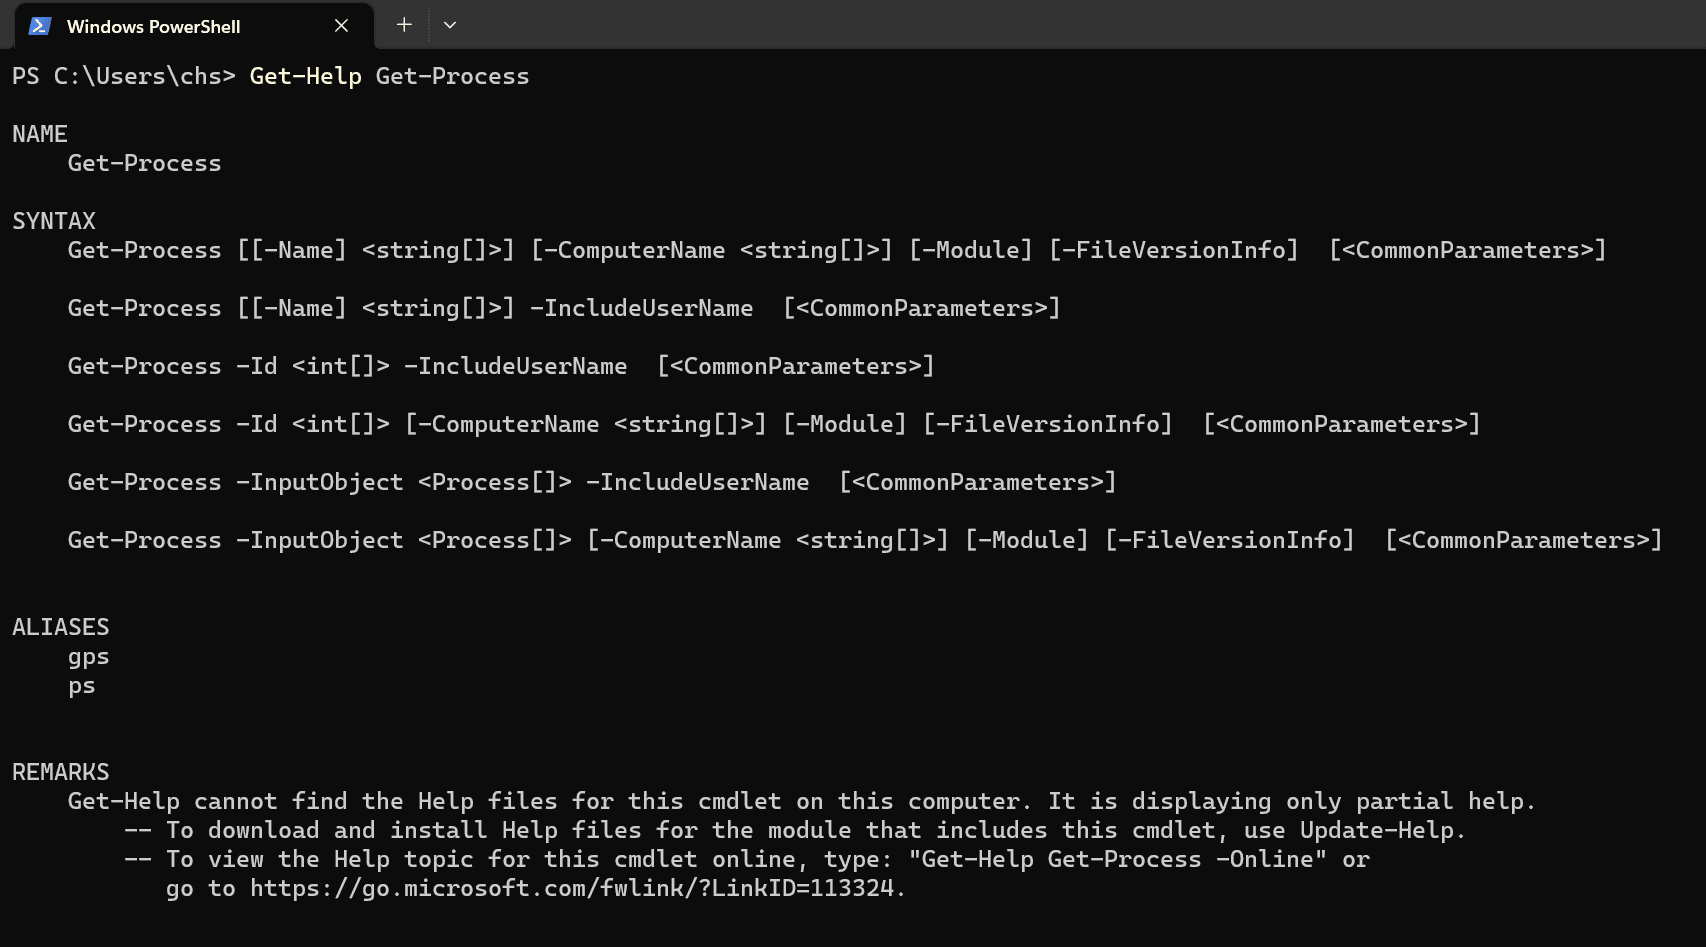
Get-Help
PowerShell comes with extensive built-in help.
To get more information about a specific command, use the Get-Help command followed by the command you want to learn about.
Get-Help Get-Process
Working with Files and Folders
PowerShell makes managing files and directories/folders a breeze. Here are some basic commands to get you started managing files and folders on your system.
Get-ChildItem
Use this command to list the files and directories in a specified location. By default, it shows the contents of the current directory.
Get-ChildItem

Copy-Item
This command allows you to copy files or directories from one location to another.
Copy-Item -Path "C:\Source\file.txt" -Destination "D:\Destination\"
Remove-Item
Use this command to delete files or directories. Be cautious, as this action is irreversible. 😅
Remove-Item -Path "C:\Path\to\file.txt"
Managing Services and Processes
PowerShell provides commands to control services and processes running on your system. 🔥 Here are a few examples to get you started.
Start-Service
Use this command to start a service on your system.
Start-Service -Name "ServiceName"
Stop-Service
This command stops a running service.
Stop-Service -Name "ServiceName"
Stop-Process
As mentioned earlier, you can use this command to retrieve information about processes. To stop a specific process, you can use the Stop-Process command followed by the process ID (PID).
Stop-Process -ID 1234
Working with PowerShell Aliases
PowerShell offers aliases to make typing some commands simpler. Shortcuts for commands are known as aliases, but they are not always obvious. To improve clarity and code readability, it is imperative to become familiar with the actual commands. To view the list of aliases, you can use the Get-Alias command.
Get-Alias
That should cover some of the basic PowerShell commands you can use for Windows administration tasks. I'll go through PowerShell Cmdlets and their parameters in the following section so you can carry out more complex tasks and take better control of your system. Let's move on! ✌️
PowerShell Cmdlets and Parameters
Cmdlets, which are pronounced "command-lets", are the foundation of automation in PowerShell. These are concise, targeted orders that carry out particular operations. You may create robust and complex scripts to effectively manage your Windows environment by combining different cmdlets.
This section will examine PowerShell cmdlets and their parameters, giving you the opportunity to develop your scripting skills and carry out more complicated tasks.
Understanding PowerShell Cmdlets
PowerShell cmdlets follow a verb-noun naming convention (e.g. Get-Process, Stop-Service, New-Item). The verb indicates the action the cmdlet performs, while the noun represents the target on which the action is executed.
Let's see how those work in action.
Get-Command
To discover available cmdlets in your system, you can use the Get-Command cmdlet. This will provide you with a list of all the cmdlets available on your system.
Get-Command
Get-Command -Name "Verb-*"
To filter cmdlets by the action verb, you can use wildcards. For example, Get-Command -Name "Get-*" will display all cmdlets with names starting with "Get-".
Exploring Cmdlet Parameters
Cmdlets often accept parameters, which are additional pieces of information you can provide to modify their behavior. To see a list of parameters and their descriptions for a specific cmdlet, use the Get-Help command followed by the cmdlet's name.
Get-Help Get-Process
The output will show you the cmdlet's syntax, description, and a list of available parameters along with their explanations. 👌
Using Parameters in Cmdlets
Get-Service
You can use the -Name parameter to specify the name of a particular service you want to retrieve information about.
Get-Service -Name "Spooler"
Stop-Process
The -Name parameter allows you to stop a process by providing its name.
Stop-Process -Name "notepad"
Get-ChildItem
The -Path parameter lets you specify the location where you want to list files and directories.
Get-ChildItem -Path "C:\MyFolder\"
Using Pipeline and Multiple Cmdlets
The power of PowerShell comes from its ability to chain cmdlets together using the pipeline (|) operator. If you have worked with Linux, you should already be familiar with this feature. The output of one cmdlet can be passed as input to another, allowing you to perform more complex operations with concise code. 😎
Here are a few examples for you to see how it works in action.
Retrieving a Specific Process and Stopping It
The following command uses the Get-Process cmdlet to retrieve a process named "notepad" and then pipes the output to the Stop-Process cmdlet to terminate it.
Get-Process -Name "notepad" | Stop-Process
Creating and Deleting a Directory
You can use the New-Item cmdlet to create a new directory and then pipe its output to the Remove-Item cmdlet to delete it.
New-Item -ItemType Directory -Path "C:\NewDirectory" | Remove-Item
The pipeline enables you to perform multiple actions in a single line, making your scripts more efficient and easier to read.
Getting Started With PowerShell Scripting
We looked at different PowerShell commands and their capabilities in the earlier sections. Although utilizing specific commands might be effective, PowerShell's real power comes from its scripting features.
In this section, I'll introduce you to PowerShell scripting, enabling you to automate tasks and create reusable scripts for your Windows administration needs.
Writing Your First PowerShell Script
A PowerShell script is a collection of commands saved in a text file with a ".ps1" extension. Let's create a simple script to display "Hello, World!" in the PowerShell console:
- Open your preferred text editor (e.g., Notepad++, Visual Studio Code).
- Type the following line in the editor you have opened:
Write-Host "Hello, World!"
Save the file with a .ps1 extension (e.g. HelloWorld.ps1).
Script Execution Policies and Setting Permissions
It's possible that your system's execution policy needs to be changed before you may be able to run PowerShell scripts. The purpose of execution policies is to prevent illegal script execution by determining whether scripts can run on a system. Windows may limit script execution by default.
To check your current execution policy, open the PowerShell console or ISE and enter the following command:
Get-ExecutionPolicy
There are four execution policies in Windows. You should get one of the following returned when running the command.
Restricted- No scripts can be run. This is the default for systems.AllSigned- Only signed scripts from trusted publishers can be run.RemoteSigned- Downloaded scripts need to be signed. Local scripts run without a signature.Unrestricted- All scripts, including unsigned and downloaded scripts, can be run. Not recommended for security reasons.
To set the execution policy, open a PowerShell console with administrator privileges and use one of the following commands in the terminal:
Set-ExecutionPolicy RemoteSigned
or
Set-ExecutionPolicy Bypass -Scope Process
The first command sets the policy to RemoteSigned, allowing you to run local scripts without a signature and downloaded scripts that are signed by trusted publishers. The second command sets the policy to Bypass for the current PowerShell session only, which can be useful for testing purposes.
Best Practices for Writing Clear and Maintainable Scripts
When writing PowerShell scripts, it's essential to follow best practices to ensure readability, maintainability, and efficient execution. This can somewhat be achieved using the following recipe
- Comment Your Code - Use comments (lines that begin with
#) to explain what your code does. This helps others understand your script and makes it easier to troubleshoot later. - Indentation and Formatting - Maintain consistent indentation and formatting to improve code readability.
- Use Descriptive Variable Names - Choose meaningful names for your variables, making it easier to understand their purpose.
- Error Handling - Implement error handling with
Try-Catchblocks to gracefully handle unexpected situations and provide meaningful error messages. - Modularization - Break down complex scripts into smaller functions and modules for better organization and reusability.
Now that you've dipped your toes into PowerShell scripting, you're ready to explore more advanced concepts and techniques in the upcoming sections. Let's get to them! 🎉
Variables, Operators, and Data Types
Variables are essential for storing and managing data in PowerShell. They let you save data for later usage, which gives your scripts additional flexibility and dynamism.
You can conduct complex computations and successfully handle different sorts of data if you have a solid understanding of variables, operators, and data types.
Working with Variables
In PowerShell, you can create variables by assigning a value to a name followed by the $ symbol. Variable names are case-insensitive and can contain letters, numbers, and underscores, but they cannot start with a number. Here are some examples to get you started.
# Assigning a string to a variable
$greeting = "Hello, PowerShell! My name is Christian"

# Assigning a number to a variable
$age = 27

# Assigning the result of an expression to a variable
$sum = 5 + 10
You can use variables in commands and scripts by referencing their names with the $ symbol. Here is an example: