How to accept Stripe Payments in ASP.NET Core Web API - .NET6

Stripe is a suite of APIs powering online payment processing and commerce solutions for internet businesses of all sizes. Accept payments and scale faster. Stripe is without a doubt one of the most popular online payment gateways you can get.
By using Stripe we can develop a secure way to store our customer's bank details such as credit cards, etc... for our ASP.NET Core Application. I am personally using stripe for my online business and I think that it is best suited for business owners who have their business online.
By the end of this tutorial, you will be capable of accepting Stripe payments from your ASP.NET Core Web API. If you are ready, then let's get started writing some code to implement Stripe in .NET.


What is Stripe?
Stripe is a payment service provider that allows merchants to accept credit cards online. Stripe is used by all sizes of businesses including companies like Shopify and Amazon.
My personal opinion is that Stripe is best suited for people who are selling online and not in-store. The reason is because of its many unique online features such as the open application programming interface (API) they provide and also the ability to accept payments in more than 135 currencies (as of writing). I use Stripe for this blog, my Academy platform, and other SaaS products I develop for myself and my customers.
Prerequisites
In order to follow along in this tutorial about accepting Stripe payments in .NET you need to have the following:
- A Stripe Account.
- Visual Studio IDE, Rider, or similar.
- Basic C# knowledge.
- Basic .NET knowledge.
Getting Stripe details
In order to move on and accept Stripe payments in .NET, we have to get some API keys to authenticate with. This is possible when you got a Stripe account, let's fix that.
Signup for/Create a new Stripe account
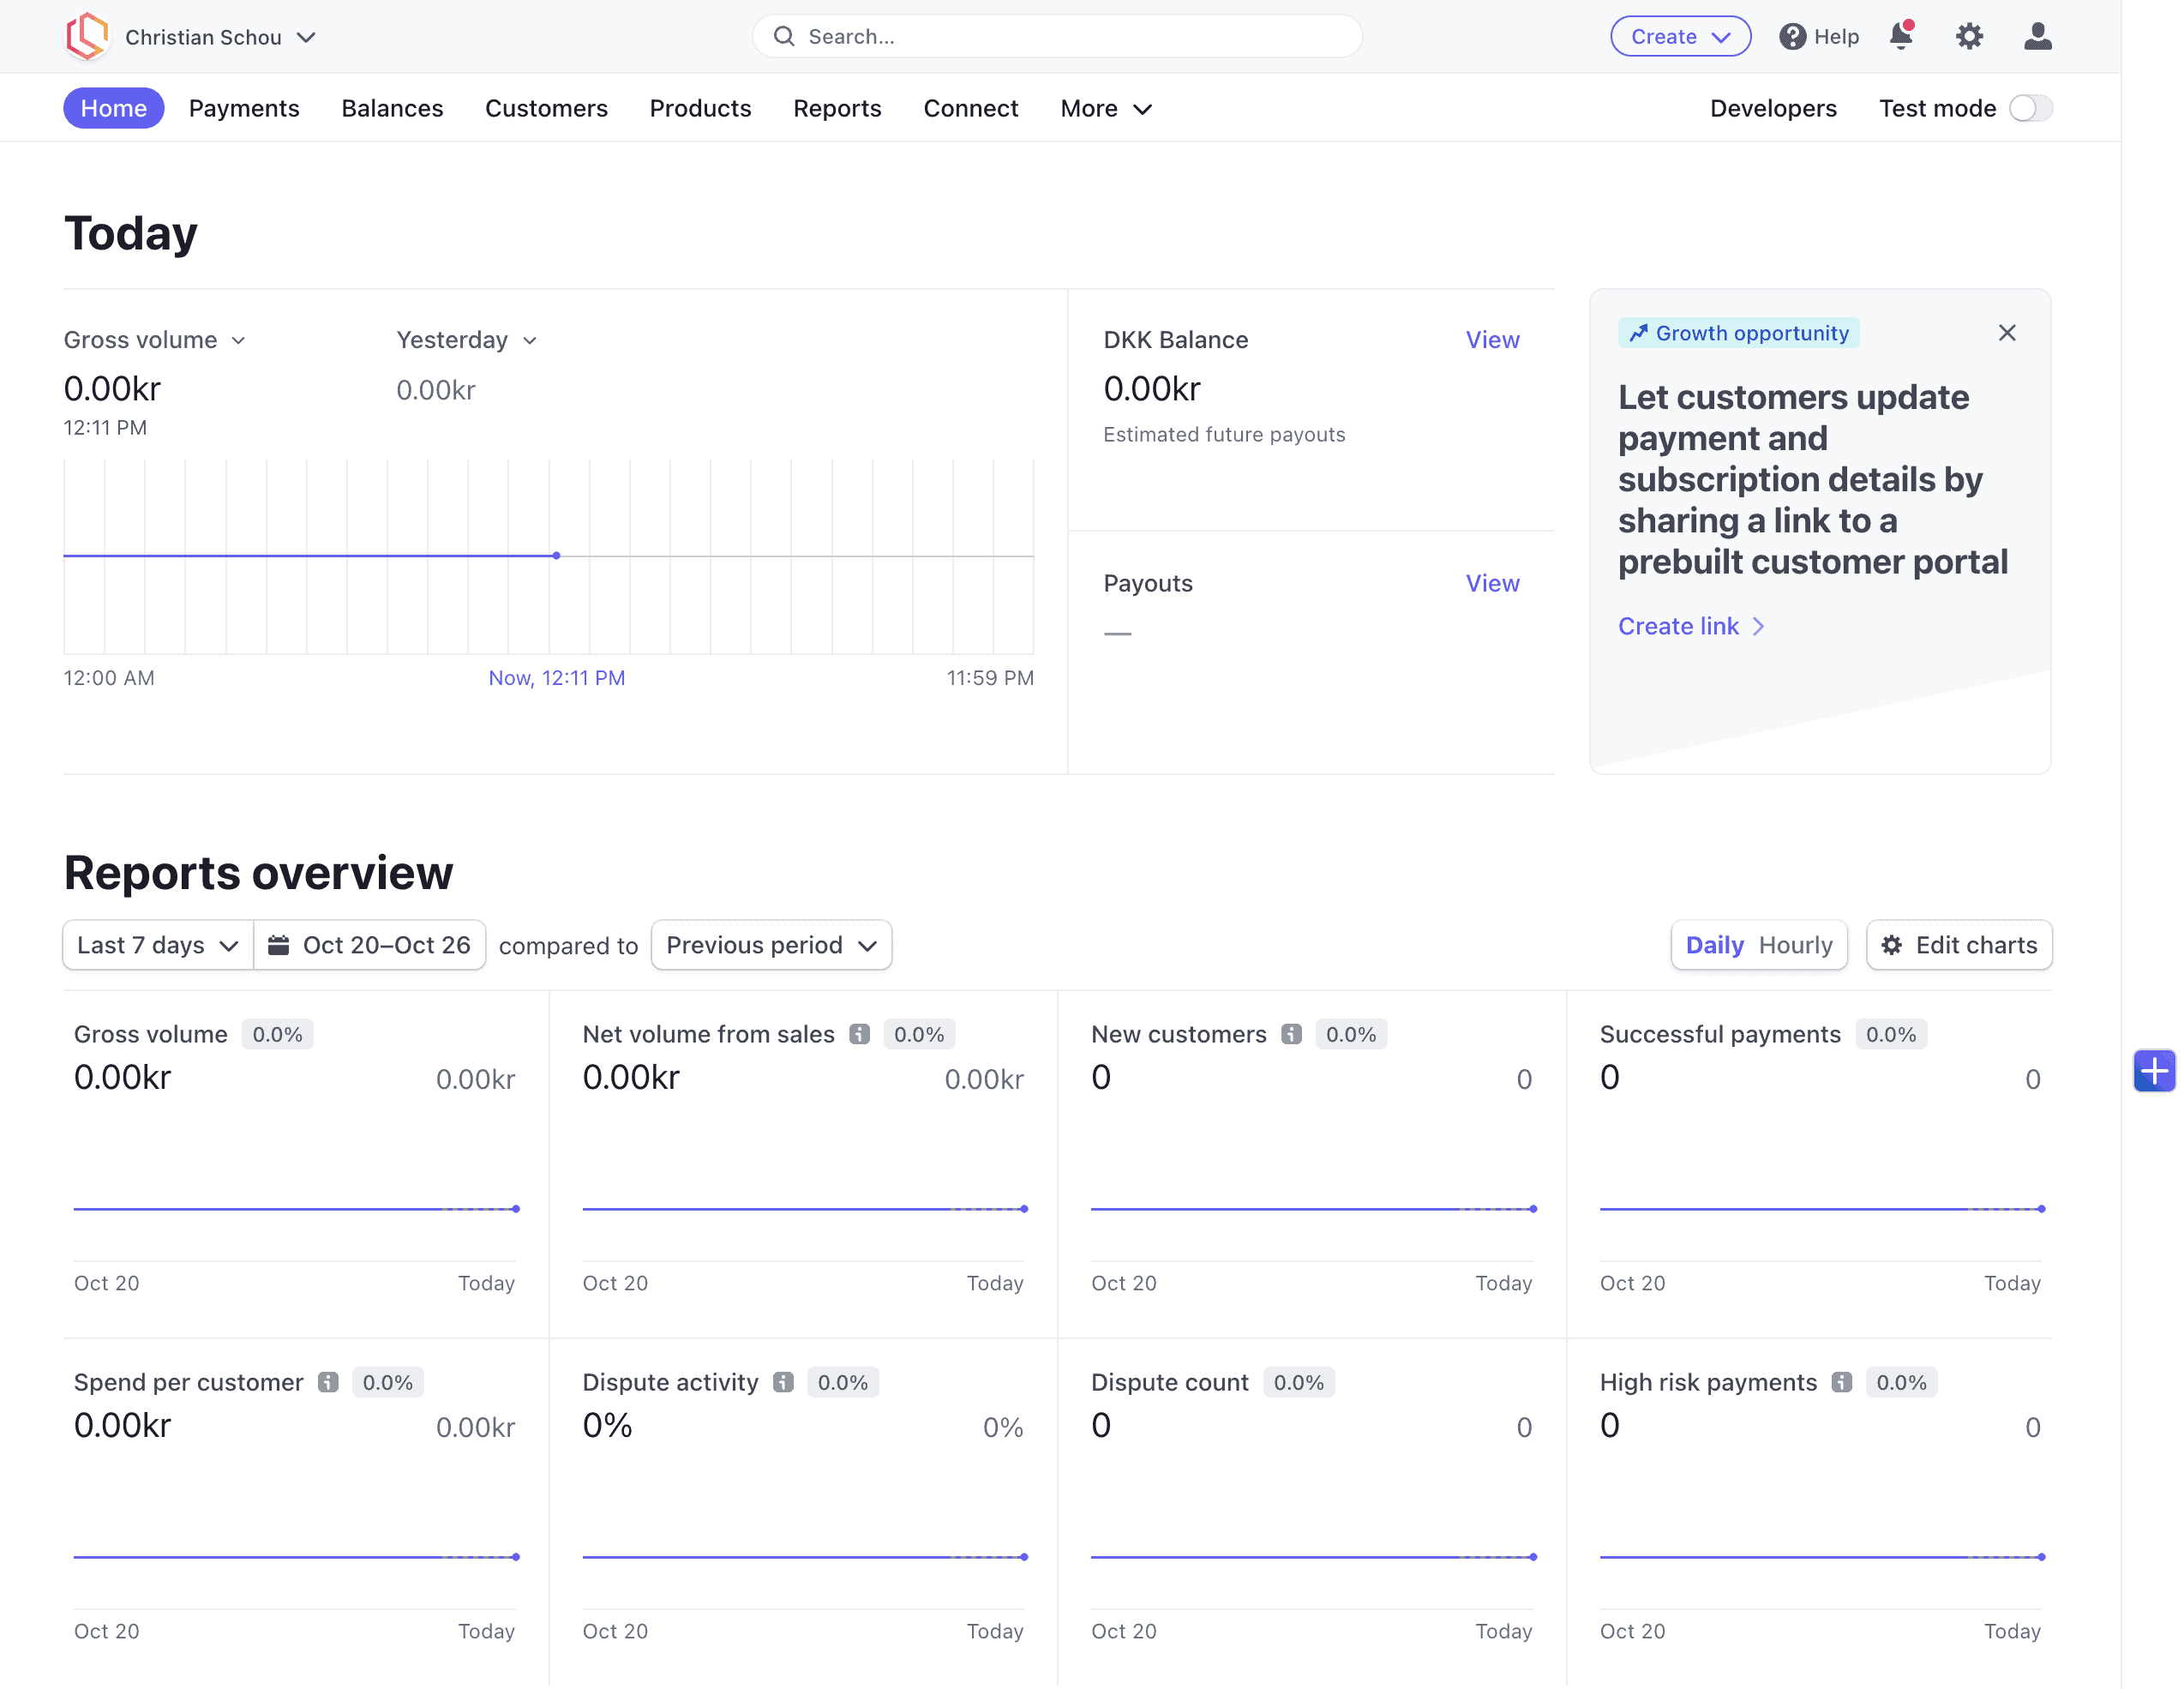
It's very easy to get started with Stripe. If you do not already have an account, you can register for one here. https://dashboard.stripe.com/register when you log in, you should see a dashboard similar to the one below.
Get Stripe keys
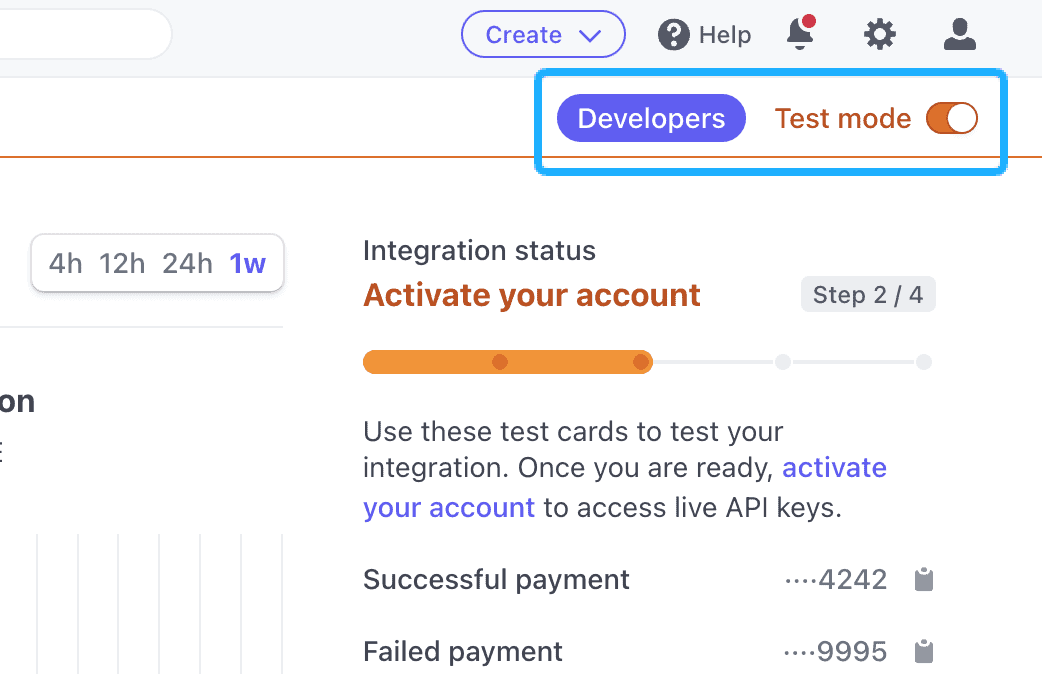
At the top of your Stripe Dashboard, you got a link named Developers. Click that and also enable Test mode by switching the button next to Developers.
On your left you got a few tabs, click the one named API keys. You should now be presented with a page like the one below.
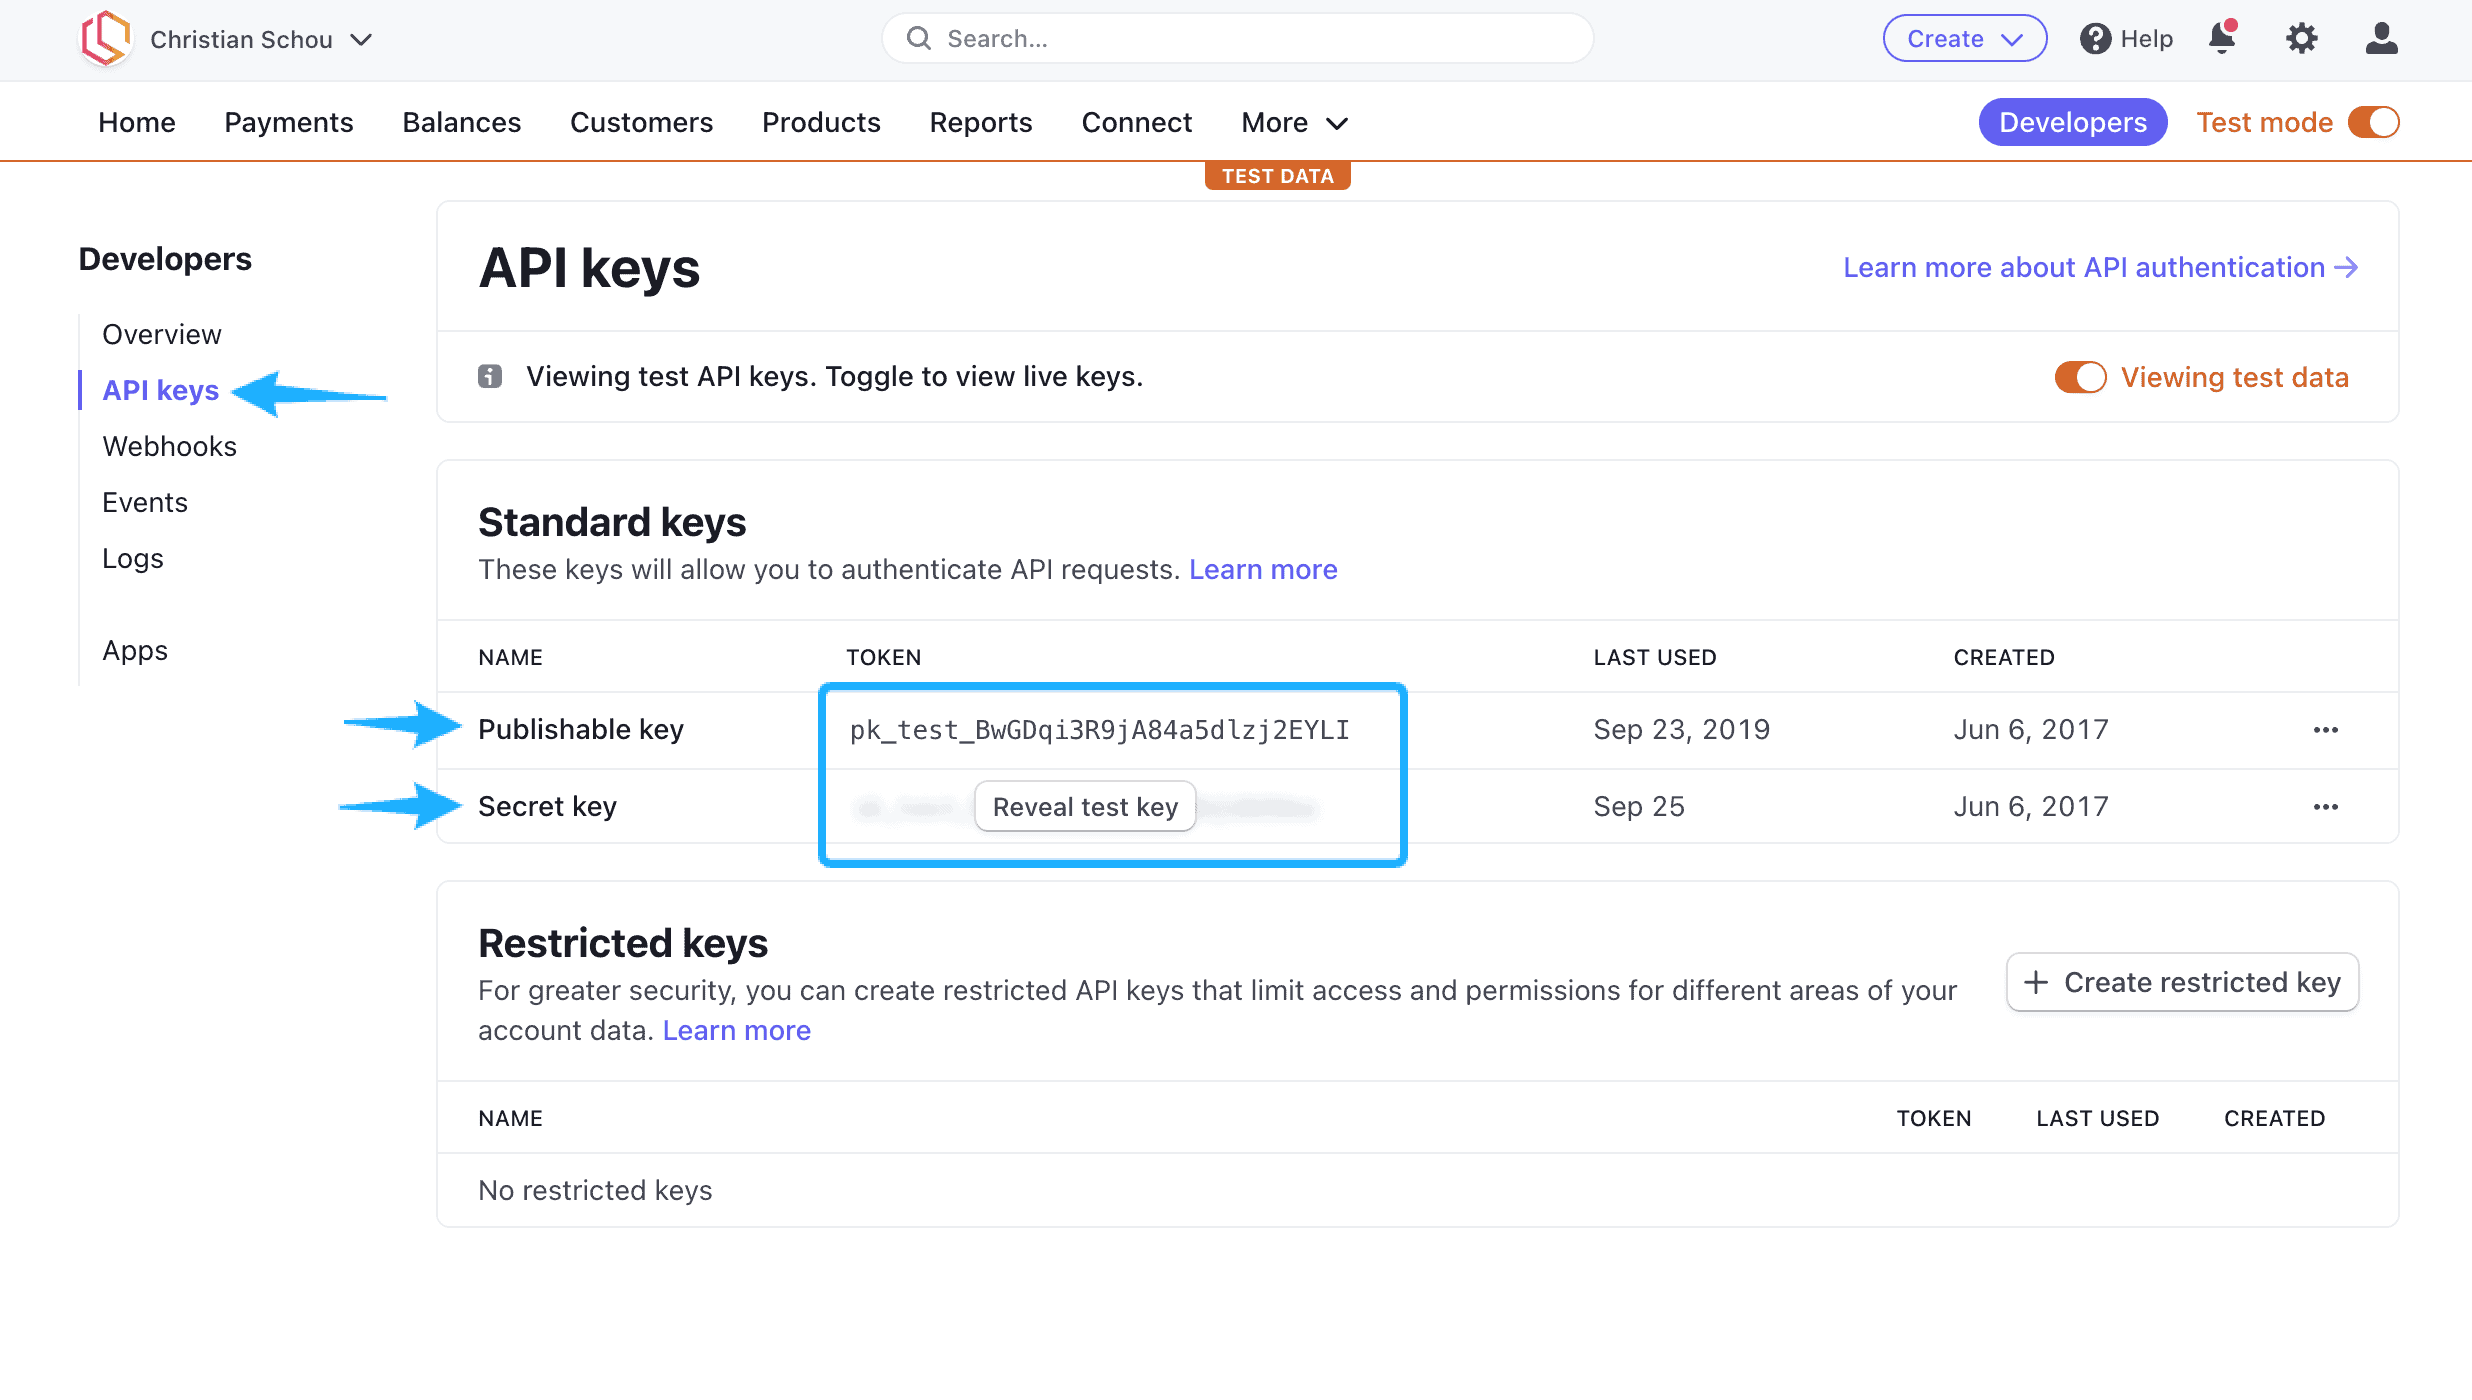
Copy the key from Secret key and store it in a secret place, we will be using it later in this article to connect and work with Stripe.
What are the keys used for?
- The
Publishable keyis used by the client application. This could be a web or mobile app making connections. - The
Secret keyis used in the authentication process at the backend server (API Server). By default, we use this key to perform any of the requests between our Web API and Stripe.
We will be using the Secret key, so please copy and store it in a secret place.
Create the Stripe Web API
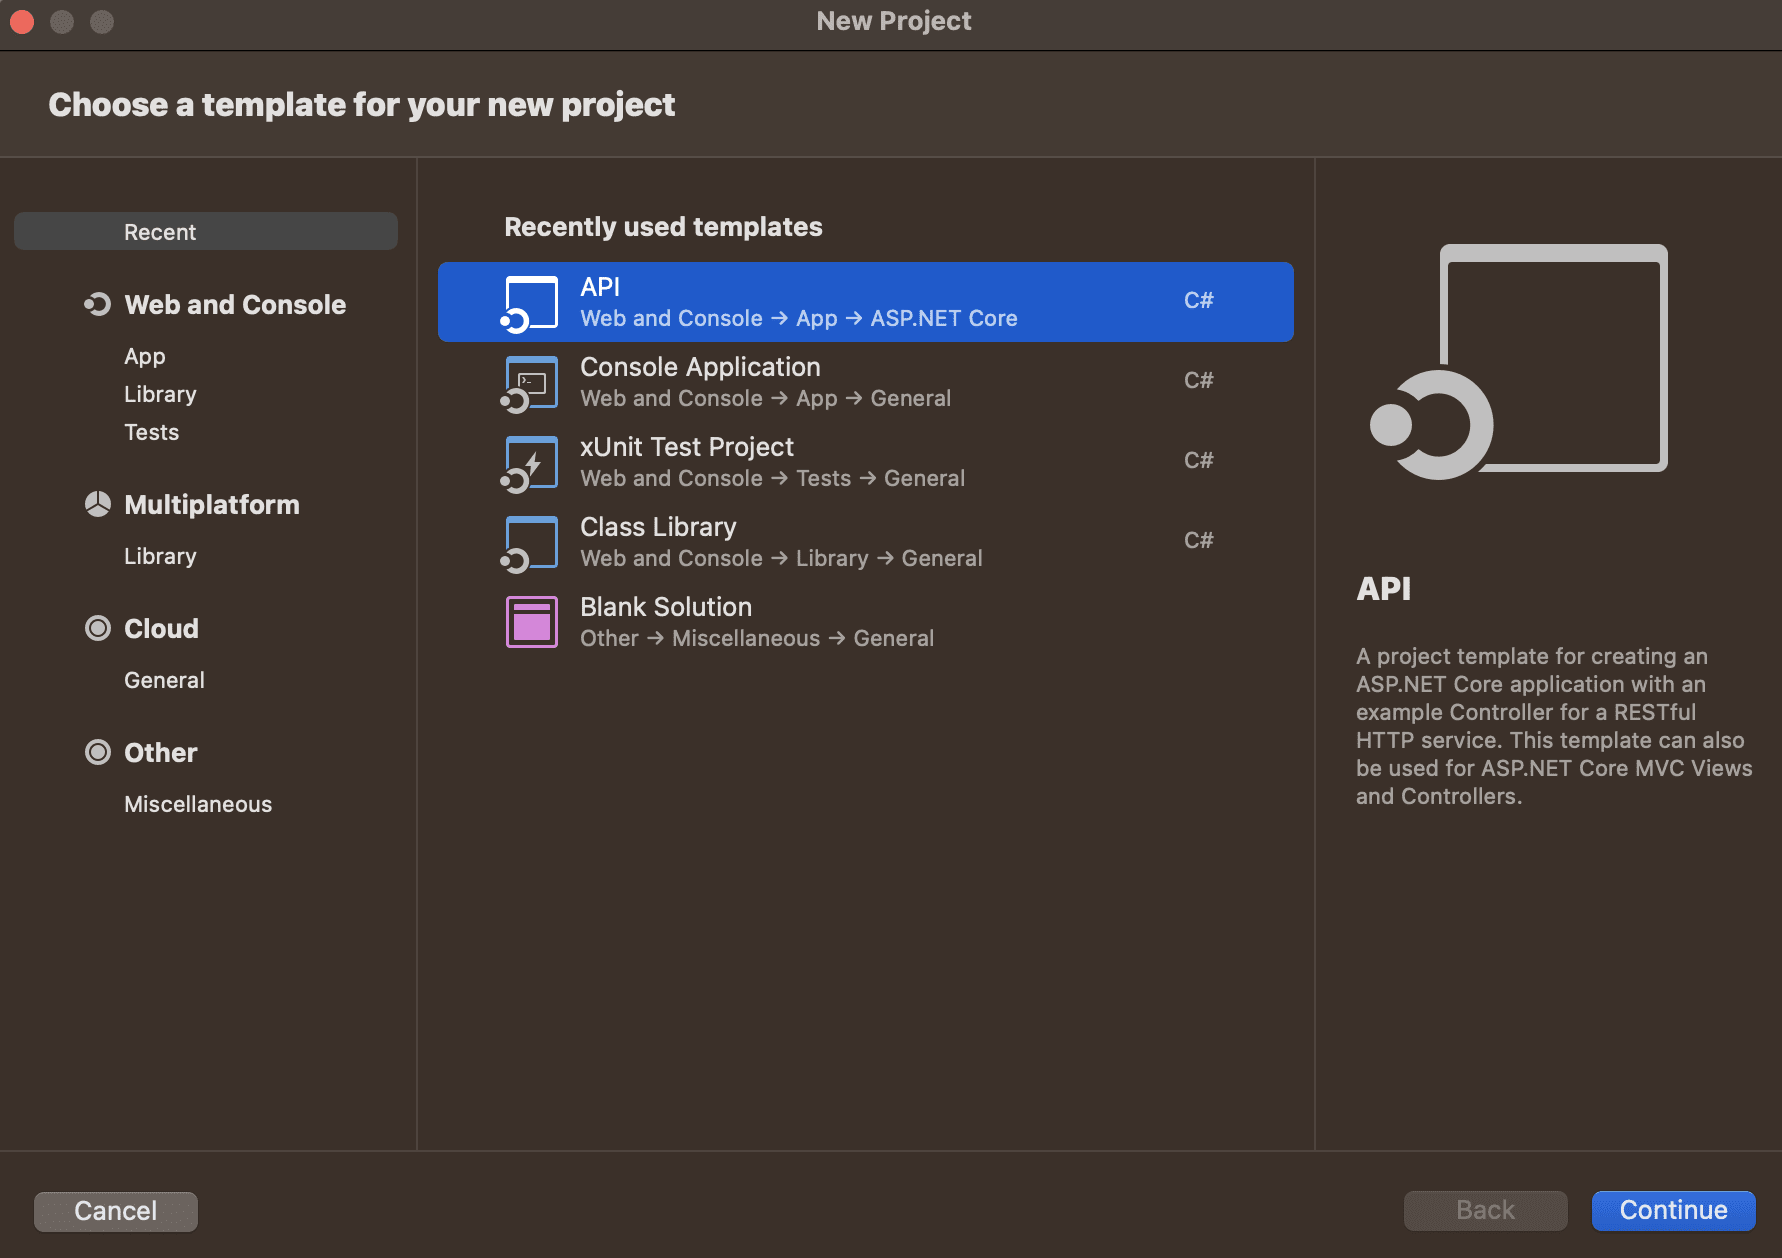
I will be using a clean template of the ASP.NET Core Web API in Visual Studio for this tutorial. I have deleted the Weather Forecast class and controller from the project, as we don't need these files.
We will create a full monolithic application for this demo. I will create all resources within the same project (the Host project). In a real-life scenario, I would split this into several projects and services.
Install Dependencies
Luckily for us, we won't have to write a ton of code to make this work. We can rely on the Stripe.net library. You can read more about the NuGet Package if you want to. You can install it through the console or by using the NuGet Package Manager UI inside Visual Studio.
 stripe
Install through Package Manager Console:
Install-Package Stripe.netOr by using the Visual NuGet Package Manager in Visual Studio:
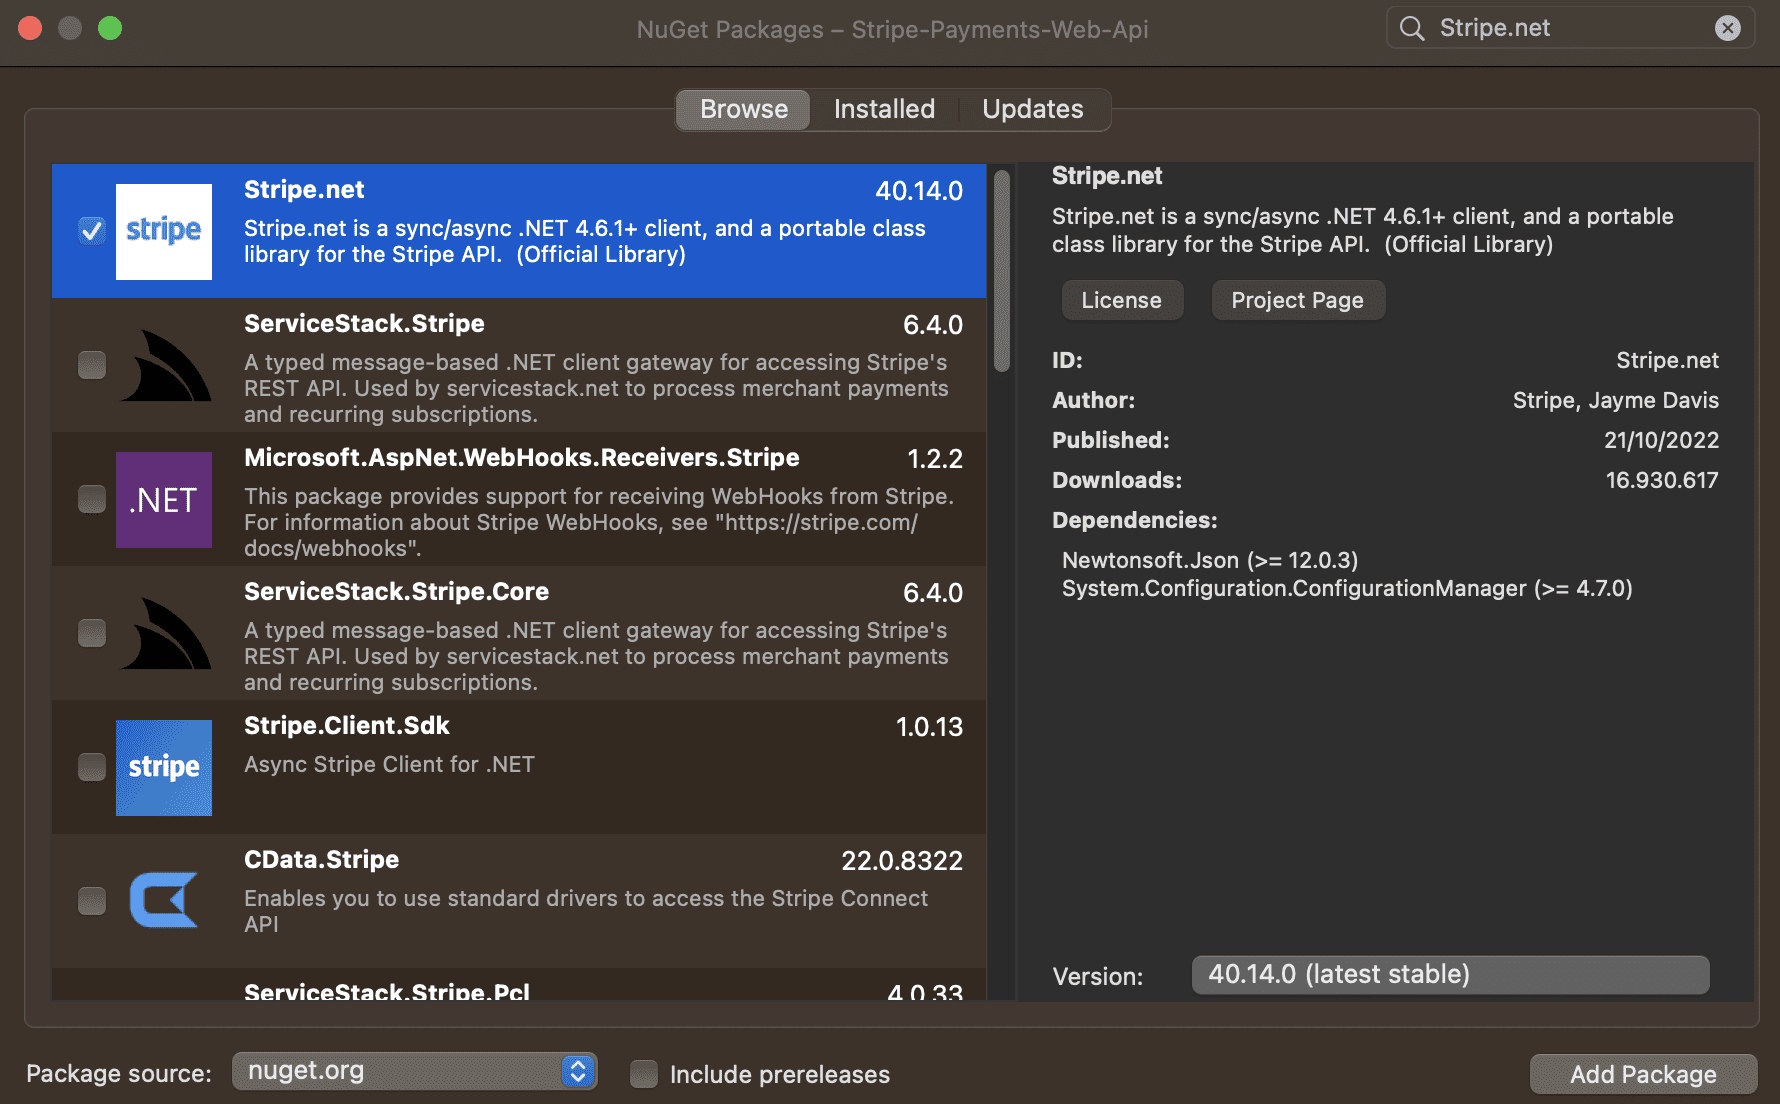
That is the only package we have to add for this tutorial. Let's write some code for our transactions to work with Stripe.
Add records for Stripe
C# 9 introduced records. A record is a reference type we can use instead of classes or structs. I often use records when I need to store data, which is also the case with our Stripe data.
I would not recommend using records if you need object-oriented hierarchies that focus on responsibilities and the behavior of your objects.
Enough about records, let's use them to define our Stripe resources for working with the Stripe API.
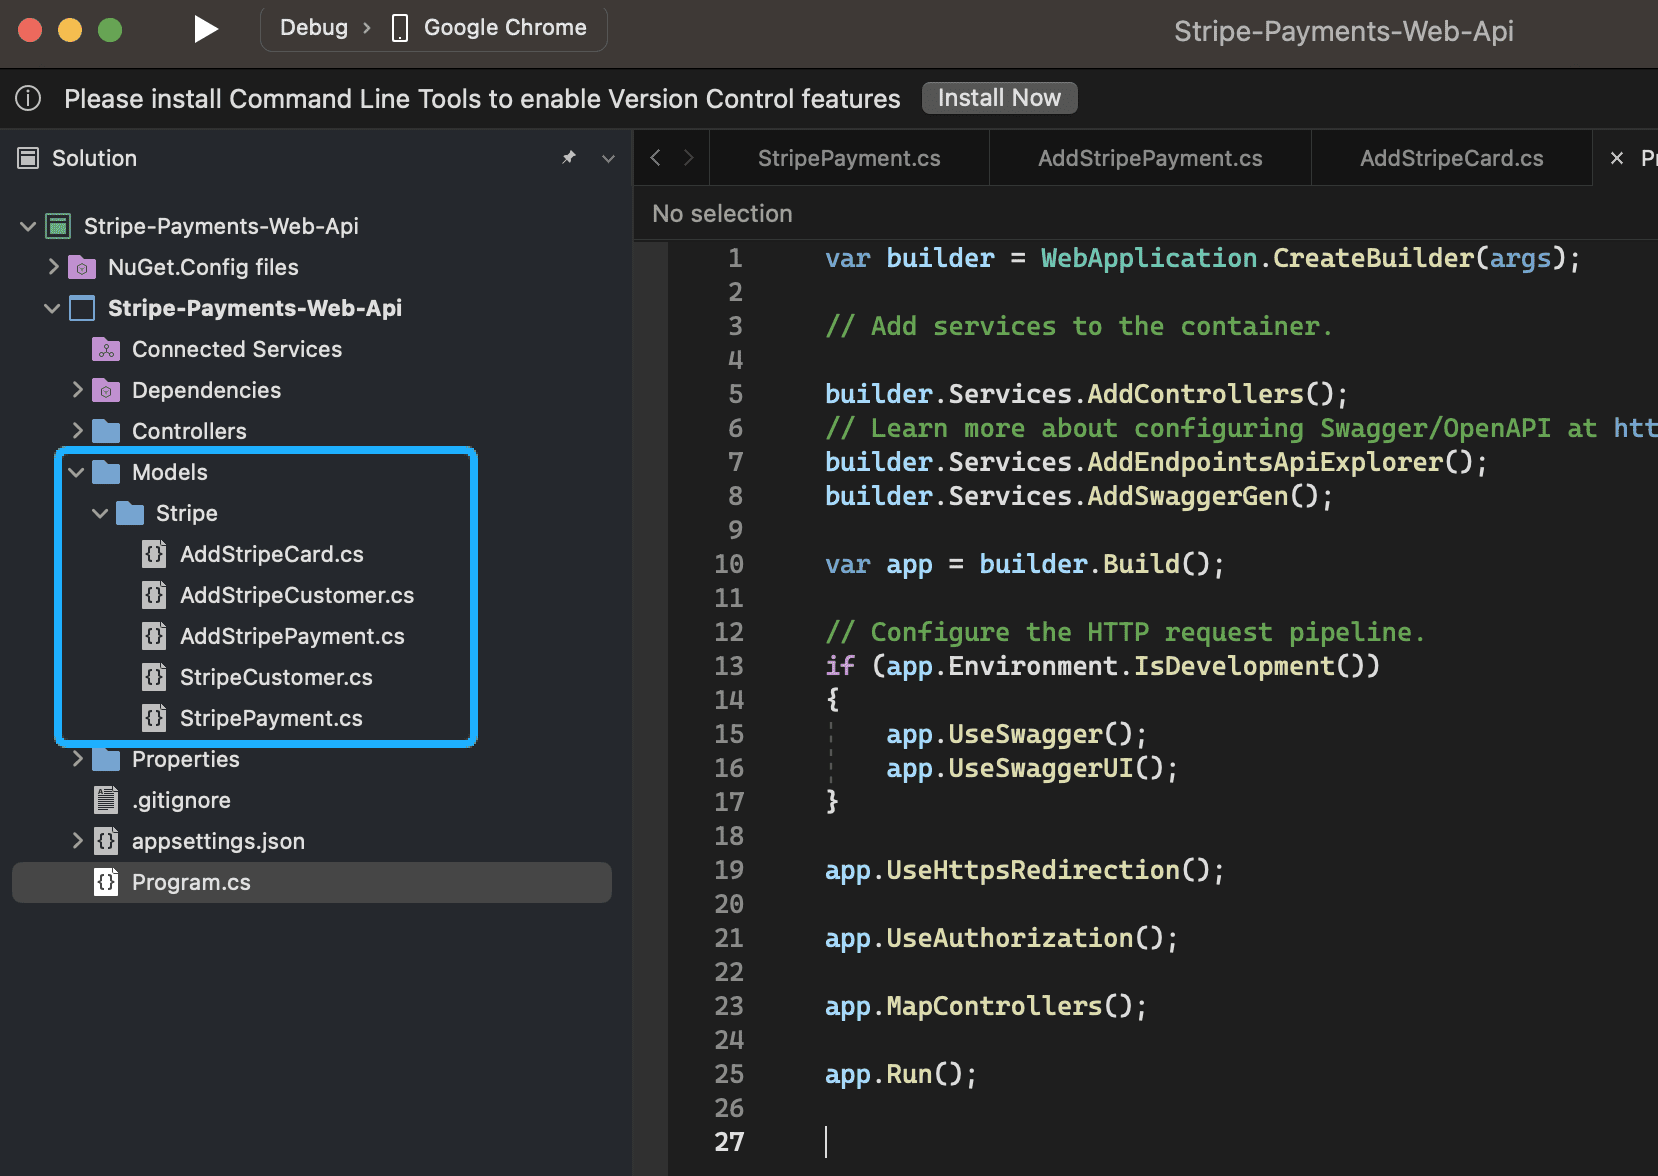
Create a new folder named Models and a child folder named Stripe. Inside Stripe, create 5 new files like the ones below. The final project structure should now look like this:
AddStripeCard.cs
using System;
namespace Stripe_Payments_Web_Api.Models.Stripe
{
	public record AddStripeCard(
		string Name,
		string CardNumber,
		string ExpirationYear,
		string ExpirationMonth,
		string Cvc);
}
AddStripeCustomer.cs
using System;
namespace Stripe_Payments_Web_Api.Models.Stripe
{
	public record AddStripeCustomer(
		string Email,
		string Name,
		AddStripeCard CreditCard);
}
AddStripePayment.cs
using System;
namespace Stripe_Payments_Web_Api.Models.Stripe
{
	public record AddStripePayment(
		string CustomerId,
		string ReceiptEmail,
		string Description,
		string Currency,
		long Amount);
}
StripeCustomer.cs
using System;
namespace Stripe_Payments_Web_Api.Models.Stripe
{
	public record StripeCustomer(
		string Name,
		string Email,
		string CustomerId);
}
StripePayment.cs
using System;
namespace Stripe_Payments_Web_Api.Models.Stripe
{
	public record StripePayment(
        string CustomerId,
        string ReceiptEmail,
        string Description,
        string Currency,
        long Amount,
        string PaymentId);
}
Add Services to work with Stripe
Now it is time to communicate with Stripe Online Services through their open API. For this, we will create a Stripe Service that handles communication to and from Stripe.
Create a new folder named Contracts and Application in the root of your project. Inside Contracts add a new interface named IStripeAppService with the following code inside:
using System;
using Stripe_Payments_Web_Api.Models.Stripe;

namespace Stripe_Payments_Web_Api.Contracts
{
	public interface IStripeAppService
	{
		Task<StripeCustomer> AddStripeCustomerAsync(AddStripeCustomer customer, CancellationToken ct);
		Task<StripePayment> AddStripePaymentAsync(AddStripePayment payment, CancellationToken ct);
	}
}
As you can see we have added two async methods (since Stripe.net is an async library). I will go-in-depth when we implement the services inside our Application folder in a moment.
Create a new file named StripeAppService inside the Application. Let's split this service class up into two sections. One for our Customer creation and a second one for adding a new payment to Stripe.
Dependency Injection in StripeAppService
using System;
using Stripe;
using Stripe_Payments_Web_Api.Contracts;
using Stripe_Payments_Web_Api.Models.Stripe;

namespace Stripe_Payments_Web_Api.Application
{
	public class StripeAppService : IStripeAppService
	{
        private readonly ChargeService _chargeService;
        private readonly CustomerService _customerService;
        private readonly TokenService _tokenService;

		public StripeAppService(
            ChargeService chargeService,
            CustomerService customerService,
            TokenService tokenService)
		{
            _chargeService = chargeService;
            _customerService = customerService;
            _tokenService = tokenService;
		}

        /// <summary>
        /// Create a new customer at Stripe through API using customer and card details from records.
        /// </summary>
        /// <param name="customer">Stripe Customer</param>
        /// <param name="ct">Cancellation Token</param>
        /// <returns>Stripe Customer</returns>
        public Task<StripeCustomer> AddStripeCustomerAsync(AddStripeCustomer customer, CancellationToken ct)
        {
            throw new NotImplementedException();
        }

        /// <summary>
        /// Add a new payment at Stripe using Customer and Payment details.
        /// Customer has to exist at Stripe already.
        /// </summary>
        /// <param name="payment">Stripe Payment</param>
        /// <param name="ct">Cancellation Token</param>
        /// <returns><Stripe Payment/returns>
        public Task<StripePayment> AddStripePaymentAsync(AddStripePayment payment, CancellationToken ct)
        {
        	throw new NotImplementedException();
        }
    }
}
In the code above we have implemented the interface methods without adding logic to them yet. In the constructor, we are doing dependency injection using three services from the Stripe.net library.
Let's add logic to our methods so we are able to create new customers for our application and charge them later on using credit card data stored at Stripe and not our application.
AddStripeCustomerAsync()
public async Task<StripeCustomer> AddStripeCustomerAsync(AddStripeCustomer customer, CancellationToken ct)
{
    // Set Stripe Token options based on customer data
    TokenCreateOptions tokenOptions = new TokenCreateOptions
    {
        Card = new TokenCardOptions
        {
            Name = customer.Name,
            Number = customer.CreditCard.CardNumber,
            ExpYear = customer.CreditCard.ExpirationYear,
            ExpMonth = customer.CreditCard.ExpirationMonth,
            Cvc = customer.CreditCard.Cvc
        }
    };

    // Create new Stripe Token
    Token stripeToken = await _tokenService.CreateAsync(tokenOptions, null, ct);

    // Set Customer options using
    CustomerCreateOptions customerOptions = new CustomerCreateOptions
    {
        Name = customer.Name,
        Email = customer.Email,
        Source = stripeToken.Id
    };

    // Create customer at Stripe
    Customer createdCustomer = await _customerService.CreateAsync(customerOptions, null, ct);

    // Return the created customer at stripe
    return new StripeCustomer(createdCustomer.Name, createdCustomer.Email,createdCustomer.Id);
}
In the code above we are creating a new customer and the customer's credit card at Stripe through the API. We start off by creating a new token object that contains the customer's credit card details. When creating the customer we set the ID of our created token at the customer object.
By the end, we return a new StripeCustomer by using the returned customer details from the creation of the customer.
AddStripePaymentAsync()
public async Task <StripePayment> AddStripePaymentAsync(AddStripePayment payment, CancellationToken ct)
{
    // Set the options for the payment we would like to create at Stripe
    ChargeCreateOptions paymentOptions = new ChargeCreateOptions {
        Customer = payment.CustomerId,
        ReceiptEmail = payment.ReceiptEmail,
        Description = payment.Description,
        Currency = payment.Currency,
        Amount = payment.Amount
    };

    // Create the payment
    var createdPayment = await _chargeService.CreateAsync(paymentOptions, null, ct);

    // Return the payment to requesting method
    return new StripePayment(
      createdPayment.CustomerId,
      createdPayment.ReceiptEmail,
      createdPayment.Description,
      createdPayment.Currency,
      createdPayment.Amount,
      createdPayment.Id);
}
The part everyone loves - charging the customer some money for a product. This service only creates a single charge (payment) for a specific customer.
We start by setting the options for the payment and then submit the charge to Stripe using the customer account and card details we submitted earlier. Finally, we create and return a new StripePayment object using the returned details from the Stripe API.
Add Controllers
Our backend application service is now capable of adding new customers to Stripe from .NET and charging them using the Stripe.Net library taking care of the API calls for us.
To make the API a bit clean I will create a single controller and specify the routes manually for customers and payments (charges).
Create a new controller named StripeController and add the following code inside - I will explain below.
using System;
using System.Collections.Generic;
using System.Linq;
using System.Threading.Tasks;
using Microsoft.AspNetCore.Mvc;
using Stripe_Payments_Web_Api.Contracts;
using Stripe_Payments_Web_Api.Models.Stripe;

namespace Stripe_Payments_Web_Api.Controllers
{
    [Route("api/[controller]")]
    public class StripeController : Controller
    {
        private readonly IStripeAppService _stripeService;

        public StripeController(IStripeAppService stripeService)
        {
            _stripeService = stripeService;
        }

        [HttpPost("customer/add")]
        public async Task<ActionResult<StripeCustomer>> AddStripeCustomer(
            [FromBody] AddStripeCustomer customer,
            CancellationToken ct)
        {
            StripeCustomer createdCustomer = await _stripeService.AddStripeCustomerAsync(
                customer,
                ct);

            return StatusCode(StatusCodes.Status200OK, createdCustomer);
        }

        [HttpPost("payment/add")]
        public async Task<ActionResult<StripePayment>> AddStripePayment(
            [FromBody] AddStripePayment payment,
            CancellationToken ct)
        {
            StripePayment createdPayment = await _stripeService.AddStripePaymentAsync(
                payment,
                ct);

            return StatusCode(StatusCodes.Status200OK, createdPayment);
        }
    }
}
Let's divide the controller into three sections.
- First, we create a constructor with dependency injection for our
IStripeAppService. - Then we add a new controller action
AddStripeCustomer()that requests the service for Stripe in our backend and created the customer async. - The second controller action
AddStripePayment()takes in a payment record in the body and requests a new charge through the Stripe service we injected in our constructor. - Finally, we return the created resource (the response from the app service) in both actions.
Register Services
Remember that we used some 3rd-party service in Stripe.net? We have to register those services for our backend to work. Also, we have to specify our secret key from Stripe and register our StripeAppService because we inject it.
I have separated the service registrations into a separate file named StripeInfrastructure located at the root of the project. Inside it I have added the following code:
using System;
using Stripe;
using Stripe_Payments_Web_Api.Application;
using Stripe_Payments_Web_Api.Contracts;

namespace Stripe_Payments_Web_Api
{
	public static class StripeInfrastructure
    {
		public static IServiceCollection AddStripeInfrastructure(this IServiceCollection services, IConfiguration configuration)
		{
			StripeConfiguration.ApiKey = configuration.GetValue<string>("StripeSettings:SecretKey");

			return services
				.AddScoped<CustomerService>()
				.AddScoped<ChargeService>()
				.AddScoped<TokenService>()
				.AddScoped<IStripeAppService, StripeAppService>();
		}
	}
}
This static class is responsible for registering all services we need to make Stripe work at our backend. By having the service registrations in a separate class we make Program.cs cleaner. (I like clean files and classes 🧹)
Let's update Program.cs to the following instead of the default from Microsoft. This will load the StripeInfrastructure at every startup.
using Stripe_Payments_Web_Api;

var builder = WebApplication.CreateBuilder(args);

// Add services to the container.

builder.Services.AddControllers();
builder.Services.AddEndpointsApiExplorer();
builder.Services.AddSwaggerGen();

// Add Stripe Infrastructure
builder.Services.AddStripeInfrastructure(builder.Configuration);

var app = builder.Build();

// Configure the HTTP request pipeline.
if (app.Environment.IsDevelopment())
{
    app.UseSwagger();
    app.UseSwaggerUI();
}

app.UseHttpsRedirection();

app.UseAuthorization();

app.MapControllers();

app.Run();
As you probably noticed in AddStripeInfrastrucutre(...) we are using the secret Stripe key from appsettings.json. Currently, this value is not present, let's update appsettings.json and add our secret key.
{
  "StripeSettings": {
    "SecretKey": "someSecretKeyHere"
  },
  "Logging": {
    "LogLevel": {
      "Default": "Information",
      "Microsoft.AspNetCore": "Warning"
    }
  },
  "AllowedHosts": "*"
}
All right - now for the moment we all have been waiting for. Making some tests using Swagger to create a new customer and a payment or two 💰💰.
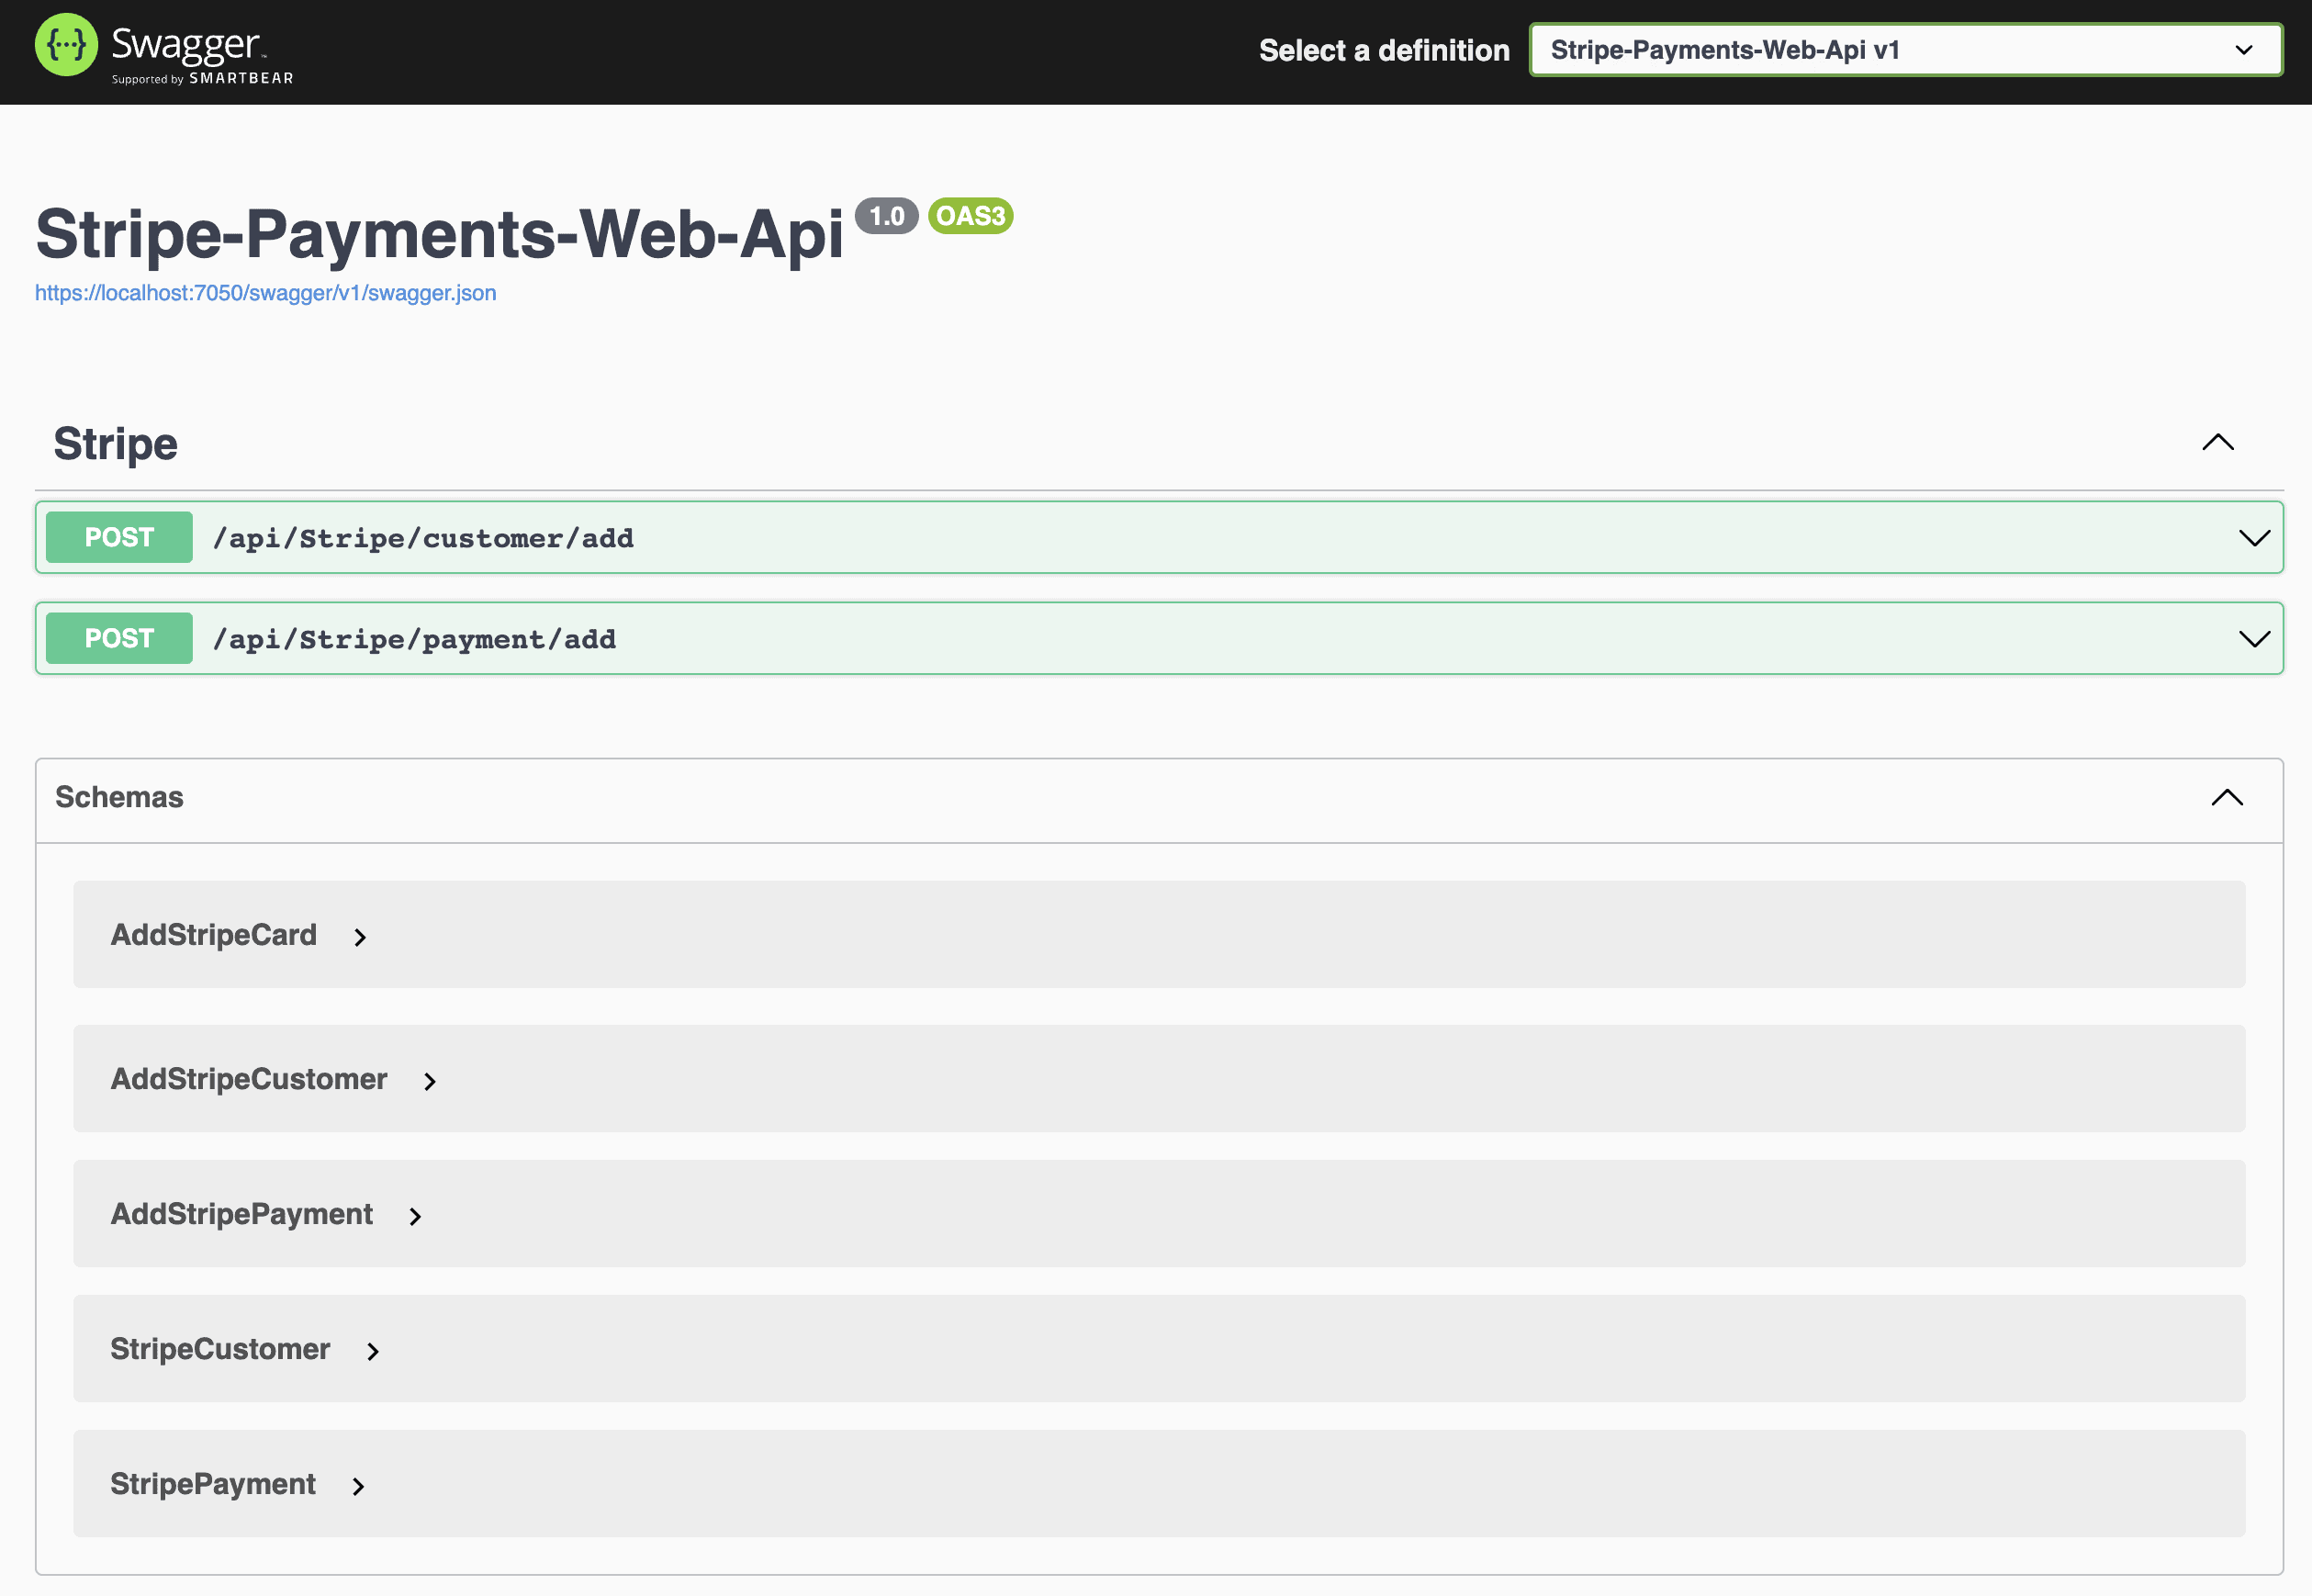
Testing the Web API
Spin up the Web API and check out the Swagger page. You should have two actions like I do below:
Create a new customer
First we have to add the customer to Stripe in order to create a charge on their credit card. Below is a payload I will submit through a POST request:
{
  "email": "yoourmail@gmail.com",
  "name": "Christian Schou",
  "creditCard": {
    "name": "Christian Schou",
    "cardNumber": "4242424242424242",
    "expirationYear": "2024",
    "expirationMonth": "12",
    "cvc": "999"
  }
}
When testing out the Stripe API you got three card numbers to test on. You can set expiration and CVC to what you prefer.
- 4242424242424242 (Successful Payments)
- 4000000000009995 (Failed Payments)
- 4000002500003155 (Required Authentication)
My response from the API was:
{
  "name": "Christian Schou",
  "email": "yourmail@gmail.com",
  "customerId": "cus_MgWyoA3VnOozzn"
}
Let's check out the Stripe Dashboard to see if we made any API requests.
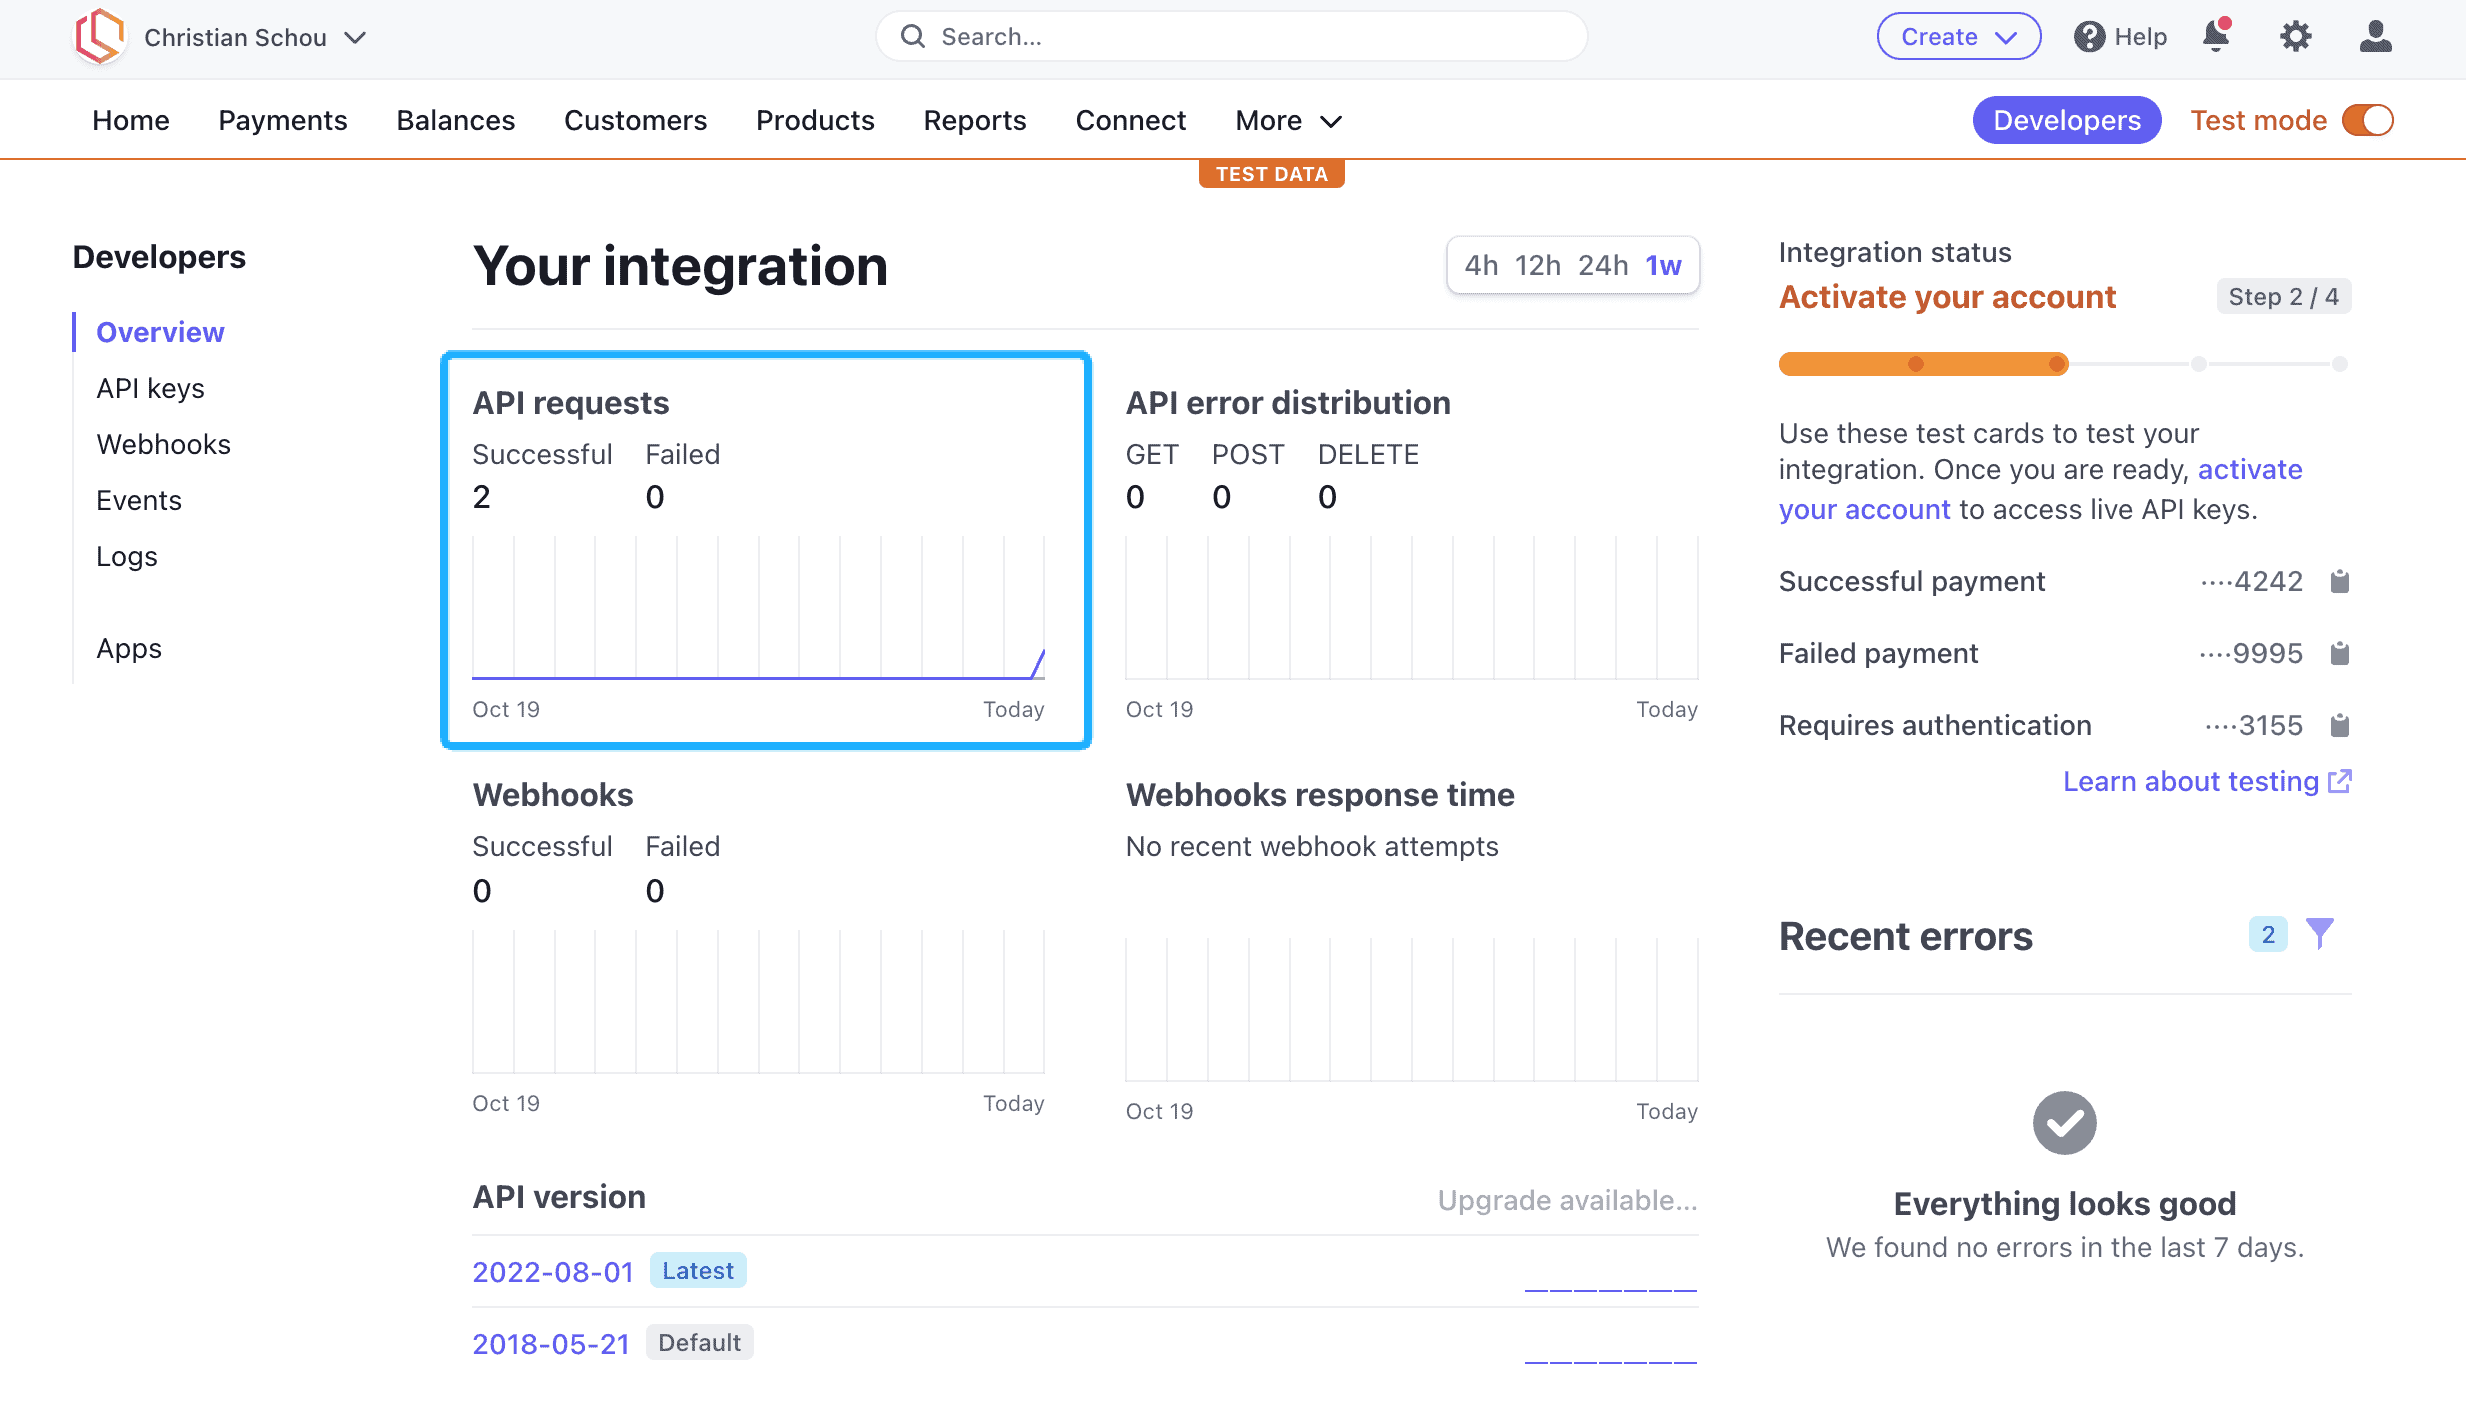
Awesome! two successful API requests. Let's see if we got a new customer in our Customers section on the dashboard as we expect.
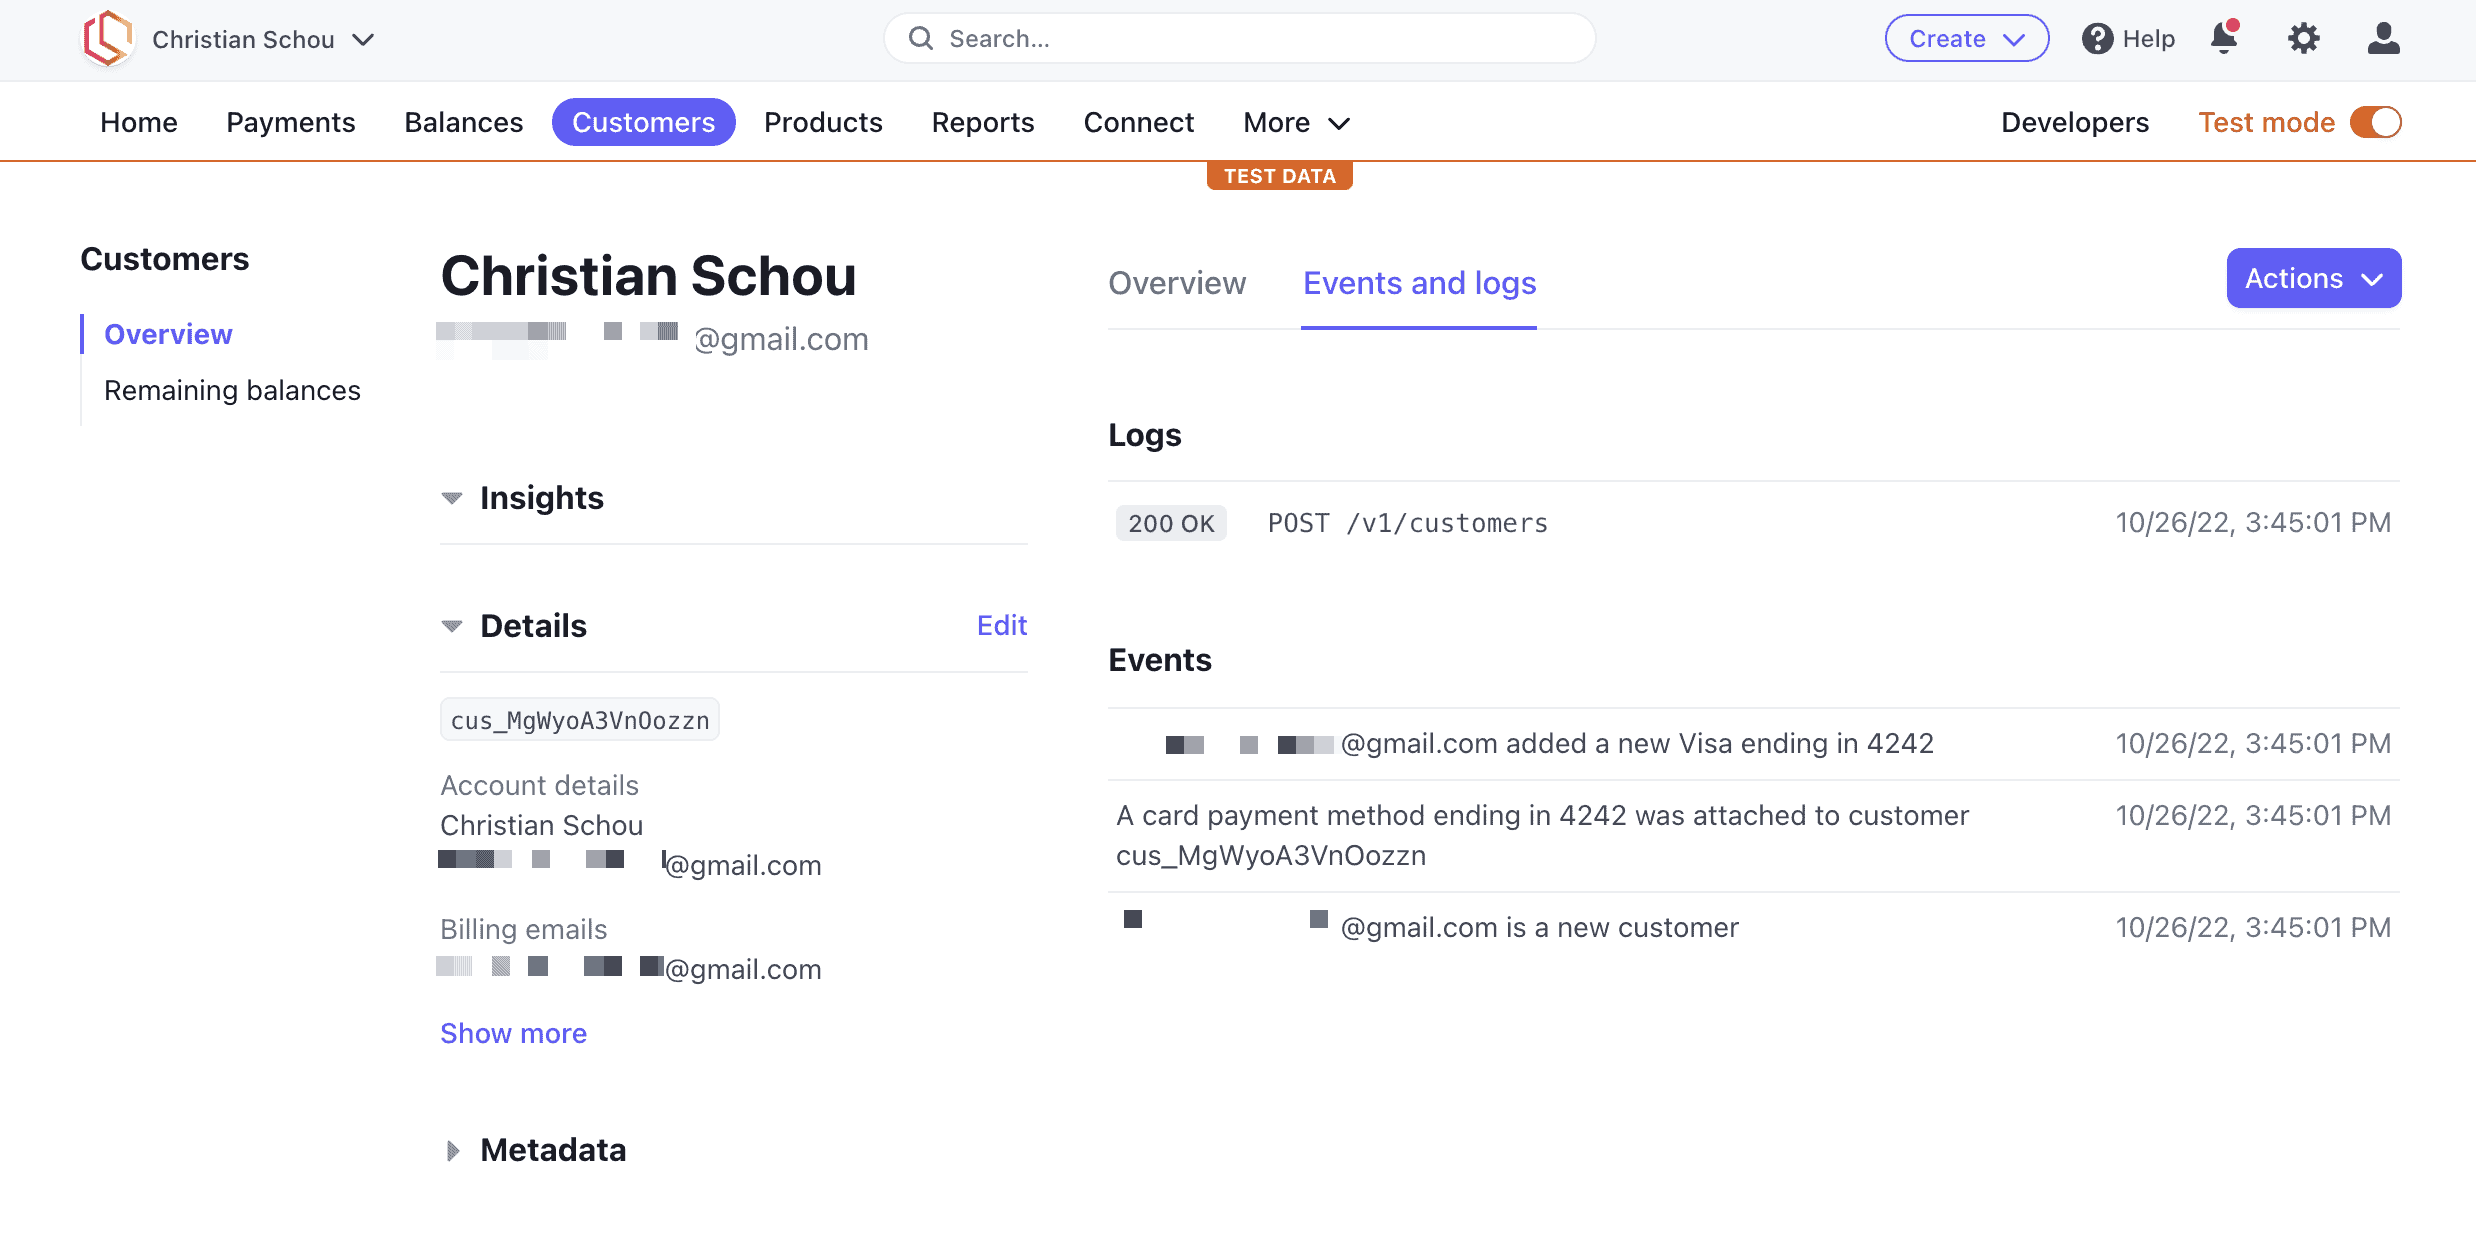
As we expected! You can also see the registered credit card that is ending in 4242 that we made using the token in the backend. Perfect!
Create Payment/Charge on Customer
Let's make a payment/charge on the customer we just created. For this tutorial I will be creating a charge with the following details:
- Customer ID: cus_MgWyoA3VnOozzn
- Receipt Mail: yourmail@gmail.com
- Description: Demo product for Stripe .NET API
- Currency: USD
- Amount: 10
{
  "customerId": "cus_MgWyoA3VnOozzn",
  "receiptEmail": "christian.schou17@gmail.com",
  "description": "Demo product for Stripe .NET API",
  "currency": "USD",
  "amount": 1000
}
Response from API was:
{
  "customerId": "cus_MgWyoA3VnOozzn",
  "receiptEmail": "christian.schou17@gmail.com",
  "description": "Demo product for Stripe .NET API",
  "currency": "usd",
  "amount": 1000,
  "paymentId": "ch_3LxABPGYkZ4JUC1c1At9fxUY"
}
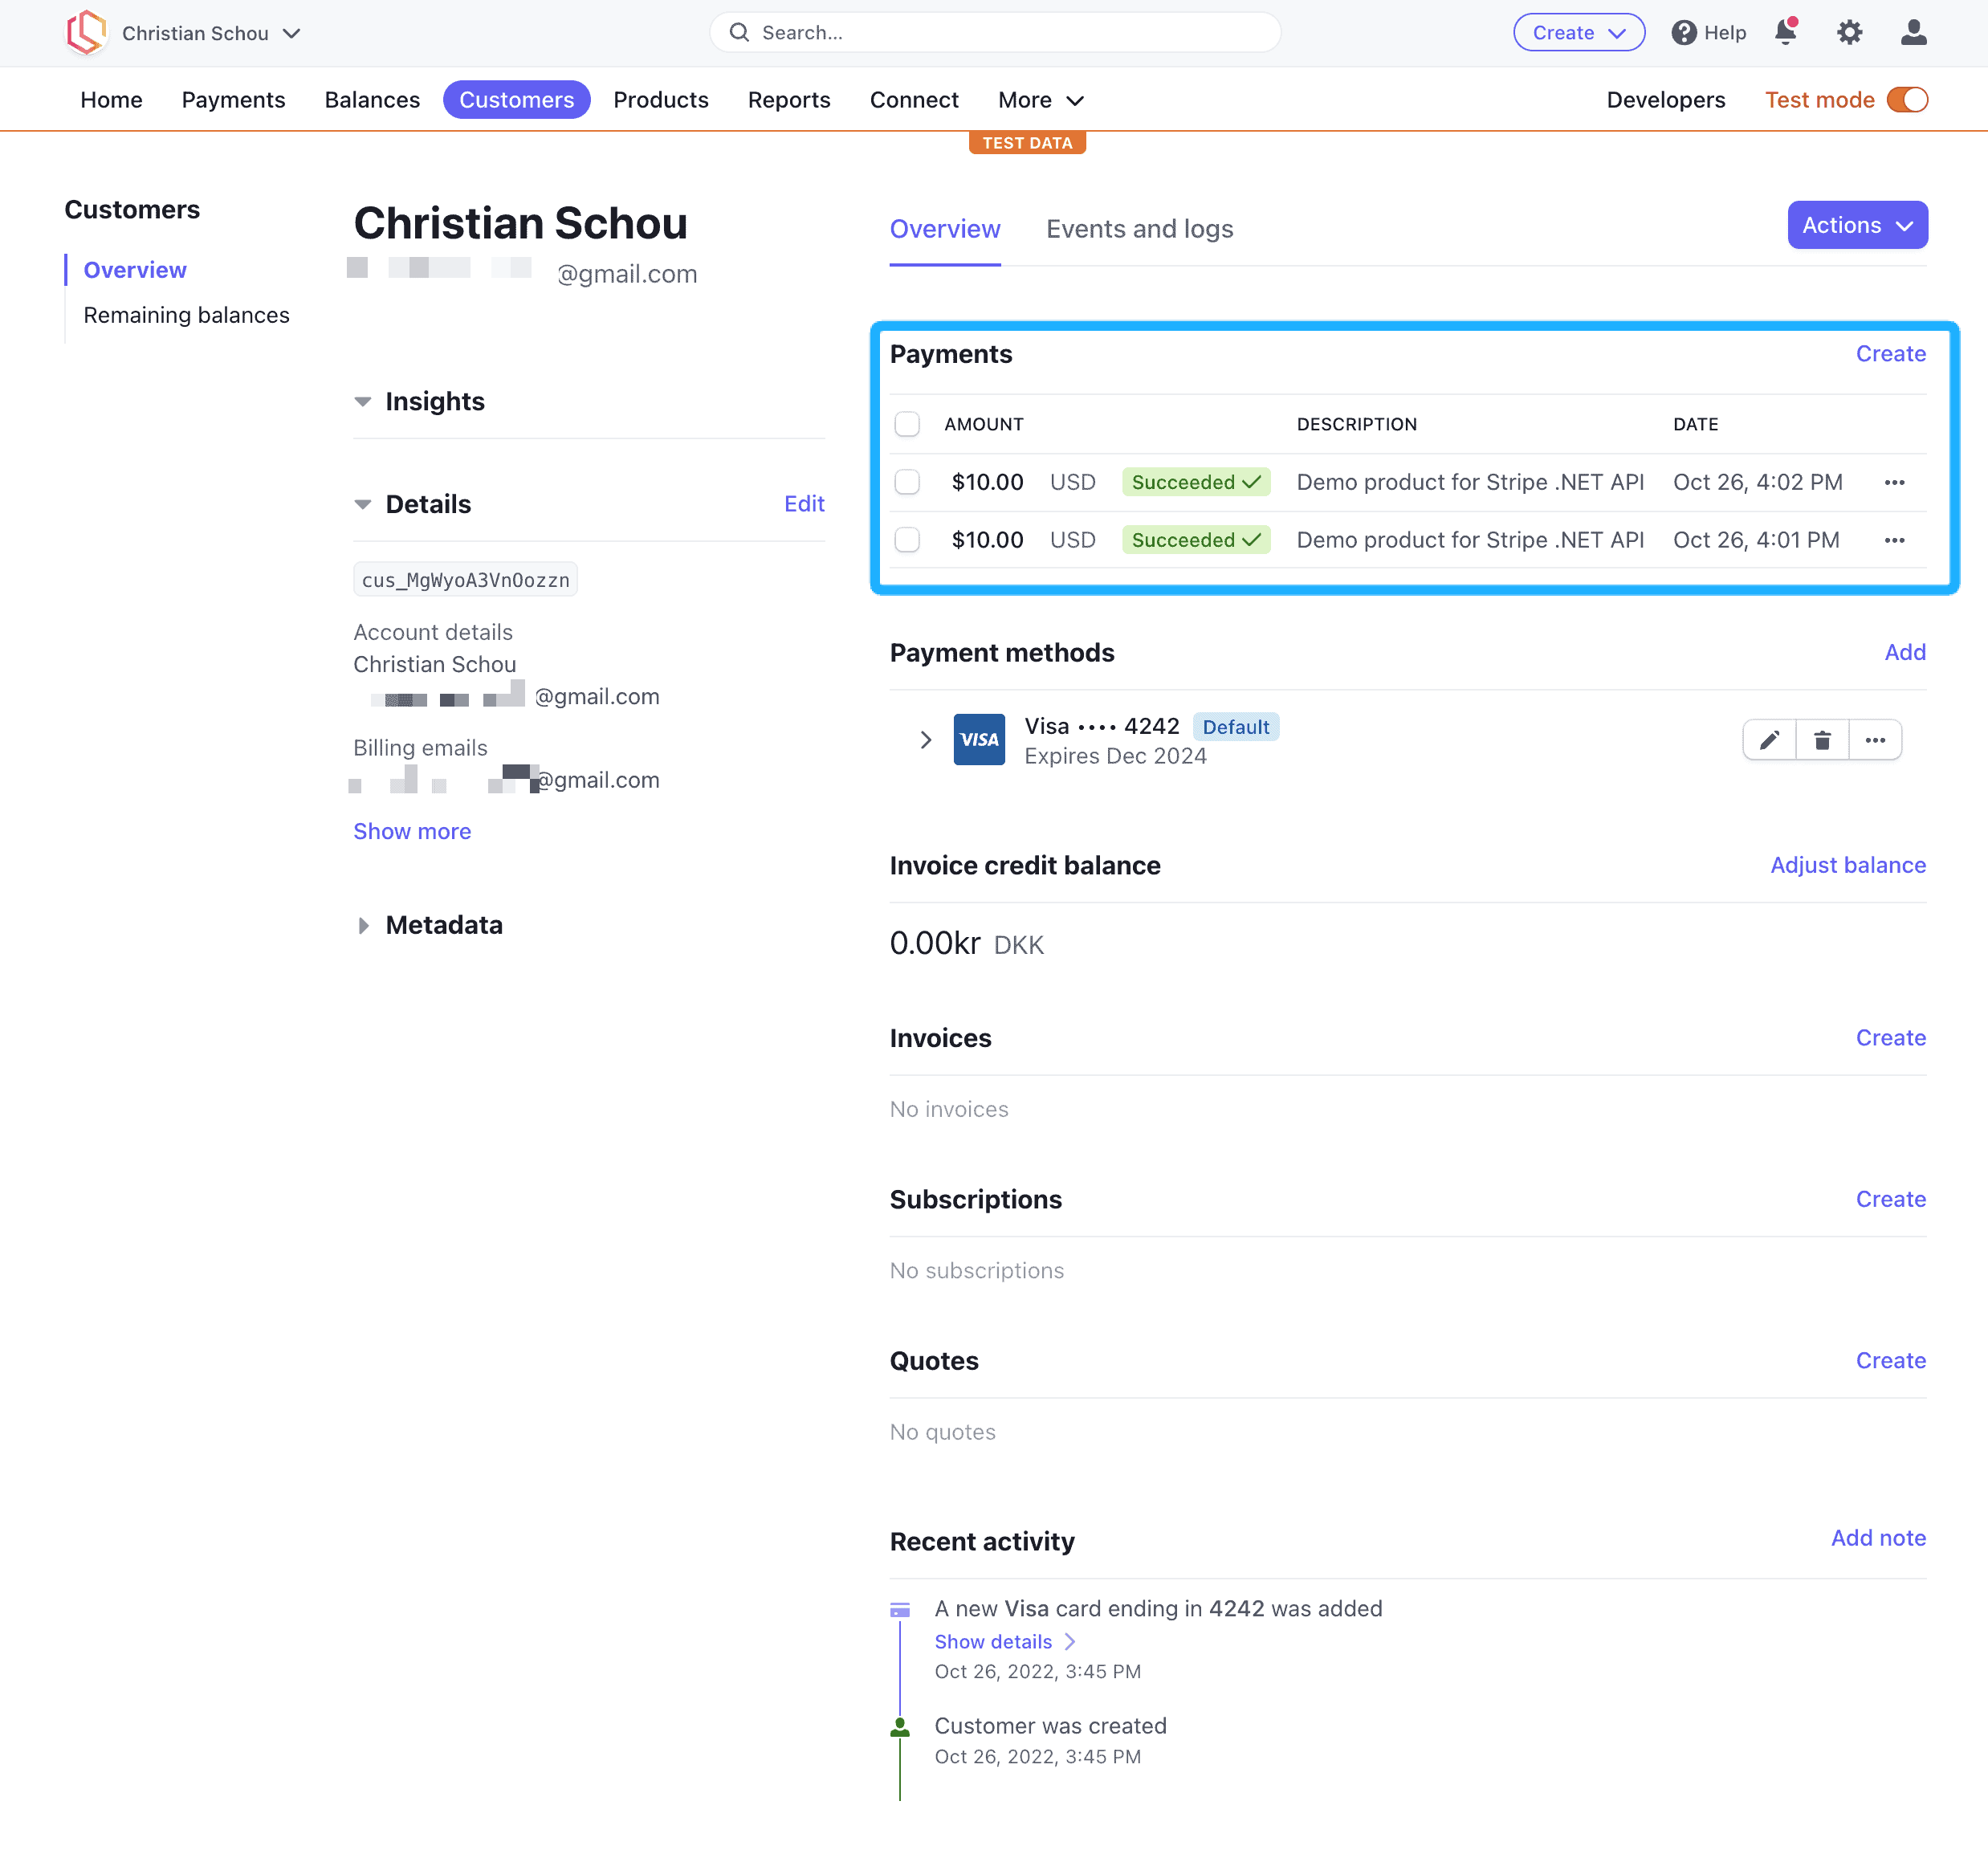
Why is it 1000 in amount? Because it's counted in cents. 100 cents is equivalent to $1.00. I made two charge requests for the customer account. Let's check it out on the Stripe Dashboard.
That looks perfect. To test it I also made a few error requests that also showed up correctly in Stripe. Here are the results of that:
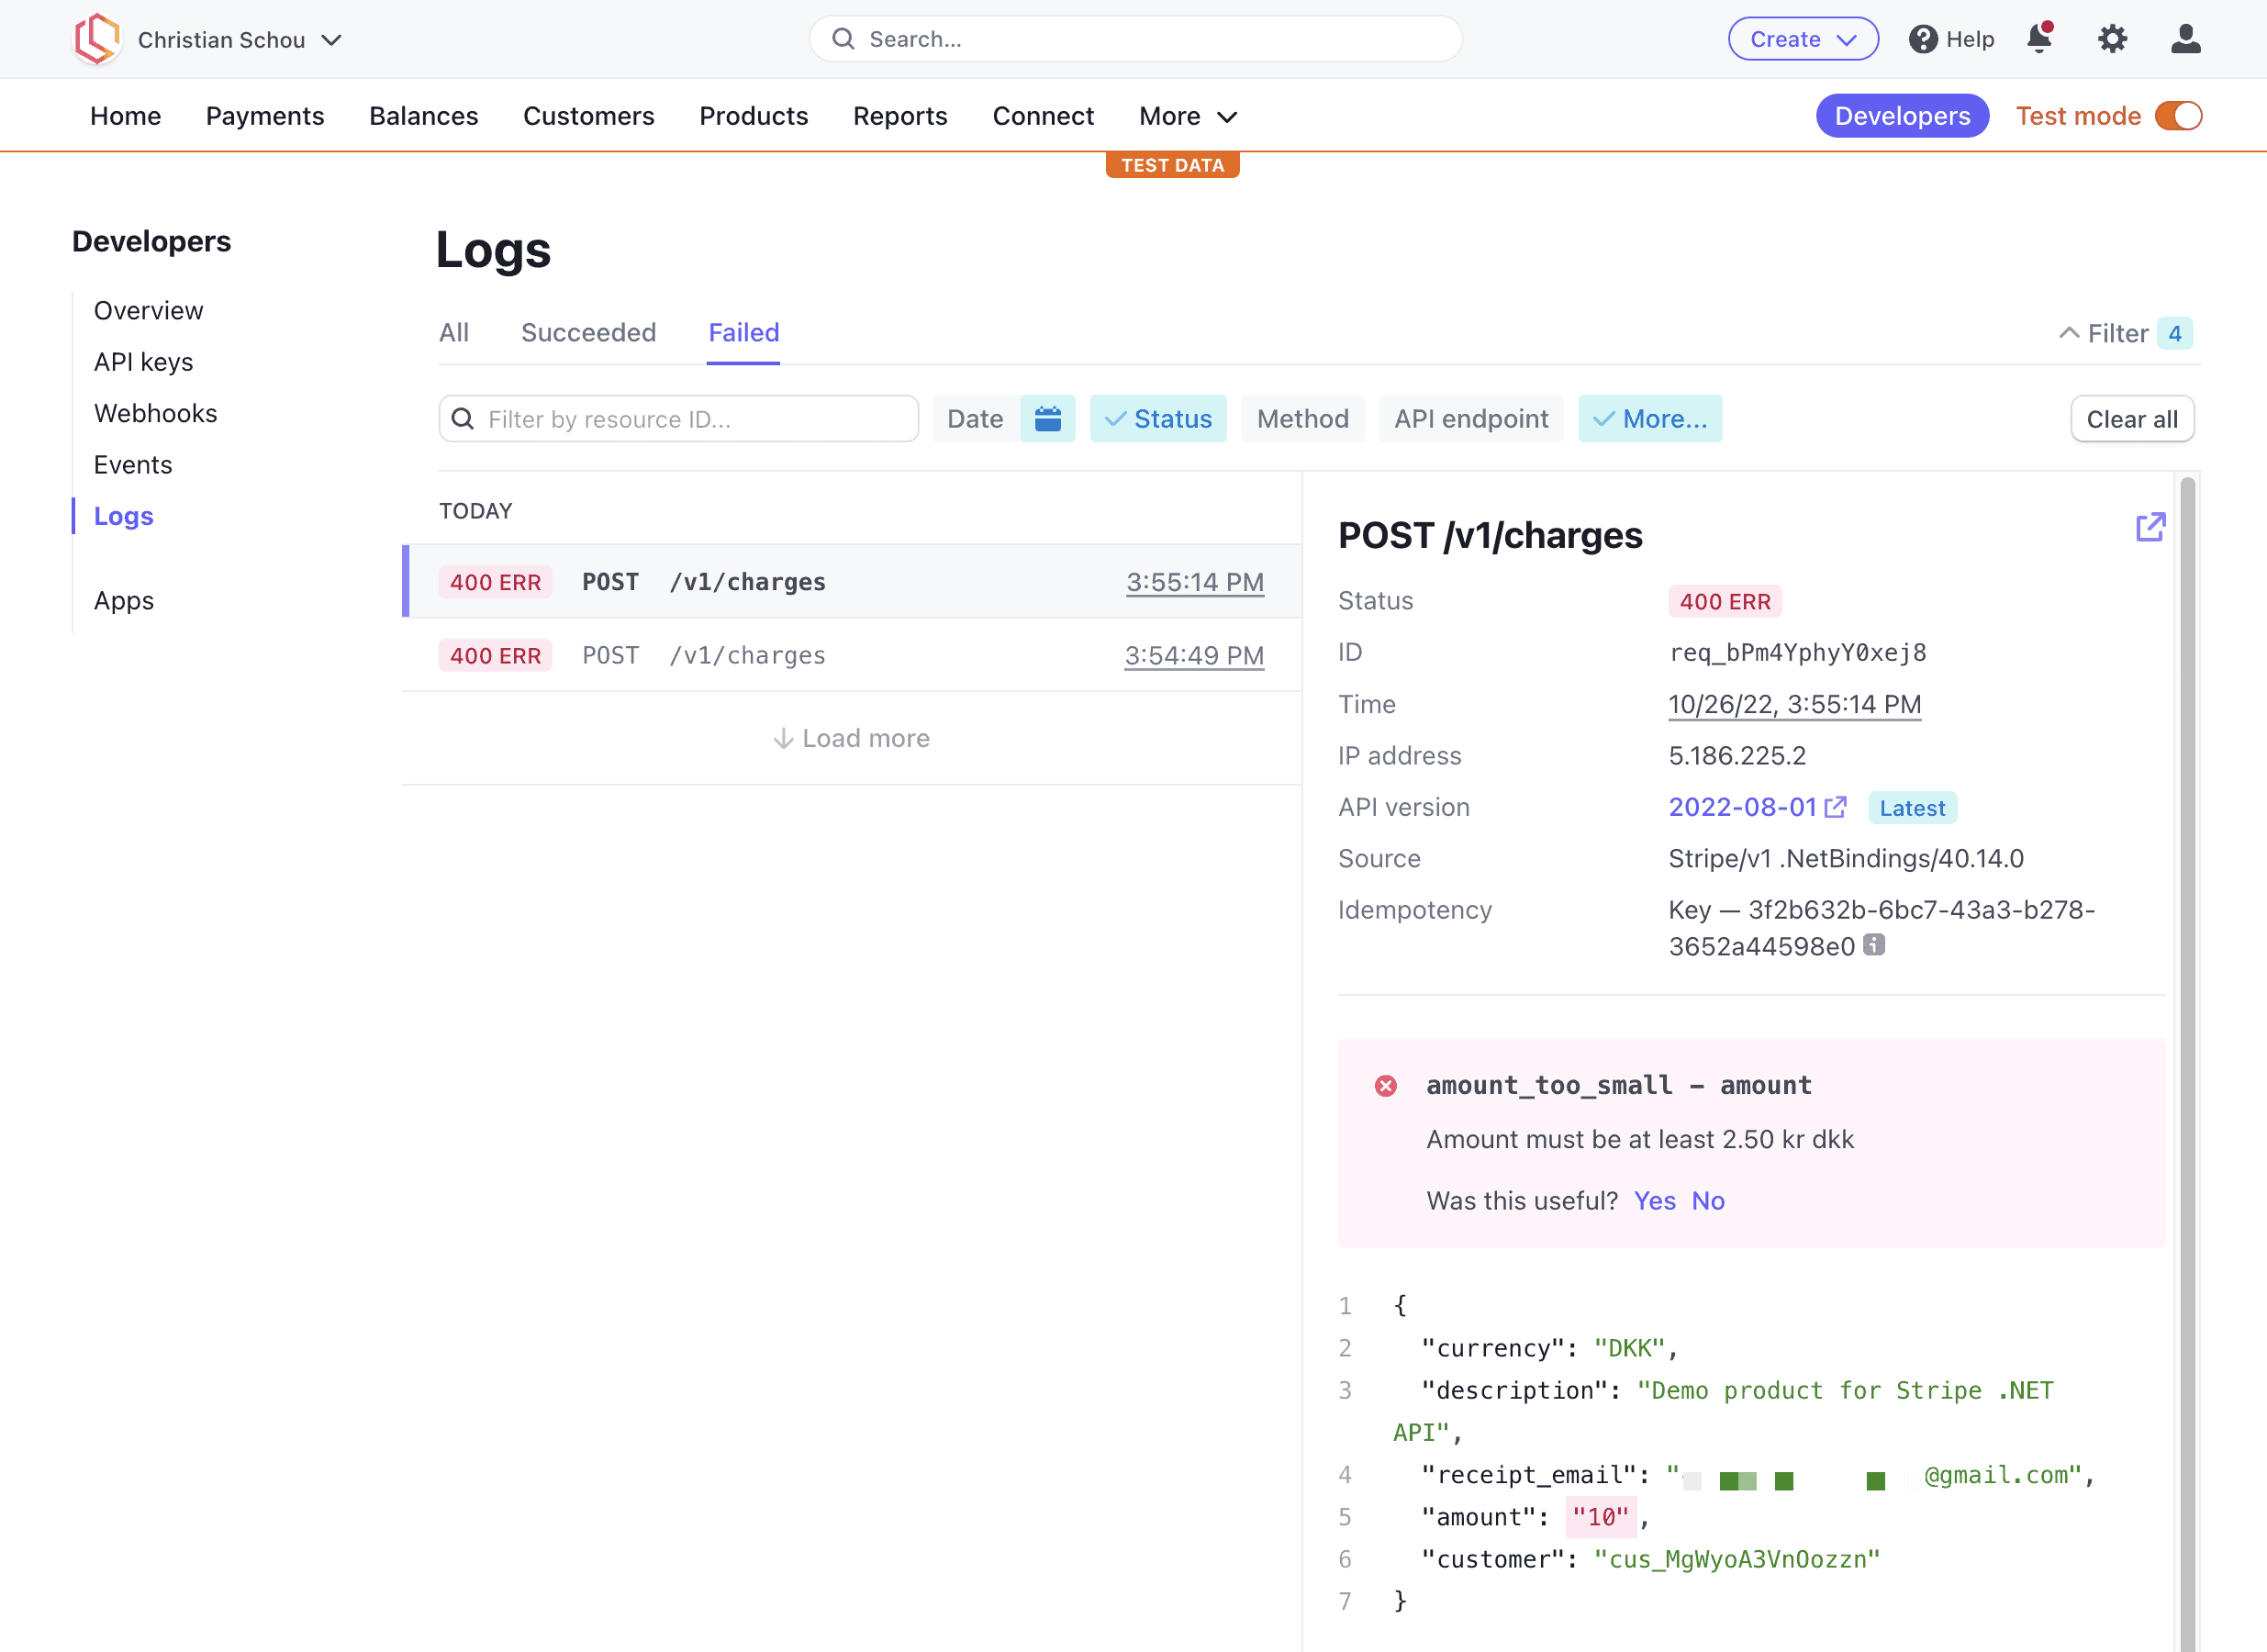
As you can see Stripe provides you with a very detailed description of what you did wrong. As I am from Denmark my default currency for conversion is dkk, hence the amount of 2.50 dkk for the minimum amount to be submitted.
The receipt
Stripe is automatically generating a nice-looking receipt for us and sending it to the customer (not happening in test mode). I sent it manually from Stripe and it looks like this for our charge transaction:

Summary
Stripe is a very powerful online payment gateway and it is easy to integrate Stripe with ASP.NET Core. In this tutorial, you have learned how to implement Stripe in .NET to accept payments through an API.
I would recommend you take a look at the full API specification at Stripe to see how many cool features they provide through their open API. You might get surprised.
If you got any questions on how to accept payments using Stripe in .NET, please let me know in the comments. Until next time - happy coding! ✌️
Source Code
The full source code is available on GitHub if you would like to check it out.
Tech-With-Christian