How to log events on ASP.NET Core Web API with NLog (.NET 5.0)
During development, logging (maybe with NLog) is a crucial part - but why? While you develop your application it's easy to debug, set breakpoints, and test small features to figure out where the issues are. Have you thought about what happens if you would like to debug in a production environment?
It's not possible... And here the logging comes into the picture. They help us figure out what is wrong with our code when running in production mode. Errors happen - we can't get around that. By default, .NET Core has a built-in implementation for handling the logging of messages. Though in all projects I make I prefer to create my own custom logger service that can be extended per my needs.
This project builds on a solution I made in my previous post > How to configure ASP.NET Core Web API .NET Core Service Configuration - It's just a .NET Core API Solution.
Adding new projects for solution
For this tutorial, I will be adding two projects. The first one is named LoggerService, this will be responsible for logger logic. The second project is named Contracts and will hold interfaces to be used in the whole project.
Both projects are of the type Class Library (.NET Core). To create a new project Open your solution, right-click on the solution in your solution explorer, click Add and select New Project. In the popup window, you have to select Class library for .NET Core.
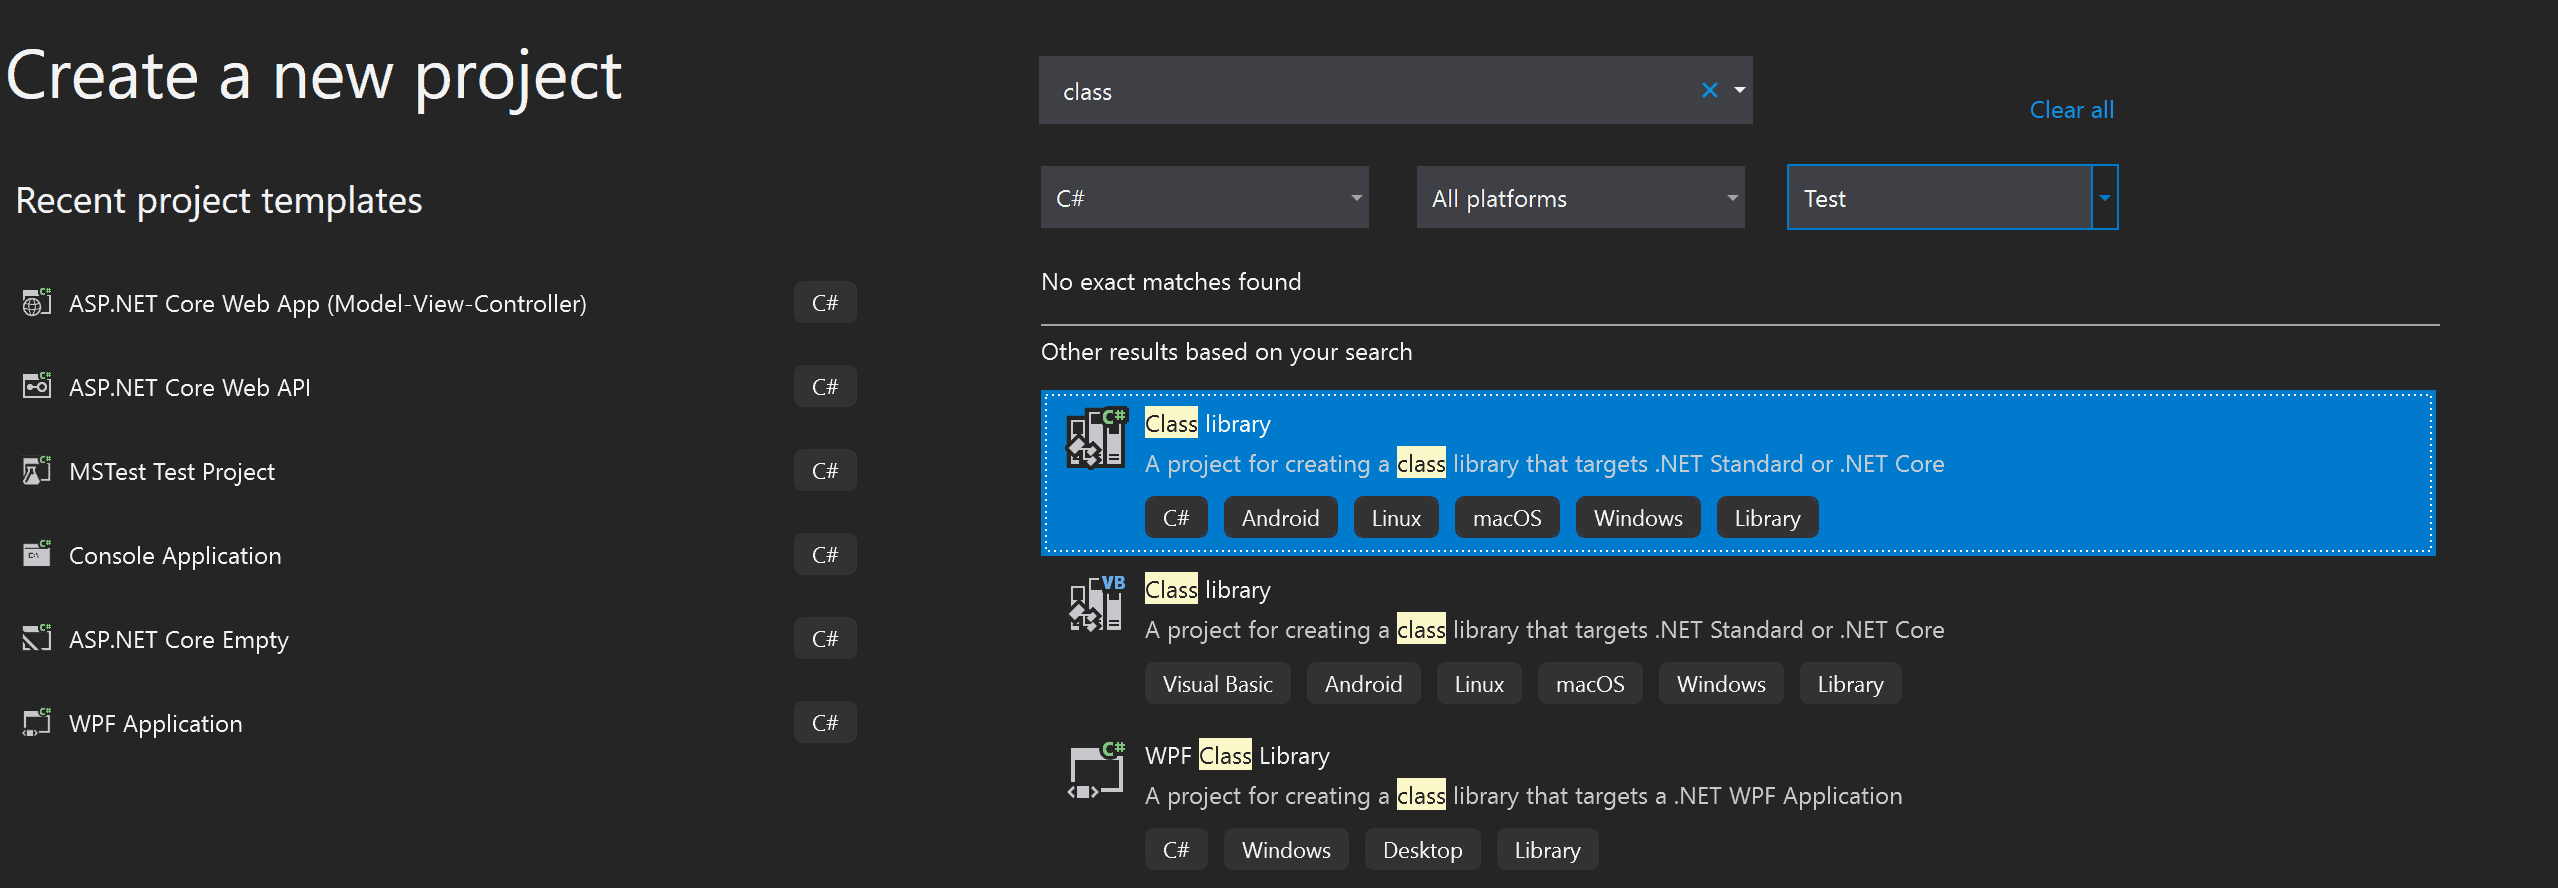
On the configuration page, leave the Location as the default set by Visual Studio and name the class library that you find suitable for the type of service. Click on Next, when done.

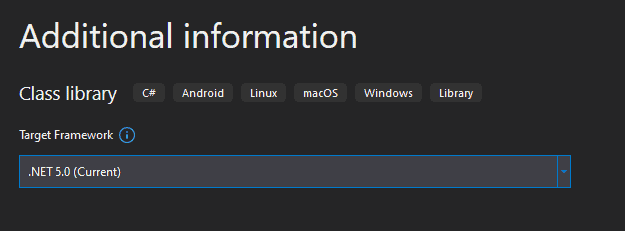
By default .NET 5.0 should be selected for you, if not click the drop-down and select it. Finish up by clicking Create in the lower right corner.
Do the same thing for the Contracts project. When you have finished that task we need to configure references for the projects. Go back and right-click on the first project we created (NetApiCoreServer) and click on Add and Click on Project Reference. In the popup window select LoggerService as shown below:
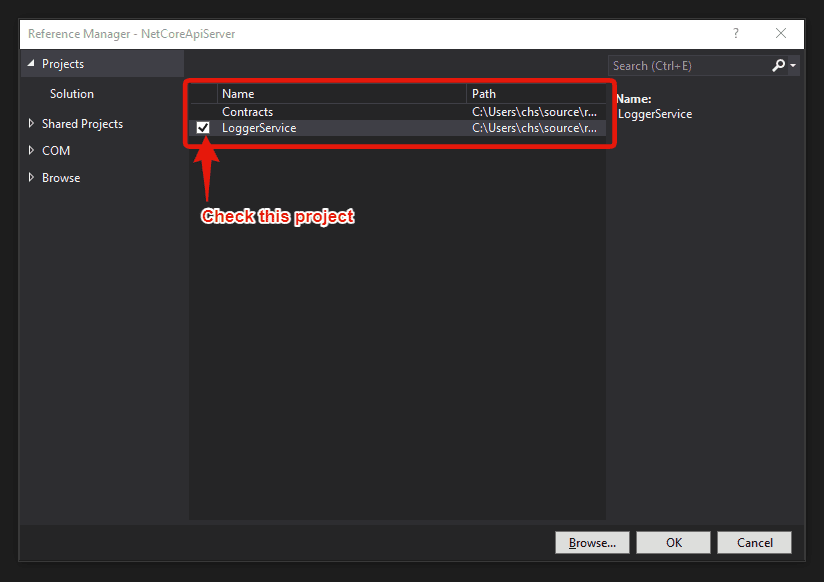
Do the same thing for LoggerService. This time you have to add Contracts as a reference. This gives access to the main project since it got a reference to LoggerService.
Install NLog and Create Interface
Normally I add four logging methods by default to new projects. By default, our logger service should be able to log the following messages:
- Info Messages
- Debug Messages
- Warning Messages
- Error Messages
Add interface in Contracts
Go to your Contracts project and create a new interface named ILoggerManager. This should contain four method definitions as shown in the code below:
namespace Contracts
{
    public interface ILoggerManager
    {
        void LogInfo(string message);
        void LogWarning(string message);
        void LogDebug(string message);
        void LogError(string message);
    }
}
Before we make the actual implementation for this interface, we need to add the NLog library to our LoggerService project. In short – NLog is a logging platform for .NET which helps developers create and log messages from applications.
Install NLog package in LoggerService
Normally I would install the package through the Package Manager Console, but some of my readers have requested that I also show you how to install it from the GUI (NuGet Package Manager). Below is the command you have to execute in the Package Manager Console to install NLog.
Package Manager Console : LoggerService
Install-Package NLog.Extensions.Logging
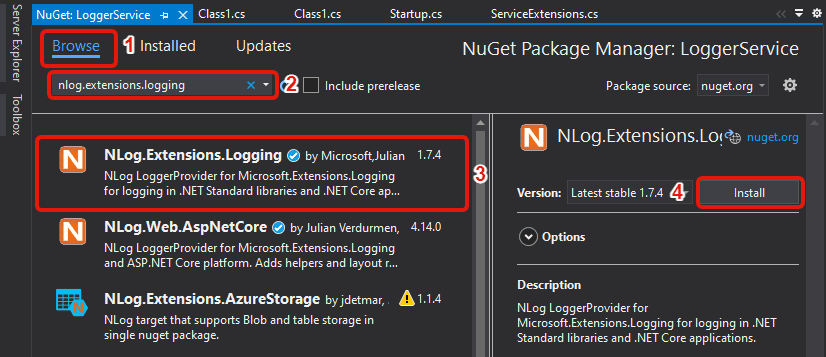
NuGet Package Manager : LoggerService
Right-click on LoggerServices, select Manage NuGet Packages... to open up the NuGet Package Manager. Click on Browse and enter nlog.extensions.logging in the search field, select the first option and click Install.
After a short period of time, you now have the NLog library installed in the LoggerService project and you are good to go.
Implementation of LoggerManager and NLog Configuration
Now for the more fun part – Open up the LoggerService project and create a new class named LoggerManager to match the Interface we created in the Contracts project. Add the following code to the new LoggerManager Class:
using Contracts;
using NLog;

namespace LoggerService
{
    public class LoggerManager : ILoggerManager
    {
        private static ILogger logger = LogManager.GetCurrentClassLogger();
        public void LogDebug(string message)
        {
            logger.Debug(message);
        }
        public void LogError(string message)
        {
            logger.Error(message);
        }
        public void LogInfo(string message)
        {
            logger.Info(message);
        }
        public void LogWarning(string message)
        {
            logger.Warn(message);
        }
    }
}
For NLog to fully function it needs information about where it should create the log files, the naming convention, and the minimum level of logging for the application. To do this you have to create a new file in the main project with the name nlog.config and add the below code. You should change the path for the internal log and file name to match the configuration of your solution.
<?xml version="1.0" encoding="utf-8" ?>
<nlog xmlns="http://www.nlog-project.org/schemas/NLog.xsd"
      xmlns:xsi="http://www.w3.org/2001/XMLSchema-instance"
      autoReload="true"
      internalLogLevel="Trace"
      internalLogFile="C:\Users\chs\source\repos\NetCoreApiServer\InternalLogs\internallog.txt">
  <targets>
    <target name="logfile" xsi:type="File"
            fileName="C:/Users/chs/source/repos/NetCoreApiServer/Logs/${shortdate}_logfile.txt"
            layout="${longdate} ${level:uppercase=true} ${message}"/>
  </targets>
  <rules>
    <logger name="*" minlevel="Debug" writeTo="logfile" />
  </rules>
</nlog>
With that in place, let’s go ahead and configure the log service in the main project.
Add NLog to Startup Configuration to enable logging of messages
It is very easy to set up logging for a service. The only thing we have to do is add this piece of code to our constructor in the Startup class.
public Startup(IConfiguration configuration)
{
    Configuration = configuration;
    LogManager.LoadConfiguration(String.Concat(Directory.GetCurrentDirectory(), "/nlog.config"));
}
Then we have to add the logger service inside .NET Cores IOC container. You can accomplish this in multiple ways:
- Call
services.AddSingleton– This will create a service the first time you request it and then every subsequent request is calling the same instance of the service. What this means is that all components of this is sharing the same service everytime they need it. You will always be using the same instance. - Call
services.AddScoped– This will create the service for every request made. That means whenever a user makes a request through HTTP, a new instance of the service is created. - Call
services.AddTransient– This created the service every time the application is requesting it. If you got one request against your application and multiple components need this service, then the service will be created again for each component.
Since our logging service always will be using the same service, let’s register it using a Singleton. Go to the ServiceExtensions class we created in the previous tutorial about the configuration of .NET Core Service Configuration and append the following code to the end of the class.
public static void ConfigureNLogService(this IServiceCollection services)
{
    services.AddSingleton<ILoggerManager, LoggerManager>();
}
Don’t forget to register this configuration in ConfigureServices in the Startup class to invoke the logger method. Add the short piece of code shown below:
public void ConfigureServices(IServiceCollection services)
{

    services.ConfigureCors();
    services.ConfigureIISIntegration();
    services.ConfigureNLogService();

    services.AddControllers();
    services.AddSwaggerGen(c =>
    {
        c.SwaggerDoc("v1", new OpenApiInfo { Title = "NetCoreApiServer", Version = "v1" });
    });
}
Awesome – now the only thing we have to do is to inject the logger service into the constructor of the class that we would like to use logging at. .NET Core will give us the logger service through the IOC container including its features. This is also referred to as Dependency Injection.
Dependency Injection, Inversion of Control and Testing NLog
Well, I have been mentioning IOC a few times in this article – for beginners IOC is short for Inversion of Control and DI is short for Dependency Injection and you will often meet these teams in the development community. But what are they? Everybody is talking about them but no one is saying exactly what they are.
Ever heard about loose coupling? Dependency Injection is a technique a developer can use to achieve that – they get a loose coupling between objects and their dependencies. In other words – Instead of instantiating an object every time it’s needed, we can do it only one time and then serve it within a class, often through the constructor of that specific class.
If the system is designed to make use of DI, you may find that the classes are requesting their dependencies through the constructor. If that’s the case it’s a good idea to have a class that can give access to all classes through the constructor. These classes are very often referred to as containers or what I call Inversion of Control containers. You can see the container as a factory responsible for allowing access to instances of types that are requested from that specific container.
In this project, I will make a constructor injection on the WeatherForecastController to make use of the LoggerService. This is the default controller created by the project creator and will be available in the Controllers folder. Add the following code to use the NLog service and log values to the files at the location we specified in nlog.config.
using Contracts;
using Microsoft.AspNetCore.Mvc;
using System;
using System.Collections.Generic;
using System.Linq;

namespace NetCoreApiServer.Controllers
{
    [ApiController]
    [Route("[controller]")]
    public class WeatherForecastController : ControllerBase
    {
        private static readonly string[] Summaries = new[]
        {
            "Freezing", "Bracing", "Chilly", "Cool", "Mild", "Warm", "Balmy", "Hot", "Sweltering", "Scorching"
        };

        private readonly ILoggerManager _logger;

        public WeatherForecastController(ILoggerManager logger)
        {
            _logger = logger;
        }

        [HttpGet]
        public IEnumerable<string> WriteLogs()
        {
            _logger.LogInfo("Here is info message from the controller.");
            _logger.LogDebug("Here is debug message from the controller.");
            _logger.LogWarning("Here is warn message from the controller.");
            _logger.LogError("Here is error message from the controller.");
            return new string[] { "value1", "value2" };
        }

        [HttpGet]
        public IEnumerable<WeatherForecast> Get()
        {
            var rng = new Random();
            return Enumerable.Range(1, 5).Select(index => new WeatherForecast
            {
                Date = DateTime.Now.AddDays(index),
                TemperatureC = rng.Next(-20, 55),
                Summary = Summaries[rng.Next(Summaries.Length)]
            })
            .ToArray();
        }
    }
}
Testing the logger functionality
Okay so now all the configuration has been made – it’s time for testing. Start the application and go to Swagger (which should open by default) and request the endpoint WriteLogs at the WeatherForecastController.
Success – we got the two values back that we implemented in the controller action. Go and check the location for the log files to see, if you have a log file from the request. The result inside the file should look like the following:
2021-09-16 17:14:46.2747 INFO Here is info message from the controller.
2021-09-16 17:14:46.3399 DEBUG Here is debug message from the controller.
2021-09-16 17:14:46.3551 WARN Here is warn message from the controller.
2021-09-16 17:14:46.3670 ERROR Here is error message from the controller.
Summary
Now we got a fully functioning logger service that will be available at all classes through dependency injection. We have talked about why logging is an important thing to do, how you can create an external service for the logger, how to use NLog, and the setup of the configuration for NLog. Very briefly have I talked about Dependency Injection and Inversion of Control and how you inject a service.
Thank you for reading this tutorial. I will In the next tutorial about logging teach you how to log the events to an MS SQL database – which makes it easier in the future to sort events and present them in a Dashboard through the controller. More on that later – Happy coding!