How to add Toast Notifications in an ASP.NET Core Web App (.NET 6)
What are toast notifications? I have worked with several web apps and all of them have included lots of functionality where the user interacted with buttons etc… A user asked me if they could get a status message when uploading a file to the server or when the page updated data correctly, with errors, and so on. I picked up the challenge and started searching for NuGet packages to solve this problem. I came across two different projects with the same goal in mind, and in this article, I will show you how to add toast notifications in an ASP.NET Core Web App running on .NET 6.
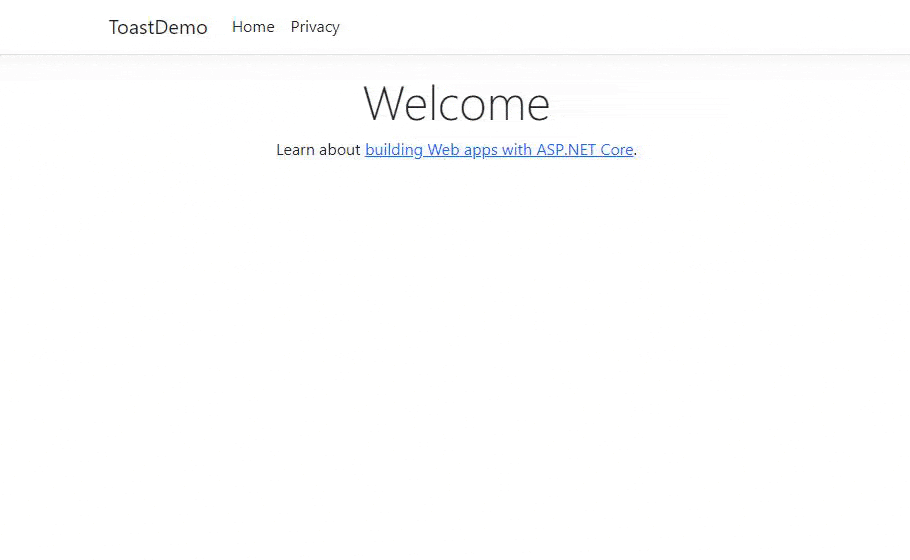
I won’t be implementing any logic as it will be shown on the default template for ASP.NET Core Web App (with Razor pages). Normally the web application would redirect the user to a new page displaying a simple text depending on the returned response from the server.
This seemed a little outdated to be, but it was working and no one have ever asked to do it more smartly, so why touch it? I started searching for alternatives (i know the notifications from other applications I have used before, but I have never made the implementation myself), and then I found these two NuGet packages:
- NToastNotify – It’s a package containing an abstraction for the server-side rendered toast notifications using toast.js or noty.js. It also supports AJAX calls.
- ToastNotification – An elegant way to implement Toast Notifications in ASP.NET Core Web Applications.
If you are ready, then let’s add some toast notifications to an ASP.NET Core Web App.
What is a Toast Notification?
I already knew about the Toast name for notifications, but what exactly does that mean? If we check Stackoverflow, there is already a question for this and a brilliant answer by Bramha Ghosh:
“Toast” refers to a UI feature where an event causes a small text box to appear at the bottom of the screen. The behavior seems like a piece of bread emerging from a toaster.
In other words, it is a tool for developers to display a message to the user, whenever the user makes an interaction with the application. The toast can contain any kind of information we would like to show to the user, to better inform them about what happened.
The toast notifications were actually born with the Android OS, but due to its genius way of showing a notification inside an application, it has emerged on other platforms like ASP.NET Core. Below is a screenshot of what toast notifications can look like:
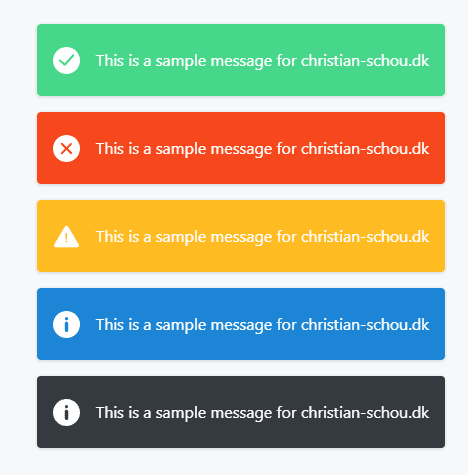
The toast notifications we are going to implement in the demo in this article, will not look like those above. The ones you see in the image above are generated using the JavaScript framework Vue.js.
Add Toast Notifications to ASP.NET Core
The great thing about both NuGet packages I have listed above is that they are very easy to implement in your ASP.NET Core Web application. Let’s go ahead and do that! I won’t be showing how to create a new ASP.NET Core Web App in this tutorial. You can just use the one from the template inside Visual Studio (IDE).
Implement NToastNofity in ASP.NET Core
The first package I will show you is named NToastNotify and is an abstraction of JavaScript Toastr to create toast notifications in ASP.NET Core Projects. Some great features about this package are server-side toast notification rendering and toast notification on AJAX calls (great when using APIs).
#1 – Install NToastNotify from NuGet
To install it in your project, you can use the following ways:
Install-Package NToastNotify#2 – Register NToastNotify in the Service Container
Open Program.cs and update the service container to the following:
using NToastNotify;

var builder = WebApplication.CreateBuilder(args);

// Add services to the container.
builder.Services.AddRazorPages().AddNToastNotifyNoty(new NotyOptions
{
    ProgressBar = true,
    Timeout = 5000
});
#3 – Add NToastNotify Middleware
In Program.cs add the following line just before the line app.MapRazorPages(); like I have done below:
var app = builder.Build();

// Configure the HTTP request pipeline.
if (!app.Environment.IsDevelopment())
{
    app.UseExceptionHandler("/Error");
    // The default HSTS value is 30 days. You may want to change this for production scenarios, see https://aka.ms/aspnetcore-hsts.
    app.UseHsts();
}

app.UseHttpsRedirection();
app.UseStaticFiles();

app.UseRouting();

app.UseAuthorization();

app.UseNToastNotify();

app.MapRazorPages();

app.Run();
#4 – Add the NToastNotify component to your layout page
Expand the folder Pages and navigate to the Shared folder. Inside here you will find a file named _Layout.cshtml– open this and add the following line at the bottom just before the closing tag for your body: @await Component.InvokeAsync("NToastNotify"). See line 50 below.
<!DOCTYPE html>
<html lang="en">
<head>
<meta charset="utf-8" />
<meta name="viewport" content="width=device-width, initial-scale=1.0" />
<title>@ViewData["Title"] - ToastDemo</title>
<link rel="stylesheet" href="~/lib/bootstrap/dist/<a class="wpg-linkify wpg-tooltip" title="<h3 class="wpg-tooltip-title">What is <span class="wpg-tooltip-term-title">CSS</span></h3><div class="wpg-tooltip-content">CSS or Cascading Style Sheets is a style sheet language used to define visual appearance and formatting of HTML documents. WordPress themes use CSS and HTML to output the data generated by WordPress. Every WordPress theme contains a style.css file which has style rules to define the formatting of pages generated by WordPress.<p class="wpg-read-more"><a href="https://christian-schou.dk/glossary/css/">Read more..</a></p></div>" target="_blank">css</a>/bootstrap.min.css" />
<link rel="stylesheet" href="~/css/site.css" asp-append-version="true" />
<link rel="stylesheet" href="~/ToastDemo.styles.css" asp-append-version="true" />
</head>
<body>
<header>
<nav class="navbar navbar-expand-sm navbar-toggleable-sm navbar-light bg-white border-bottom box-shadow mb-3">
<div class="container">
<a class="navbar-brand" asp-area="" asp-page="/Index">ToastDemo</a>
<button class="navbar-toggler" type="button" data-bs-toggle="collapse" data-bs-target=".navbar-collapse" aria-controls="navbarSupportedContent"
aria-expanded="false" aria-label="Toggle navigation">
<span class="navbar-toggler-icon"></span>
</button>
<div class="navbar-collapse collapse d-sm-inline-flex justify-content-between">
<ul class="navbar-nav flex-grow-1">
<li class="nav-item">
<a class="nav-link text-dark" asp-area="" asp-page="/Index">Home</a>
</li>
<li class="nav-item">
<a class="nav-link text-dark" asp-area="" asp-page="/Privacy">Privacy</a>
</li>
</ul>
</div>
</div>
</nav>
</header>
<div class="container">
<main role="main" class="pb-3">
@RenderBody()
</main>
</div>
<footer class="border-top footer text-muted">
<div class="container">
© 2022 - ToastDemo - <a asp-area="" asp-page="/Privacy">Privacy</a>
</div>
</footer>
<script src="~/lib/jquery/dist/jquery.min.js"></script>
<script src="~/lib/bootstrap/dist/js/bootstrap.bundle.min.js"></script>
<script src="~/js/site.js" asp-append-version="true"></script>
@await RenderSectionAsync("Scripts", required: false)
@await Component.InvokeAsync("NToastNotify")
</body>
</html>That line will render the necessary view component inside the View. You can actually place it where ever you want inside that file, but I prefer to stick to the bottom to keep things organized.
#5 – Add your Toast Notifications to the OnGet() method
For this demo, I will only be adding toast notifications to the OnGet() method inside Index.cshtml.cs, but actually, you can add them to any method you would like and I will also include a few examples below to give you an idea of how that could be accomplished.
First, we have to add NToastNotify to our PageModel for the Index page. The IndexModel is inheriting the PageModel and you can find the .cs file by clicking the little arrow in front of Index.cshtml. Now you have to add the toast notifications, just like I have done below:
using Microsoft.AspNetCore.Mvc.RazorPages;
using NToastNotify;

namespace ToastDemo.Pages
{
    public class IndexModel : PageModel
    {
        private readonly ILogger<IndexModel> _logger;
        private readonly IToastNotification _toastNotification;

        public IndexModel(ILogger<IndexModel> logger, IToastNotification toastNotification)
        {
            _logger = logger;
            _toastNotification = toastNotification;
        }

        public void OnGet()
        {
            // Success Toast
            _toastNotification.AddSuccessToastMessage("Woo hoo - it works!");

            // Info Toast
            _toastNotification.AddInfoToastMessage("Here is some information.");

            // Error Toast
            _toastNotification.AddErrorToastMessage("Woops an error occured.");

            // Warning Toast
            _toastNotification.AddWarningToastMessage("Here is a simple warning!");
        }
    }
}
Let’s spin that up.
Awesome – it works! Now let’s move on to ToastNotification and see how we can implement that NuGet package inside our Web Application.
Implement ToastNotification in ASP.NET Core
The second package I will show you how to use is ToastNotification which is my preferred package for creating Elegant Toast Notifications in ASP.NET Core Web Applications. It also supports AJAX calls, which I use a lot when interacting with APIs and right now it implements two popular toast JavaScript libraries: Toastify-js and Notyf. Let’s implement them in our Web App.


#1 – Install ToastNotification from NuGet
You can install the NuGet package by using one of your preferred methods below:
Install-Package AspNetCoreHero.ToastNotificationWith that out of the way, let’s move on to the fun part.
#2 – Register ToastNotification in the Service Container
Open Program.cs and add the following line of code to the service container:
using AspNetCoreHero.ToastNotification;
using NToastNotify;

var builder = WebApplication.CreateBuilder(args);

// Add services to the container.
builder.Services.AddRazorPages().AddNToastNotifyNoty(new NotyOptions
{
    ProgressBar = true,
    Timeout = 5000
});

// Add ToastNotification
builder.Services.AddNotyf(config =>
{
    config.DurationInSeconds = 5;
    config.IsDismissable = true;
    config.Position = NotyfPosition.TopRight;
});
#3 – Add ToastNotification Middleware
If you like me or many other developers who are working with Partial Views, returned data from APIs, etc… then you need to configure this middleware to make sure that the notification is loaded without reloading the page (AJAX).
Add the following using statement to the top of Program.cs : using AspNetCoreHero.ToastNotification.Extensions; Now add the following line of code to the Configuration part of your Program.cs file.
var app = builder.Build();

// Configure the HTTP request pipeline.
if (!app.Environment.IsDevelopment())
{
    app.UseExceptionHandler("/Error");
    // The default HSTS value is 30 days. You may want to change this for production scenarios, see https://aka.ms/aspnetcore-hsts.
    app.UseHsts();
}

app.UseHttpsRedirection();
app.UseStaticFiles();

app.UseRouting();

app.UseAuthorization();

app.UseNToastNotify();

app.UseNotyf();

app.MapRazorPages();

app.Run();
#4 – Add the Notyf component to your layout page
Just like we did before, we have to open up _Layout.cshtml and add this line: @await Component.InvokeAsync("Notyf") to the bottom of the file, to display the toast notifications in our Views.
<!DOCTYPE html>
<html lang="en">
<head>
<meta charset="utf-8" />
<meta name="viewport" content="width=device-width, initial-scale=1.0" />
<title>@ViewData["Title"] - ToastDemo</title>
<link rel="stylesheet" href="~/lib/bootstrap/dist/css/bootstrap.min.css" />
<link rel="stylesheet" href="~/css/site.css" asp-append-version="true" />
<link rel="stylesheet" href="~/ToastDemo.styles.css" asp-append-version="true" />
</head>
<body>
<header>
<nav class="navbar navbar-expand-sm navbar-toggleable-sm navbar-light bg-white border-bottom box-shadow mb-3">
<div class="container">
<a class="navbar-brand" asp-area="" asp-page="/Index">ToastDemo</a>
<button class="navbar-toggler" type="button" data-bs-toggle="collapse" data-bs-target=".navbar-collapse" aria-controls="navbarSupportedContent"
aria-expanded="false" aria-label="Toggle navigation">
<span class="navbar-toggler-icon"></span>
</button>
<div class="navbar-collapse collapse d-sm-inline-flex justify-content-between">
<ul class="navbar-nav flex-grow-1">
<li class="nav-item">
<a class="nav-link text-dark" asp-area="" asp-page="/Index">Home</a>
</li>
<li class="nav-item">
<a class="nav-link text-dark" asp-area="" asp-page="/Privacy">Privacy</a>
</li>
</ul>
</div>
</div>
</nav>
</header>
<div class="container">
<main role="main" class="pb-3">
@RenderBody()
</main>
</div>
<footer class="border-top footer text-muted">
<div class="container">
© 2022 - ToastDemo - <a asp-area="" asp-page="/Privacy">Privacy</a>
</div>
</footer>
<script src="~/lib/jquery/dist/jquery.min.js"></script>
<script src="~/lib/bootstrap/dist/js/bootstrap.bundle.min.js"></script>
<script src="~/js/site.js" asp-append-version="true"></script>
@await RenderSectionAsync("Scripts", required: false)
@await Component.InvokeAsync("NToastNotify")
@await Component.InvokeAsync("Notyf")
</body>
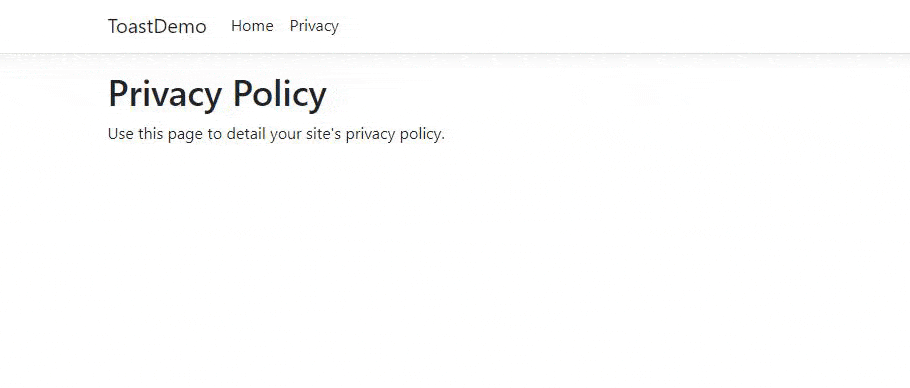
</html>#5 – Add your Toast Notifications to the OnGet() method at the Privacy Policy page
First, we have to do some Dependency Injection (DI) inside Privacy.cshtml.cs, like I have done below:
using AspNetCoreHero.ToastNotification.Abstractions;
using Microsoft.AspNetCore.Mvc.RazorPages;

namespace ToastDemo.Pages
{
    public class PrivacyModel : PageModel
    {
        private readonly ILogger _logger;
        private readonly INotyfService _toastNotification;

        public PrivacyModel(ILogger logger, INotyfService toastNotification)
        {
            _logger = logger;
            _toastNotification = toastNotification;
        }

        public void OnGet()
        {

        }
    }
}
Let’s add some toast notifications to the OnGet() method. By default, the toast notification service will use the global settings we supplied in Program.cs when we registered the service inside the service container, but what if we want to change the settings for the toast notification? See below:
public void OnGet()
{
    _toastNotification.Success("A success for christian-schou.dk");
    _toastNotification.Success("A success toast that will last for 10 seconds.", 10);
}
Spin it up:
Voila – that looks good! Let’s add some different kinds of toast notifications to the web application. Below is some code for adding warnings, information, and error toasts to the page:
public void OnGet()
{
    _toastNotification.Success("A success for christian-schou.dk");
    _toastNotification.Information("Here is an info toast - closes in 6 seconds.", 6);
    _toastNotification.Warning("Be aware, here is a warning toast.");
    _toastNotification.Error("Ouch - An error occured. This message closes in 4 seconds.", 4);       }
What does that look like:
What if I need to go beyond the default toast notifications? Maybe you already noticed it, but we actually have a Custom toast notification inside the package as well. Below is some code on how you can tweak the toast notification to fit perfectly to your needs:
public void OnGet()
{
    // Custom Notifications
    _toastNotification.Custom("Here is a message for you - closes in 8 seconds.", 8, "#602AC3", "fa fa-envelope-o");
    _toastNotification.Custom("Please check the settings for your profile - closes in 6 seconds.", 6, "#0c343d", "fa fa-user");
}
Let’s run that and see what it looks like:
The final file should look like this:
using AspNetCoreHero.ToastNotification.Abstractions;
using Microsoft.AspNetCore.Mvc.RazorPages;

namespace ToastDemo.Pages
{
    public class PrivacyModel : PageModel
    {
        private readonly ILogger<PrivacyModel> _logger;
        private readonly INotyfService _toastNotification;

        public PrivacyModel(ILogger<PrivacyModel> logger, INotyfService toastNotification)
        {
            _logger = logger;
            _toastNotification = toastNotification;
        }

        public void OnGet()
        {
            // Default Notifications
            _toastNotification.Success("A success for christian-schou.dk");
            _toastNotification.Information("Here is an info toast - closes in 6 seconds.", 6);
            _toastNotification.Warning("Be aware, here is a warning toast.");
            _toastNotification.Error("Ouch - An error occured. This message closes in 4 seconds.", 4);

            // Custom Notifications
            _toastNotification.Custom("Here is a message for you - closes in 8 seconds.", 8, "#602AC3", "fa fa-envelope-o");
            _toastNotification.Custom("Please check the settings for your profile - closes in 6 seconds.", 6, "#0c343d", "fa fa-user");
        }
    }
}
Summary
In this tutorial, we saw how easy it is to implement toast notification inside our ASP.NET Core Application. It will enrich the user experience a lot and make it easier for the developer to show a status of what is going on inside the application when the user is interacting with the functionality.
Both libraries are good go-to NuGet packages for implementing toast notifications inside our applications. The one I like the most is definitely the last one I showed you. It’s easy to use and customize to fit your needs in a given scenario.
Below is a link to the source code on my GitHub. You are welcome to clone or copy it for your own applications. If you got any questions, suggestions, or issues, please let me know in the comments. Have an awesome day!
 Christian-Schou