Configure Docker
Now that we have a fully functioning server with a running version of Docker, it's time to enable Docker Swarm to turn our server into a manager node in a cluster.
If you skipped the last part of this series, you can check it out at the link below or by using the navigation here on the page.

A Docker Swarm Primer
Swarm mode is an advanced feature for managing a cluster of Docker daemons. It allows us to do container orchestration for clustering and scheduling our Docker Containers.
By using Docker Swarm we can enable and manage a cluster of Docker nodes (servers) as a single virtual system - how cool is that!? ✌️ You can join both virtual and physical servers/machines into a Docker Swarm cluster. This allows you to use bare metal servers and VPS machines.
To read more about the Swarm you can check out the official Docker documentation for Swarm below.

If you would like to get to know much more about Docker Swarm the easy way, I would recommend you to check out my Docker Swarm tutorial below.

With those words, let's continue and turn our Docker Standalone setup into a cluster.
Init Docker Swarm
You can have from 1 to n nodes in a Docker Swarm cluster. For this example, we will have three nodes in our cluster. I know we have configured only one server right now, but we will get to the expansion part in a moment.
We only have to run the following command on our manager node to initiate a Docker cluster or activate the Docker Swarm mode.
docker swarm initDocker will now initialize the Swarm, and you should get a response like the following telling you that it could not init the swarm because you have multiple addresses. If you don't get a message like this, it's because your server is only having one attached network, which is the public network from your server provider.
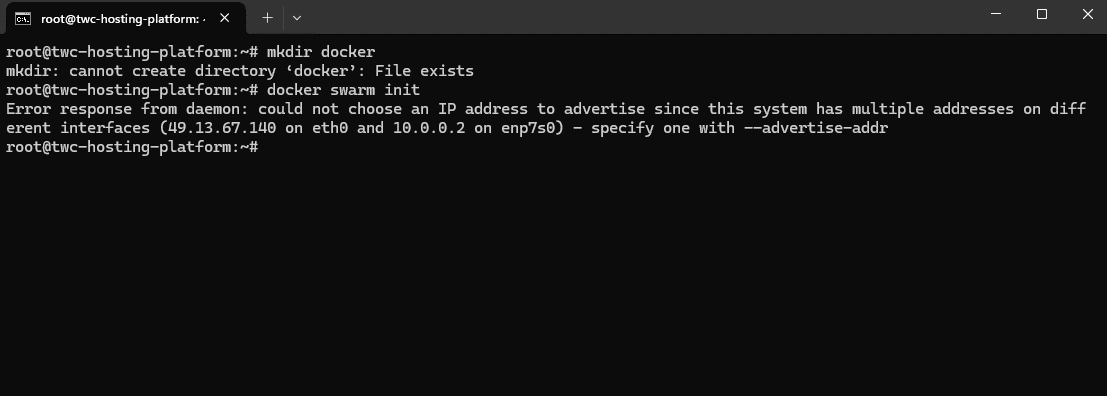
As you can see I have two networks attached on my server. The first one is the public IPv4 address and the second one is a private network that I can share between multiple servers in my cluster.
Let's use the private network for our cluster and initiate the swarm once again.
docker swarm init --advertise-addr 10.0.0.2Cool! We now have a manager node in our cluster, and it even gave us the command we should run on our worker nodes. Copy and save it!
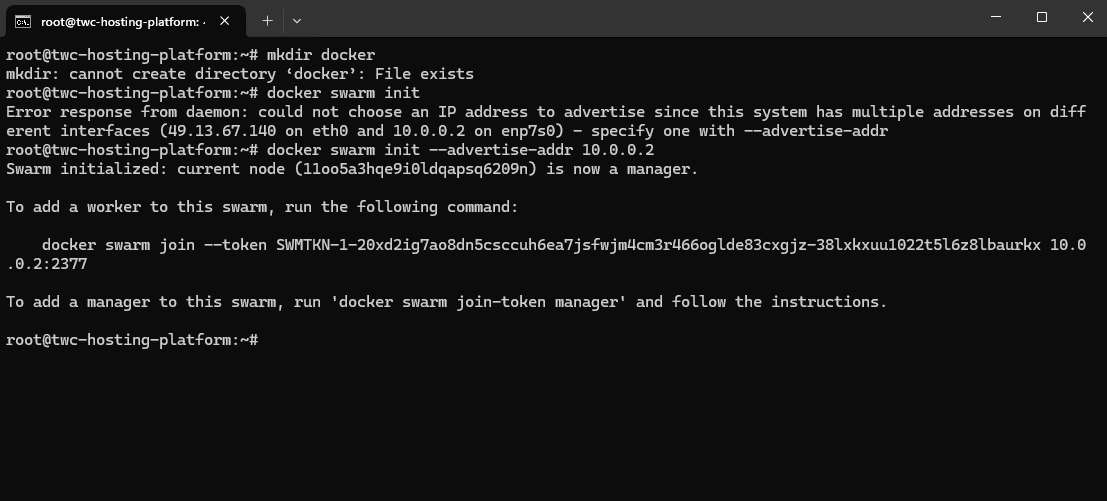
docker swarm join --token SWMTKN-1-20xd2ig7ao8dn5csccuh6ea7jsfwjm4cm3r466oglde83cxgjz-38lxkxuu1022t5l6z8lbaurkx 10.0.0.2:2377Add Worker Nodes
With the manager node in place, let's create two more servers at our server provider and join them into the cluster.
The awesome thing about this is that the servers don't have to be identical. You can create them in various sizes, specs, etc... I will create two servers with some small specs since this is a tutorial and I won't be using them for a production environment, hence it would be possible since that is how I designed this series.
Here is an overview of my servers for this cluster.
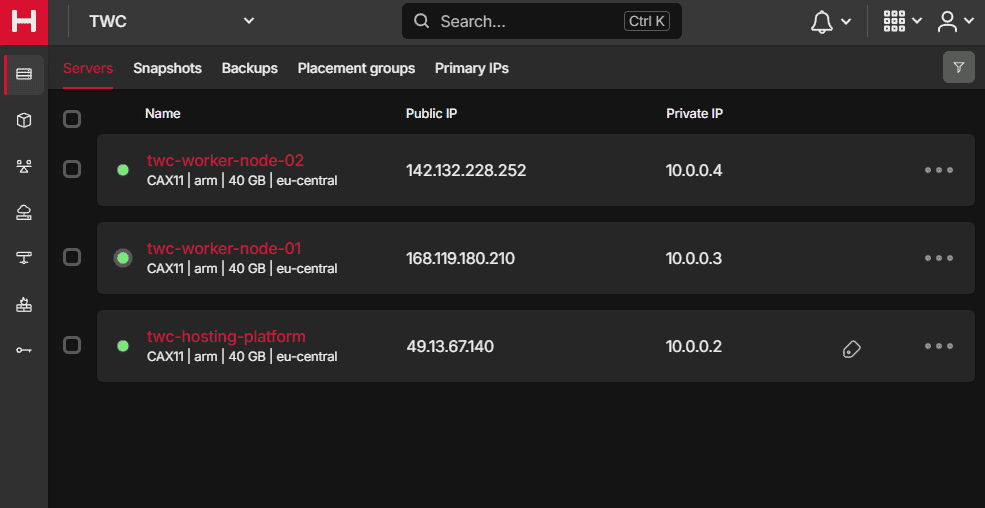
They are all within the same private network, thank you for doing that Hetzner! 🙏 All servers are placed within the same data center in Falkenstein and are of the same type/size/specs...
I have named the two worker nodes according to their job. Some would say that we should rename the manager node to include manager in the name, but you can have multiple managers and sometimes they won't have that in their name, but they will have the manager label on them when they are managers in the cluster from Docker.
To add a worker node, we will be using the private IP that we initialized our cluster with. In my case it's 10.0.0.2.
Run the following script on your worker nodes to enable the features needed for running Docker on them.
#!/bin/bash
echo "🐳 Launching Worker Node Setup! 🐳"
sudo apt update -y && sudo apt upgrade -y
sudo apt install -y ca-certificates curl gnupg lsb-release
sudo mkdir -m 0755 -p /etc/apt/keyrings
curl -fsSL https://download.docker.com/linux/ubuntu/gpg | sudo gpg --dearmor -o /etc/apt/keyrings/docker.gpg
echo "deb [arch=$(dpkg --print-architecture) signed-by=/etc/apt/keyrings/docker.gpg] https://download.docker.com/linux/ubuntu $(lsb_release -cs) stable" | sudo tee /etc/apt/sources.list.d/docker.list > /dev/null
sudo apt update -y
sudo apt install -y docker-ce docker-ce-cli containerd.io docker-buildx-plugin docker-compose-plugin
sudo apt install -y iptables
sudo iptables -A INPUT -i lo -j ACCEPT
sudo -s iptables-save -c
sudo iptables -L --line-numbers
echo "net.ipv4.ip_forward=1" | sudo tee -a /etc/sysctl.conf
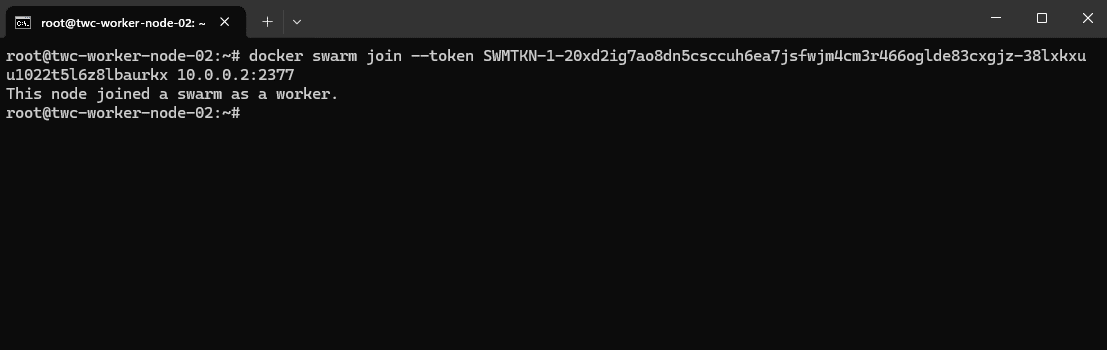
echo "🐳 Worker Node Setup Complete! 🐳"When it is done, execute the swarm join command you got in the previous step on each worker node. If you didn't note it, run the following command on your master node.
docker swarm join-token workerWhen a worker node is added to the cluster, you should get a result like mine below.
Alright, now go back to the leader/manager node in your Docker Swarm cluster, and run the following command.
docker node lsYou should get an output like the following, just with the name of your servers:
root@twc-hosting-platform:~/docker# docker node ls
ID                            HOSTNAME               STATUS    AVAILABILITY   MANAGER STATUS   ENGINE VERSION
11oo5a3hqe9i0ldqapsq6209n *   twc-hosting-platform   Ready     Active         Leader           25.0.4
yrxsusfu4ilycavplugr7cka8     twc-worker-node-01     Ready     Active                          25.0.4
csmu8gdeq0xt1jnp561t31o6n     twc-worker-node-02     Ready     Active                          25.0.4
We now have a fully working Docker Swarm Cluster with three nodes, two of them workers and one is the leader/manager.
Create A Proxy Network
Before we create any services, we need to create a network that all our services can attach to for Traefik to discover the services we would like to expose to the public.
The network will be named proxy and is an external attachable network for services created with compose, where the driver is bridge. Here is the command you have to run in your terminal.
docker network create --driver=overlay proxyYou should get a result like the following if you also run this command for listing the Docker networks.
docker network ls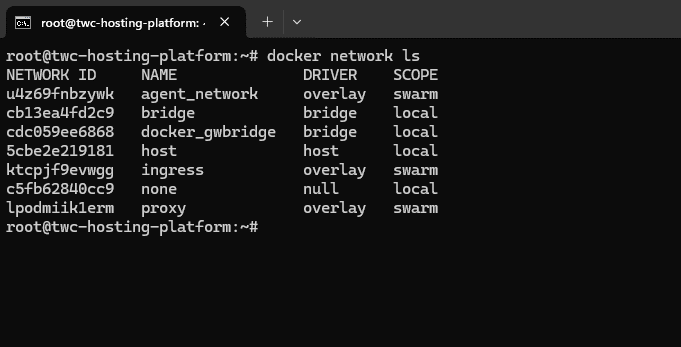
Now we have a network we can use across all our services that allows Traefik to do its job! ✌️
Create A Proper Folder Structure
You can create the folders in the way you want. Some prefer to do it in /etc, some would like to do it in the home directory, it's totally up to you.
The etc folder is a great choice for storing your system configuration files. We will have some of those for Traefik when we need to configure that service in a moment. I generally put all my Docker files in the /srv folder. I consider all my Docker files to be data required for services on a given system.
If you would like to conform to the official guidelines for this, you should put them in the /srv folder. You can read more about that on the link below.

If you would like to know more about the default Linux filesystem, you can check out my guide below. It's a wall of text, now you are warned 😅

Alright - create a new folder in the /srv folder named docker on your leader node. This will be the server which we will create the Docker services from, hence it should hold the data files for the services.
mkdir /srv/docker && cd $_Inside this folder create a new folder named services. The services folder is going to have multiple sub-folders for each of our services in the hosting platform.
mkdir services
cd services
Perfect! We are now ready to move on and spin up Traefik in our cluster to do some proper traffic management.